Just a few more easy steps and my Anzac coat will soon be finished!

Normally I would leave the lining hem free in a coat, but for demonstration purposes I’ll show you how to bag it out – that is, where all edges are enclosed.
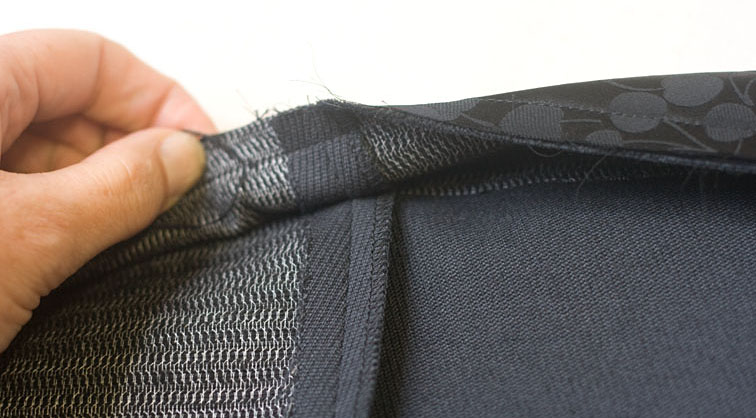
Your facing at the hem should look something like this – or it may be curved at the front edge, in which case the lowermost part of the curve will already be stitched:

Either way, the lining edge of the facing overlaps the start of the hem allowance by 2cm. The lower edge of my facing looks really messy because I cut this coat out of remnants – I’m sure yours will be a lot neater!
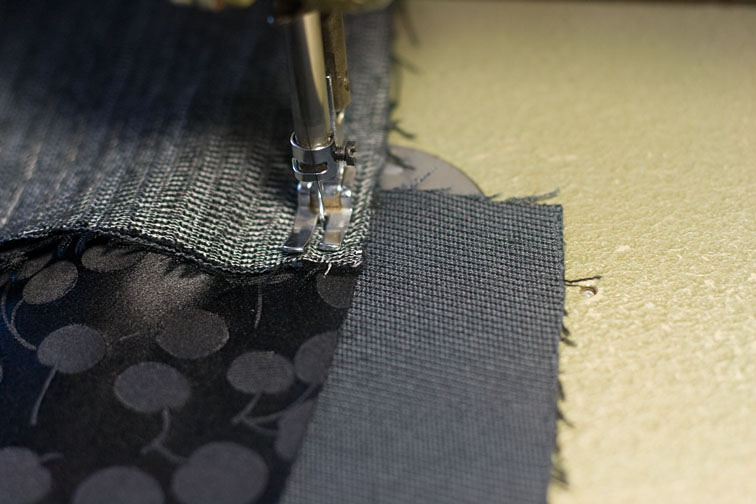
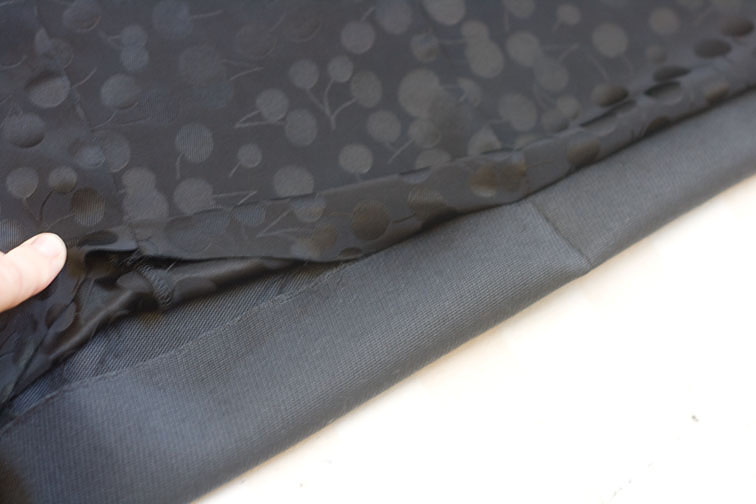
Turn the facing so the right sides are together:

And sew across the bottom edge to the point where the lining joins:
Now my method is a bit different to way this corner is normally sewn, I picked it up at an old workplace and have done it that way ever since. It has a nice smooth finish, as well as being quick and production friendly!
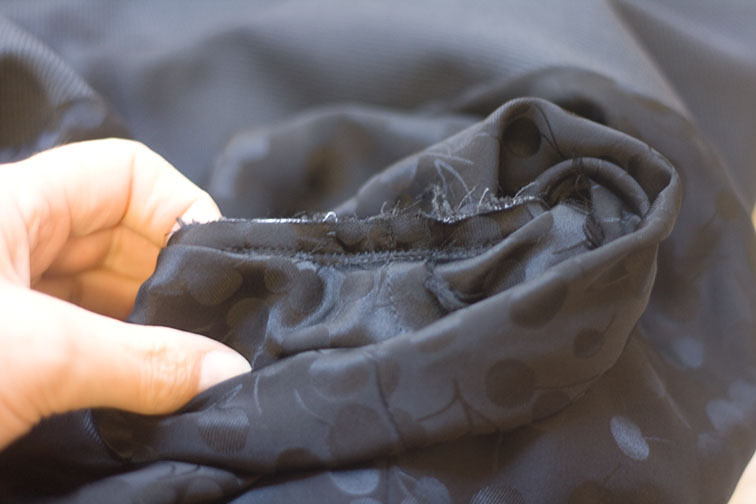
With the needle down, swing the lining so both hem edges match at the next seam:
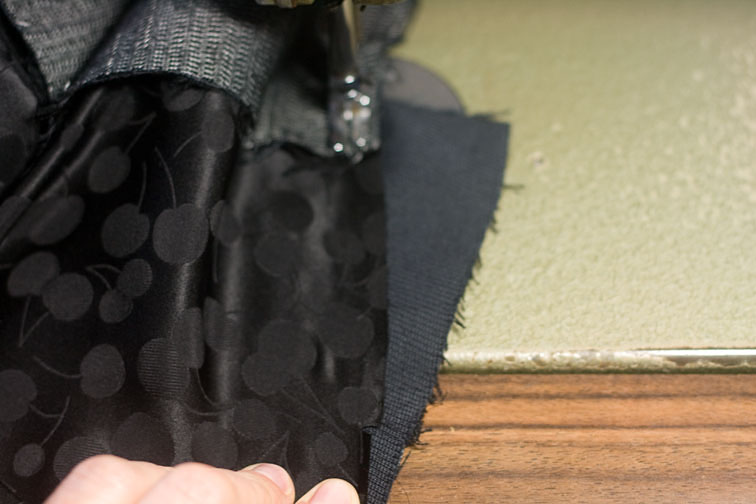
It looks a bit weird, and there could be a bit of wiggling to make it fit, but it will look fine once it is turned (remember – your pattern matched, so your sewing will too!)
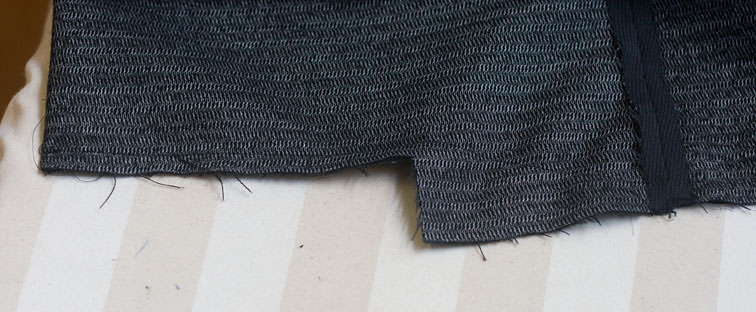
Sew the rest of the hem, but somewhere in the middle leave a 20cm gap for turning everything through – I left mine open at the CB panel:

Continue to the other side, sewing the hem around the facing in the same manner, but in reverse.

At the moment your jacket is completely inside out, with just two openings – the one at the hem, and the one in the sleeve lining. Before you turn the jacket through, tack up the hem allowances at every seam:
Now turn the coat right side out through the hem opening:
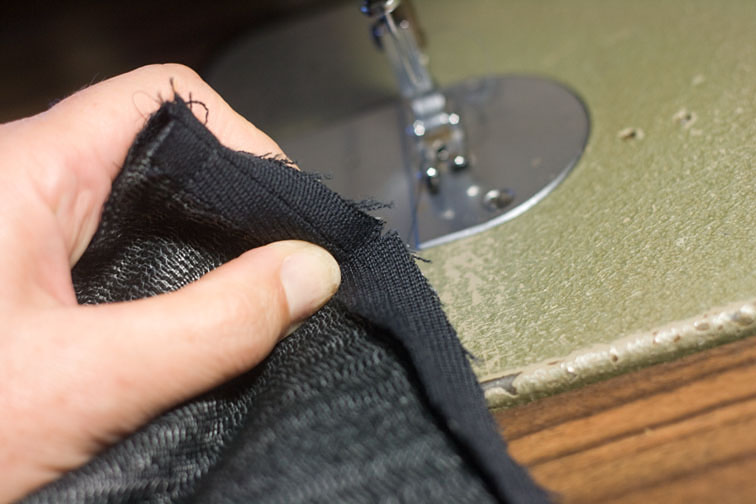
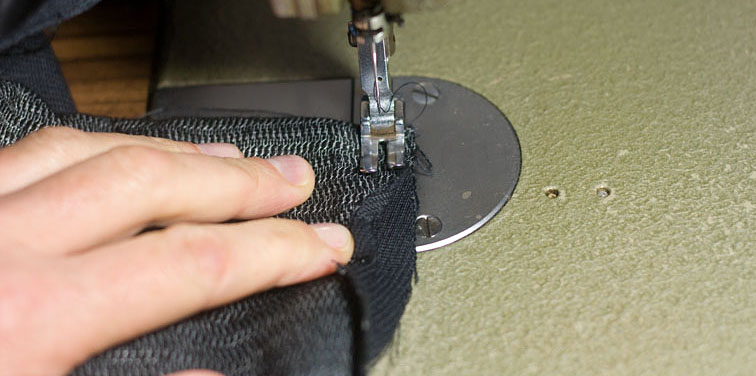
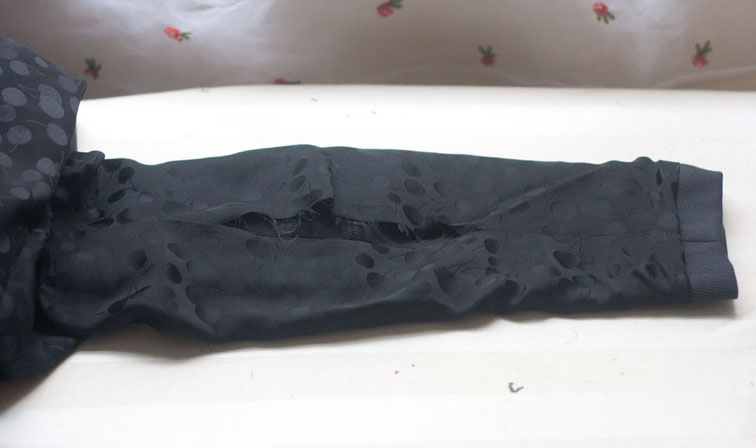
Here’s how to close the hem opening by machine – reach into the sleeve that has the lining open, and put your hand through the opening so it is between the lining and sleeve shell, and reach through the armhole right down to the hem:

Grab the hem and pull it back through the path that your hand travelled – pull enough of the hem out through the sleeve lining opening so that you can sew it:

Once you have sewn it, let it fall back through the opening into place. The next step is to attach the lining and shell underarms together, just like we did in #14:
The final step is to close the sleeve lining. I usually leave this until everything has a final press just in case I have to go back inside. In fact, the other day I noticed a jacket in my wardrobe that still hasn’t been closed up!
To enclose everything, fold the seam allowances inwards and butt the edges together (remember how we pressed them to make this easier back in #8), then edgestitch the opening closed:


That’s it – all the sewing is done – all that is left to do are the buttons and buttonholes!
I just ordered some antique brass military style buttons on Friday, so hopefully I’ll receive them this week – it’s coat weather here now and I need my coat!
Happy Sewing!

That is one beautiful coat, Sherry. Sleek and smart. I love it! With antique brass buttons? Wow!
LikeLike
Nice to this your wonderful craftsmanship at work.
Thanks for your nice comments on my blog.
LikeLike
Military buttons will look really cool. Wish I was up to buttons 🙂 Maybe another week, if I can pull myself away from the TV at night..lol
LikeLike
Do you recommend any sewing books that detail many of the methods you are teaching? Your methods are excellent, your craftmanship is beautiful. I am very inspired by your blog and would like to master many of the details you highlight.
Thank you
Marie
LikeLike
I am playing catch up on the sewalong and will definitely try this method of bagging out the lining – it looks fantastic – love the idea of sewing the gap in the hem lining through the hole in the arm! Ingenious!
Your coat looks beautiful and once buttons are attached I'm sure it will be perfect. Hope we have some really chilly days soon so you can make the best of it.
LikeLike
Love this step! I especially like the treatment at the facing/lining/hem. Everytime I read I want to jump to my machine…unfortunately I don't have anything to sew yet!
LikeLike
Lovely finish to the coat. I'm looking forward to truing up my pattern and starting my next jacket. I can see plenty of areas I need to improve. Thank you so much for the tutorials and the time and efort you put into them.
Theresa in Tucson
LikeLike
Sherry this is a lovely coat. I love your instructions. I will look back at them as soon as I make my next coat/jacket. Thank you so much for sharing
LikeLike
Sherry, I am so grateful to you for these generous step by step tutorials. I've said it before, but I genuinely believe that you are the best blog tutor there is! So much skill to pass on.
LikeLike
Totally off topic – but I just heard that Auckland had a tornado??? Hope all is OK with you.
LikeLike
The coat is beautiful, and thank you so very much for teaching and sharing your expertise in sewing methods. The whole process has been a learning experience for me. You are generous to meticulously share the many details involved in this project.
LikeLike
Thanks so much for the whole series! I'm tempted to download them and print them into a book! It's something you should consider doing-even if just by Cafe Press-I'd consider buying it because it's one of the best tutorials on tailoring RTW I've ever seen!
Joyce
LikeLike
Sherry, your coat looks great so far! So crisp and tailored. Thanks for sharing all of your awesome technical knowledge with us!
LikeLike
Your coat looks amazing. I love the clean look. I would almost be tempted not to sew on buttons but instead sew on snaps on the inside, just to keep the minimalist look.
I have still not really begun sewing after my holiday, but hope to catch up in the weekend.
LikeLike
You know what Sherry , this is the best sewing online tut I have ever seen !! I really think that you have gift for this . Can I suggest that you make either CDs or DVDs or even a book about production sewing . There are heaps of things about sewing in the home dressmaking way and in the couture way but this totally by machine in the production ,way is not something I have come across before in the one place . I actually think that a collection of tutorials about different types of clothing and methods would actually sell out there is sewing world.I hope for my own sake that you will do some more of these . Regards Mem
LikeLike
Has anyone heard from Sherry since the tornado hit Auckland on May 3rd? I do hope she is alright!
LikeLike
amazing coat!
LikeLike
I know I have been worrying about that too. Sherry are you out there???
LikeLike
Hi all – yes I'm fine! But my laptop wasn't – it finally died 😦 However now I have a new one so I'm back in action – sorry to have you worried!
LikeLike
yay! not for the dead laptop, but y'know-
I want to thank you for this entire sew-along!! for All your enormous preparation, phenomenal expertise, open-hearted generosity, detailed attention- to individuals and the group explanations. YOU ARE A WONDER! I feel as though my sewing has gone up 6 notches. Thank you from the bottom of my heart!
LikeLike
Hi again Sherry – I have just completed my Jacket – YAHOO!! I want to thank you so much for sharing your expertise and taking the considerable amount of time to present your step by step tutorials. I could not have made this project without them!! I have learnt so much – I found your hints and tips to be so clever, it all makes sense! I used your 2 piece sleeve vent tutorial as well as the Bound Buttonhole one. I am still very slow, but I am keen to go through it all again just to reinforce all of my new skills. So thanks once again! My photos are on Flickr!
LikeLike
Your coat looks so amazing. So very professional and sharp looking. Thanks again for sharing all your knowledge. My world got incredibly busy this last month, but I do plan to finish my jacket. Thanks again!
LikeLike
Lovely..as always!
LikeLike