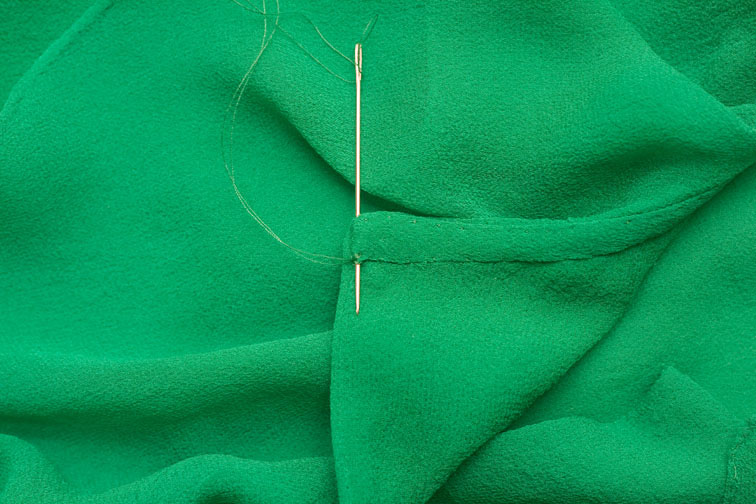
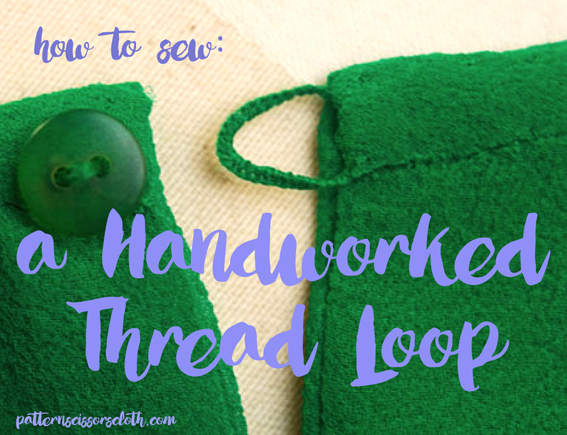
For the closure on my emerald silk georgette blouse I hand worked a thread button loop:

Handworked thread loops have a nice discreet, lightweight finish and are great for delicate fabrics and areas where there is little stress placed on the closure. They can also be worked in a straight line to form an eye for a hook, or made longer to form a belt loop at a side seam, but I’ll demonstrate the loop version here.
Thread your needle with an arm’s length of thread and knot the ends together so it is doubled. Insert the needle a short distance from where you want the loop to be, exiting at one end of the loop:

Pull the thread to draw the knot between the layers, then take a couple of small stitches to secure the thread where it exits:

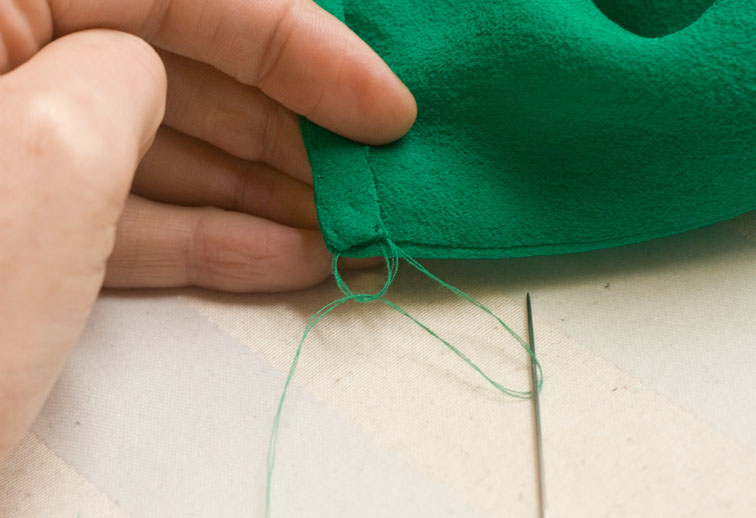
Insert the needle at the top end of the loop and exit at the bottom end – try to pass the thread through multiple thicknesses for extra strength, without catching the front layer so it remains invisible from the right side:
Do this 2-3 times to make a loop, stick the needle in the centre of the loop and wiggle it so all threads are the same length, and check that it fits your button. You can still tighten or loosen it at this stage:

If you are making a bar for a hook, make this ‘loop’ so it lies flat on the cloth with a slight gap for the hook to pass through.
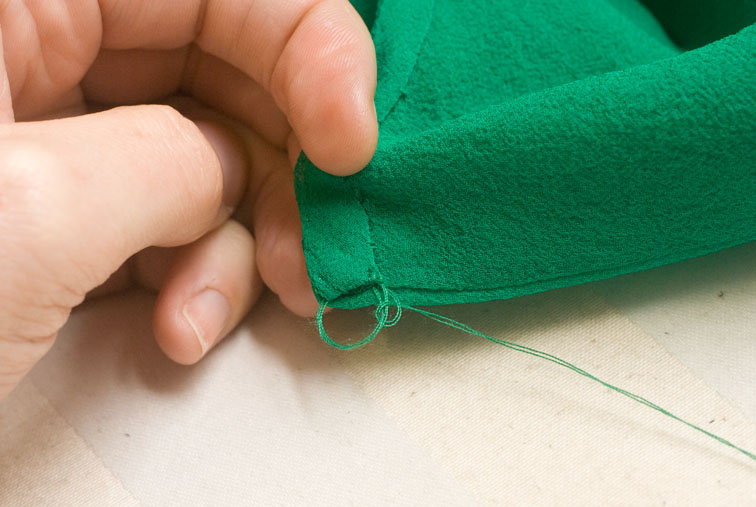
Now we blanket stitch around the loop to make it firmer – bring the needle up through the loop:

Then pass it through the loop that you have just formed:
And slowly draw up the thread being careful not to twist or knot it:
Tighten the stitch and at the same time slide it to the very start of your loop:
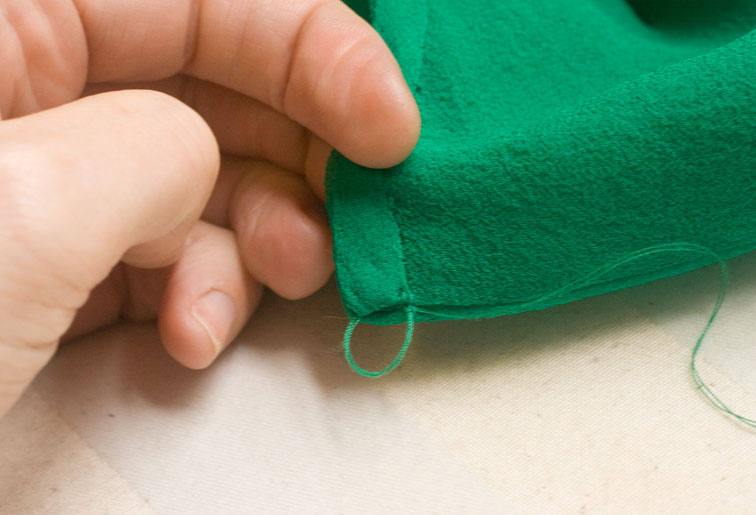
Repeat:

And keep repeating….

Keep the blanket stitches as close together as possible without overlapping. If your thread gets twisty, drop the needle and let it swing – it will spin and untwist the thread itself.

Keep going until you get to The End:

Zig-zag the needle and thread a few times through the seam allowance between the layers to finish off, exit again at a distance from the loop, then clip the thread close to the cloth. If your loop is the correct length, the edges at the front should butt together when buttoned like so – no overlapping or gaps!


Very well explained.
LikeLike
Thank you for a simply explained technique.
LikeLike
Beautiful! Thanks for the explanation. I think I had assumed these were crochet, or something.
LikeLike
That was the simplest explanation I've seen. Perfectly put. Thank you.
LikeLike
Beautiful demonstration. Thank you.
LikeLike
This is so AWESOME! I have been wondering how it is done.
Thanks so much!
LikeLike
Oh your loop looks so lovely and neat – I really must practise this technique to get my loops looking lovely like yours!
LikeLike
EXCELLENT! Thank you so much!
LikeLike
What a beautiful post. Is that silk you're working with? Divine! I'd love to do this one day. Thank you very, very much for the tutorial.
LikeLike
Thank you for the tutorial – I was wondering what that was.
LikeLike
What a timely tutorial! I am just finishing a blouse that calls for a worked loop closure. I wasn't sure from the instructions how to do it. And thanks again for your great jacket-making tutorial. I used your tips to attach the lining to my jacket and I love the results. Next time I will have to use your tips for prepping the pattern as well.
LikeLike
Very nice. Thank you!
LikeLike
Thanks so much! I've been wanting to do this and never felt like I had adequate instructions before!
LikeLike
I use this a lot! However usually I keep the thread in one- it's more work but less chances of it getting tangled!
LikeLike
I do it like that as well! Great job!
LikeLike
Thanks for the clear instructions. I have made button loops before but I do it so infrequently that I forget how to do them in between times. This is going straight into my sewing bookmarks.
LikeLike
This blouse is just lovely and the colour is gorgeous on you! All that hand-stitching means that it will forever be a special top for you.
LikeLike
Your blouse is just beautiful, and this is a great colour for you! You have every reason to be proud of this lovely hand-finished garment. Well done!
Thank you for your comment, but actually that skirt looks seriously weird with the bustle swivelled around to the front!! The other option is swivelled to the side, where it looks kinda funky…we both like it that way.
LikeLike
My finished thread loops always end up twisting. How do yours lay flat?
LikeLike
I've always wanted to learn to do that! Thanks!
LikeLike
I have always wanted to know how this is done. Thank you!
LikeLike
That looks lovely and flat, but I wondered would you use buttonhole stitch if you were doing such a closure where there was likely to be more wear and/or stress on the closure?
LikeLike
WOW I have been wondering for ages how to do this !!! Your explanation is really clear , thank you.
LikeLike
Thanks! I need a belt loop for a dress & I dont want it to show. I'm going home to try this (12 miles by bike!). Pictures will be forthcoming.
LikeLike
Thank you for this post. Mum used to make these and I have been trying to remember for years exactly how she did it. I need one for a blouse that gapes a bit and the neck, so was very glad to find your clear directions.
LikeLike
I'm a tatter and recognize this as tatting with a needle.
LikeLike
I'm a tatter and recognize this as tatting with a needle. Should come easily. 🙂
LikeLike