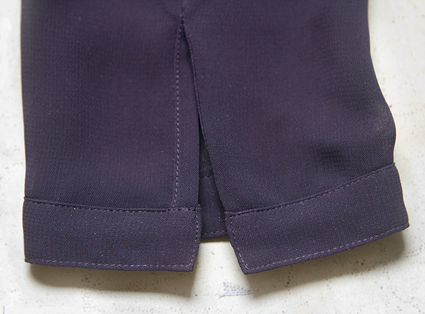
A continuous bound placket is one of my favourite methods for a sleeve placket where lightweight fabrics are used, such as on a blouse or dress. It is easily inserted into a one piece sleeve where a vertical split is made – not at the sleeve seam, but at the location of the little finger.
You will need to cut the binding twice the length of the split, and a cut width of 25mm (1″) will give a finished width of 6mm (1/4″). The binding is easier to sew if it is cut on grain, not the bias. If you are sewing checks or stripes, then cutting on the bias is a good idea to avoid pattern matching.
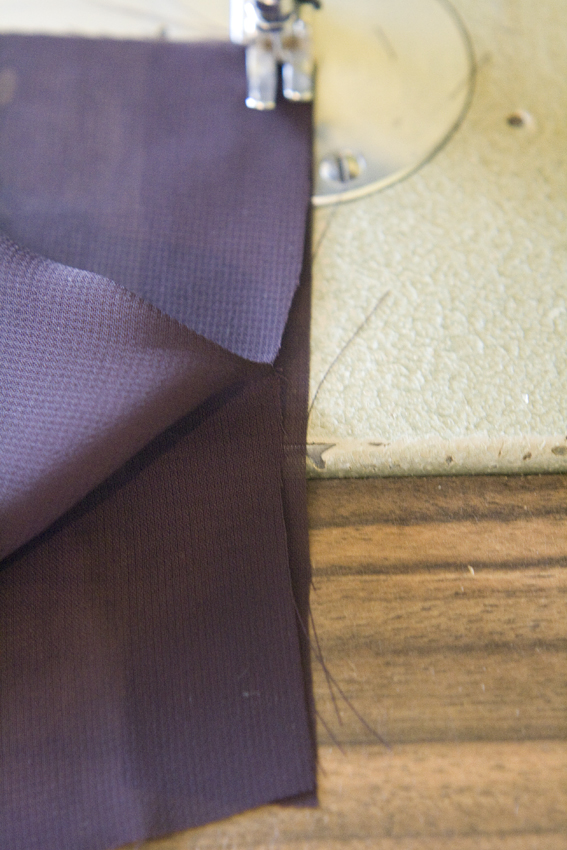
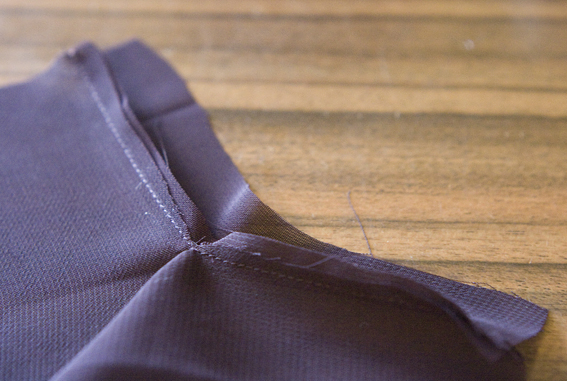
Here I have opened out the sleeve split and laid it over top of the binding, with the right side of the binding to the wrong side of the sleeve. The raw edges align at either end of the split, but at the apex of the split they are offset by 5mm – this is how it will be sewn:
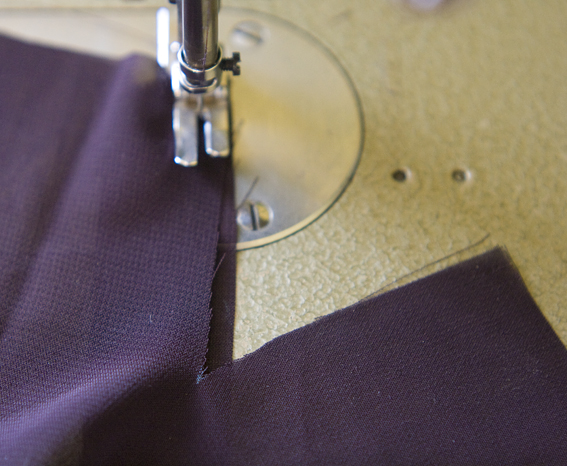
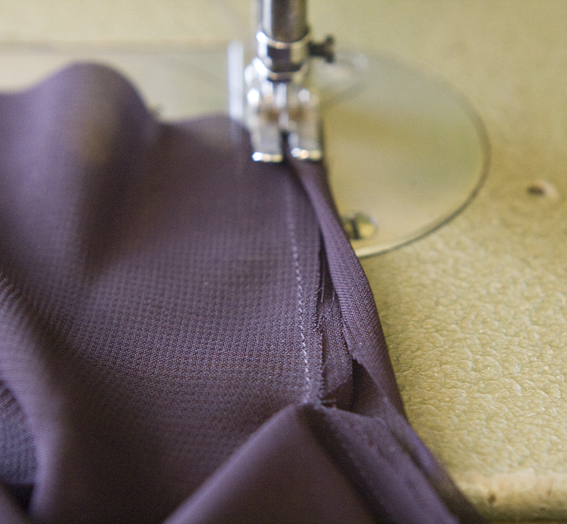
If you are finding this a bit tricky – sew the first few stitches and stop with your needle down, then you can position your fabric again. Making the binding taut by pulling it slightly towards you helps to form an even binding width. Pull both top and bottom layers evenly so that the binding does not twist like a rope.
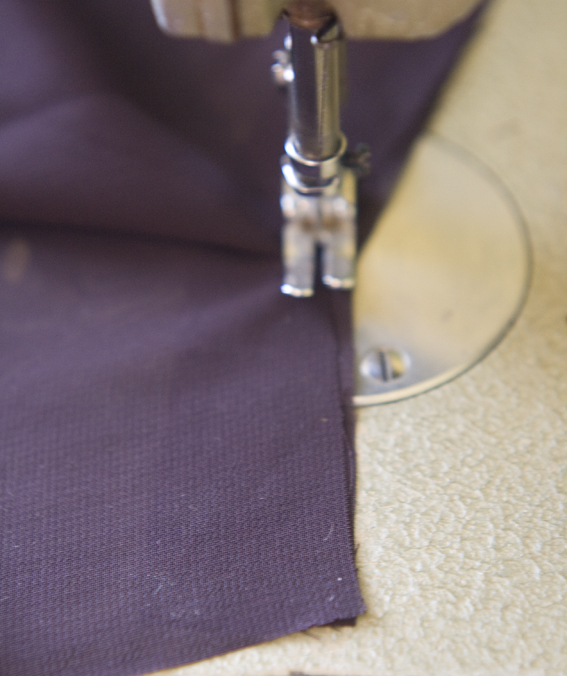
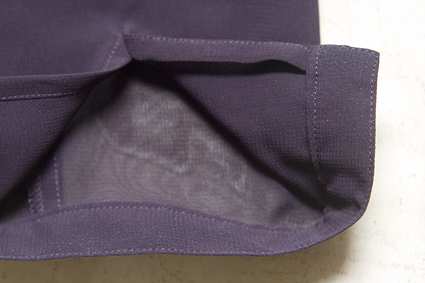
It is best not to press the edge down first, with a bit of practise you will actually achieve a neater result if it is pressed after you have edgestitched.


I love your tutorials! I essentially learned to sew by following pictures in books. Even though I've been sewing for eons, I figure there's always a better, faster way to do things. I'll have to try your method with no pins (scary!)
LikeLike
Your tutorials are fantastic – thanks so much -keep them coming!
LikeLike
I hate sewing these.. but you make it look easy! You have the best tutorials. I always send people to your invisible zipper one!
Are you sewing on an industrial machine there? Just curious!
LikeLike
Oh fantastic! I think I am tackling one of those (my first) this week! Thanks for this!!
LikeLike
Like the others, I've really benefitted from your tutorials – I've used 3 of them now with great results – I'm sure to add this to my repertoire. Many Thanks.
LikeLike
Yes, thanks Sherry – I too love your tutorials and have learnt so much. I haven't had need to do this method, but when the time comes, I know where to go – your site. Again, thanks for sharing.
LikeLike
Thanks for this – very helpful. I'll try this on the shirt I'm doing soon.
LikeLike
I'm over the moon about this post. I have trouble with sleeves like this.
LikeLike
Aha! I have always cut the strip on the bias – brain goes “binding must be bias”! Of course it never occurred to me that a straight edge doesn't need the stretch of bias duh!
Many thanks!
LikeLike
I'm glad the tutorials are helpful – photos are so much easier to follow than those diagrams on the pattern sheets aren't they!
~Tasia – yes I'm using an industrial machine, one with a lovely brown formica top!
~sandra – you could use the bias for effect, eg stripes, but yes straight grain is much easier!
LikeLike
Congratulations and thank you for your dedication to photograph and post for beginners like me learn more.
Kisses
Eilane – Brazil
LikeLike
Thanks very much for this! I knew about attaching the binding, but the little dart and folding the front side under is new to me. I might use the continuous placket more often instead of the full-on placket now I know how to make it sit flat.
LikeLike
Hello Sheryll,
Thank you so much for this, it was really helpful. The tip of sewing the diagonalacroos the fold at the top was great. How about a tutorial on a shirt yoke please! Lydia
LikeLike
Many thanks for this great tutorial. I use this since several years for all my sleeve plackets.
Regards, Muriel
LikeLike