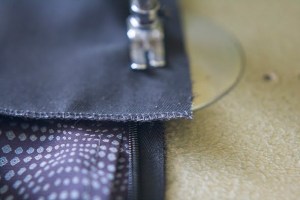
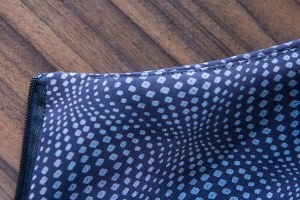
This tutorial shows you how to apply your facing around an invisible zip using your machine all the way – no handstitching or hooks! The facing is set back from the zip on the inside, so that it never gets caught when the zip is used.
I always make my facing pattern so that it matches the top of the skirt pattern – check to see whether your pattern is the same, if not you will have to adjust accordingly.
Now sew the sides of your facing to the zip edge a foot width away from the zip coil. Because my pattern pieces are the same, I need to overlap the facing by 1cm. You can trim this overlap off later if you prefer, but I usually don’t.
Repeat on the other side. I always stitch from the top down, so on one side the facing is on the bottom, and on the other side the facing is on the top.
Open out your facing and it will look like this:
Now for the top edge – fold the skirt panel around the coil of the zip onto the facing, so that the coil of the zip is right in the foldline.
From the top your arrangement should look like this:
Now you’re ready to start sewing.
Begin about 3mm above the end of your zip coil, and stitch your facing to the skirt, matching all notches and side seams, to the other end. Make sure you finish 3mm above the end of the zip coil at this end too, so your top edge is even when zipped up.
Turn through to right side. To get a nice square corner, it helps to turn the corner of the seam allowance towards the zip and pinch it as you turn it through.
Voila!
But you haven’t finished yet!
Because the top edge of your skirt is curved in places, you need to tape it to prevent it stretching. I use a 6mm wide polyester twill tape for this, and preshrink it under heaps of steam from the iron. Notice how one edge is straight and the other is wavy?
The straight edge will be placed uppermost in the finished skirt, so the slightly longer wavy edge flares to match your shape. Trust me, the tape may only be 6mm wide, but inserting it the right way up makes a big difference!
Measure the tape to fit your pattern exactly (excluding seam allowances and darts), and mark it at the side seams, CF and CB, and darts. The measurement should be done along the stitching line, not the cutting line.
Then sew the tape to the seam allowance in the top edge of your skirt, matching all your markings. I stitch closely to the straight edge of the tape, which is positioned 1mm away from the stitching line. Once the facing is turned, the wavy edge of tape will be lowermost.
I usually trim 1cm off the beginning and end of the tape to reduce bulk in the corners.
Now edgestitch the facing from the right side, catching the seam allowance underneath. Start and end your edgestitching as close to the zip as you can while still sewing neatly!
Turn and press and admire your lovely work!
I’d love to know if you have found this helpful!
Happy Sewing!


Hi Sherry, I found the tutorial only now (must have clicked the wrong link when you left a comment on my blog) and think it's very helpful. I'm going to try it this week on a skirt I'm making.
LikeLike
This is the best method for finishing any zipper/facing whether it's an invisible zip or the regular kind. Your photos are very clear. Great tutorial!
LikeLike
This is how I face my zips. One day I was fiddling around and thought “Eureka! I'll bag it out!” Then I realized I went to a lot of trouble to re-invent the wheel… hehe.
LikeLike
Hi, Sherry. I just found your site recently. Your tutorials are very helpful. Kathleen (also a pattern maker) at Fashion-Incubator.com has done several similar tutorials, but I appreciated the reminder about using tape at the waistline. Thank you!
LikeLike
Hi Sherry, this is so neat! I've just finished a skirt using your technique and will be doing it this way from now on. Thanks, your site is a wonderful resource.
LikeLike
Thank you Sherry,
wonderful tutorial. I never understood where to put the twill tape to stabilize the upper edge of a skirt. Your tutorial made it perfectly clear!
I'd love to learn how to sew a zipper in trousers… If you ever sew one for yourself please remember you have a little beginner seamstress in Venice (Italy) who'd love to learn from you and post one of your wonderful step by step tutorials ;o)
xxx
LikeLike
Very helpful tutorial! Just offsetting the facing instead of pre trimming it sounds a lot easier. These are the best instructions I've seen for twill tape stabilizing. Thank you!
LikeLike
I rarely use an invisible zipper, but that is preference. However, the next one, which is going to be a dress, will get this method. I may leave out the tape if a trial shows it to be too bulky for the design. Nehmah-who appreciates your excellent tutorial.
LikeLike
Sherry I've just finished to insert a invisible zip and assembled the facing using your tutorial. I am delighted with the outcome. Thanks for sharing your knowledge.
You can see what it looks like on my blog.
LikeLike
I love this method Sherry, many thanks for sharing it and making it look so straight-forward. Since I did my first invisible zipper with this tutorial, I've decided to use them whenever I can, it's so nice to not see them!
LikeLike
Thanks for offering this tutorial! I've just used it on a skirt, it turned out lovely!
LikeLike
Hi Sherry,
Great tutorial, and the tip for using tape in the curve of waistband is a winner!!
LikeLike
Sherry, I just used your tutorial to the letter to construct the waistband of a pair of shorts. It worked a treat and the top of the invisible zip is the best I've ever done. Thank you so very much for this wonderful method!
LikeLike
Thank you so much for this tutorial. I only wish I had known it sooner 🙂
LikeLike
Thank you!! I learnt this in a course but always forget! yay for relearning!
LikeLike
Thank you so much!! Just what I needed.
LikeLiked by 1 person
When I had to replace an invisible zip in a lined skirt for my sister yesterday, I came straight to your blog because I was hoping you had a tutorial on this… and I’m so glad you did. Thanks again.
LikeLiked by 1 person