If you are sewing the Ruby Slip and would like to use a narrower lace on the bodice – here’s how! I’ll show you how to adapt the bodice pattern pieces, and also how to convert the princess seam into gathers under the bust – like this one that I whipped up in honey coloured silk satin:
Before you jump into altering the pattern though, check out Chris’s brilliant solution for using a slightly narrower lace at Cuada Designs – it might be ideal for your lace too!
Adapting the pattern for a narrow lace:
Start by tracing around your bodice pattern pieces:
Rule a line parallel to the centre front neckline, preferably intersecting the underbust seam at the CF:
Add 1cm seam allowance and cut it out:
 |
| While you are here, add a grainline to the lower front, parallel to the CF line |
 |
| The dot is where the stitching lines intersect |
Redraw the new line, and cut out the upper Side Front piece:
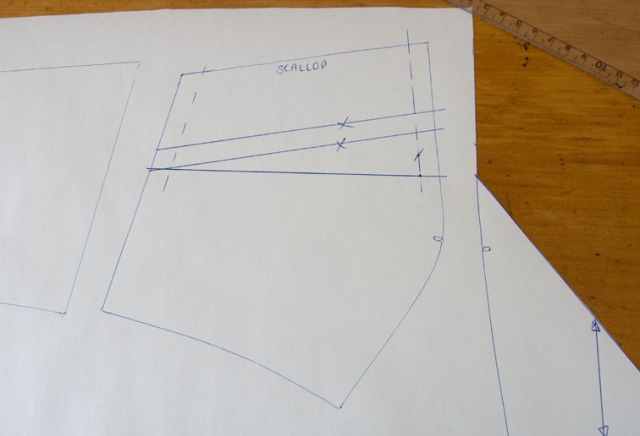 |
| This new line will be the widest part, so the lace needs to be this wide. |
Repeat for the back, once again checking the side seams match:
 |
| A small adjustment was necessary here. |
To make the lower bodice parts, cut around the remaining pieces, and trace them out again:
Then add 2cm seam allowances to the upper edge (that is, 1cm seam allowance plus 1cm that was removed from them before):
 |
| Add some grainlines too! |
Here are the final pattern pieces:
And the cut lace pieces – I ended up sewing a CF seam rather than an overlap because I thought it looked better:
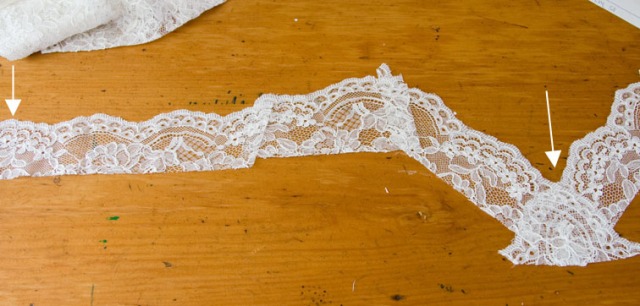 |
| CB and CF marked with arrows |
Adapting the pattern for underbust gathers:
 |
| Draw a guideline 2cm from the cutting line to help you line them up accurately |
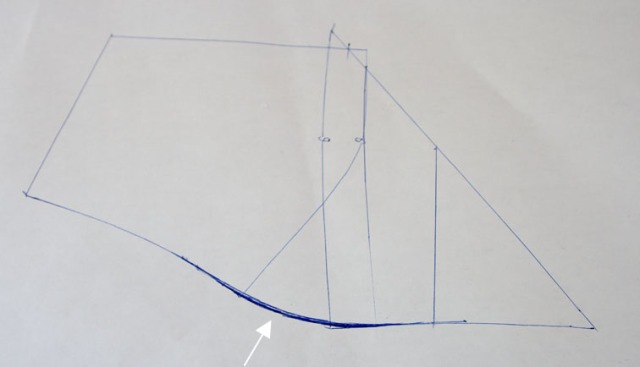
Draw a smooth curve to join the lower edges:
Mark the original dart legs, 1cm in from the old cutting lines:
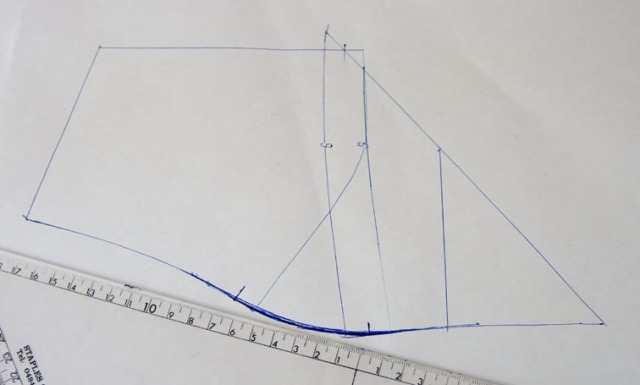 |
| Mine are 6cm apart, make a note of this amount |
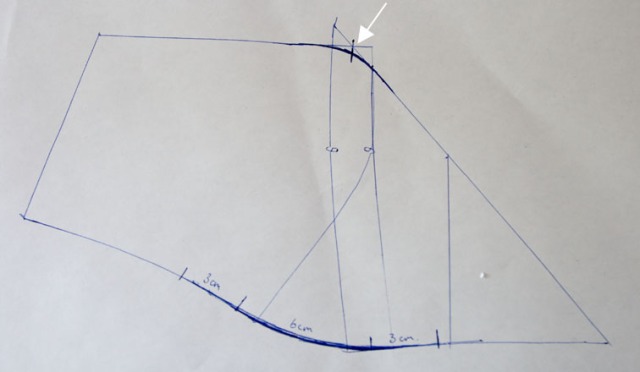
Smooth the curve at the upper edge too:
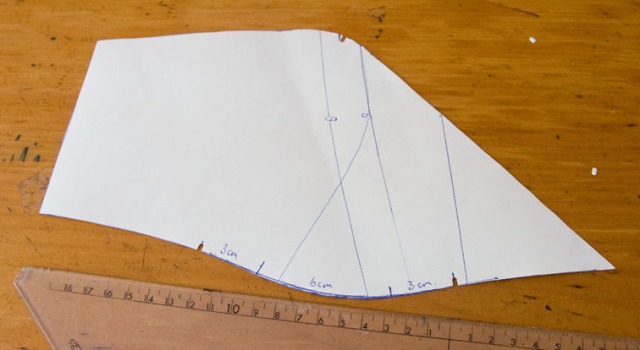
Divide the 6cm-or-whatever-your-number-is into two, and mark this either side of the original dart legs:
My total of 12cm will be gathered to 6cm:
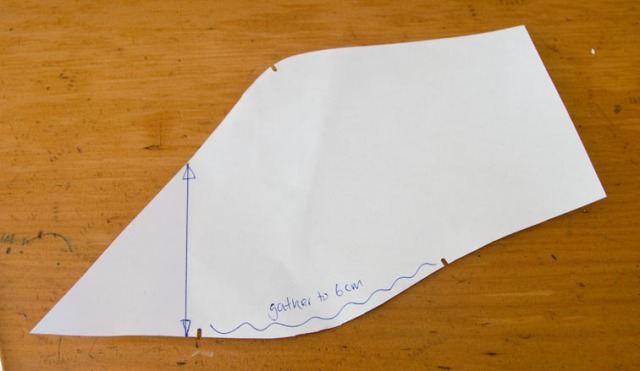 |
| Mark the grainline and notches too! |
Sewing it all together:
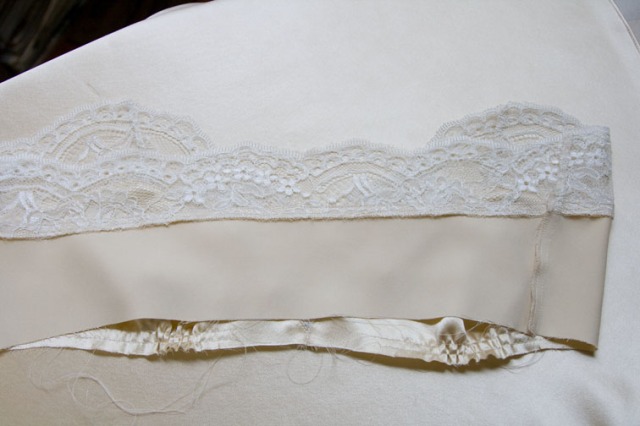
Sew the Back Lace to the Lower Back, overlock, then sew the side seams:
I egdestitched the seam allowances between the lace and satin down so they would stay nice and flat.
I also decided a CF seam looked better than an overlap – I sewed along the CF line, trimmed the excess seam allowances to 5mm and edgestitched them open.
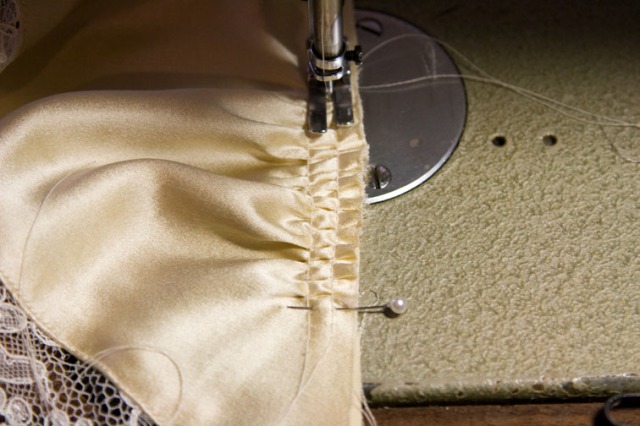
Sew a couple of rows of gathering stitches between the notches:
 |
| Hint 1: sew the gathering stitches 1cm past the notches so you can gather right up to the notch. Hint 2: Backstitch at one end so the gathering threads co-operate! |
 |
| Cut two 1cm wide strips, the length of the finished gathers plus 2cm for either side – mine were 10cm total On the raw edge, notch 2cm from either end. |
Sew the strips to the wrong side of the gathers matching the notches, and distributing the gathers evenly:
I tapered the end 2cm of the tape towards the edge like this:
 |
| When sewing this part to the skirt, the centre of the gathers (marked with a pin) will match the skirt notch |
Overlocking neatens it all up on the inside:





Oh my, this is positively my favourite version so far. I'm still searching for 'the' lace that I will use to make this slip of yours, but I'm glad it didn't come along until I saw this version. Divine!
LikeLike
This is just perfect!
LikeLike
Gorgeous!
LikeLike
My very basic machine doesn't have an overlock stitch. Any alternative suggestions for finishing the seam?
LikeLike
This is perfect. I think that I like this one the most. I think I am going to be making this for valentines this year – I bet lots of ladies will be. Thanks so much you are very talented.
LikeLike
This version is beautiful!
LikeLike
Thank you so much for sharing all of your knowledge!
Though I am not doing this se-along, I do appreciate you taking the time to do this. My next project is a coat, guess what I am reading up on…
LikeLike
ooh la la, this is so pretty. I love the ivory and honey together. I may try to make this version, too.
LikeLike
Wow, this one is so beautiful that I don't know which version I want to make now! Maybe I'll make both. 🙂
LikeLike
OMG – this is the most perfect one so far. It is so beautiful. I want one! (But it does seem a bit more complicated…) I suppose I should finish the first one before mentally starting the second?
LikeLike
I want one of each! With the lace top and with the lace edging. They are so pretty!
LikeLike
I've been wanting to make one (or three) anyway, but this version is simply to die for. It's so sumptuous! The fabric, color, and lace are all perfect. Just lovely!
LikeLike
Gorgeous and now all the lace I have seen will work with this version. Too many things to sew, can't decide which to start first. Thank you so much for all your detailed information.
LikeLike
I am enchanted with the beautiful things you are making at the moment, I have learnt a lot from reading your posts too, particularly the importance of neatness when working, which I find very difficult. Keep up the great work.
LikeLike
I am enchanted with the beautiful things you are making at the moment, I have learnt a lot from reading your posts too, particularly the importance of neatness when working, which I find very difficult. Keep up the great work.
LikeLike
Thanks so much for the mention Sherry – hopefully my solution will work for others too:) My slip is turning into a bit of a fix-as-you-go project, entirely due to my fabric choices. This alternative version of yours is gorgeous and I'm definitely planning on making it as soon as I pick up a nice quality fabric:)
LikeLike
what a beautiful slip. knowing you had this on underneath anything, would be like having a sweet little secret!
LikeLike
Dear Sherry,
as part of an experiment on a Russian forum (I'm german-russian woman), I sewed your ruby slip. I was absolutely fascinated by the modification. I succeeded quite ok as far as I can judge on this.
However, I realized that the entire piece should sit a little bit deeper and moreover it should be shortened at the armhole.
I have constructed exactly according to your instructions. A reduction at the peak and with a little part to bring down the whole place would be no improvement as the line below the chest is correct. At first I thought that I would have done something wrong, but then I saw that even if your dressform the lateral part there is very high.
In my posting I have put the line as it should be marked.
http://club.season.ru/index.php?s=&showtopic=22264&view=findpost&p=548378
kind regards
Julia
LikeLike
Hi Julia, your slip is lovely and beautifully made! I agree it looks high at the armhole though – my version is a little high in the front armhole (not as marked as on the mannequin though – it is smaller than me), and if I was making it again I would adjust this height 1cm lower. I think the gathers must cause the chest width to spread laterally a bit, as the full lace version doesn't do this on me. Those with a narrow chest width or short front will definitely need to watch out for this! Thanks for your valuable feedback.
LikeLike
Use the function of your machine zig zag!
LikeLike
This one is very nice. Thanks for sharing.
LikeLike