 |
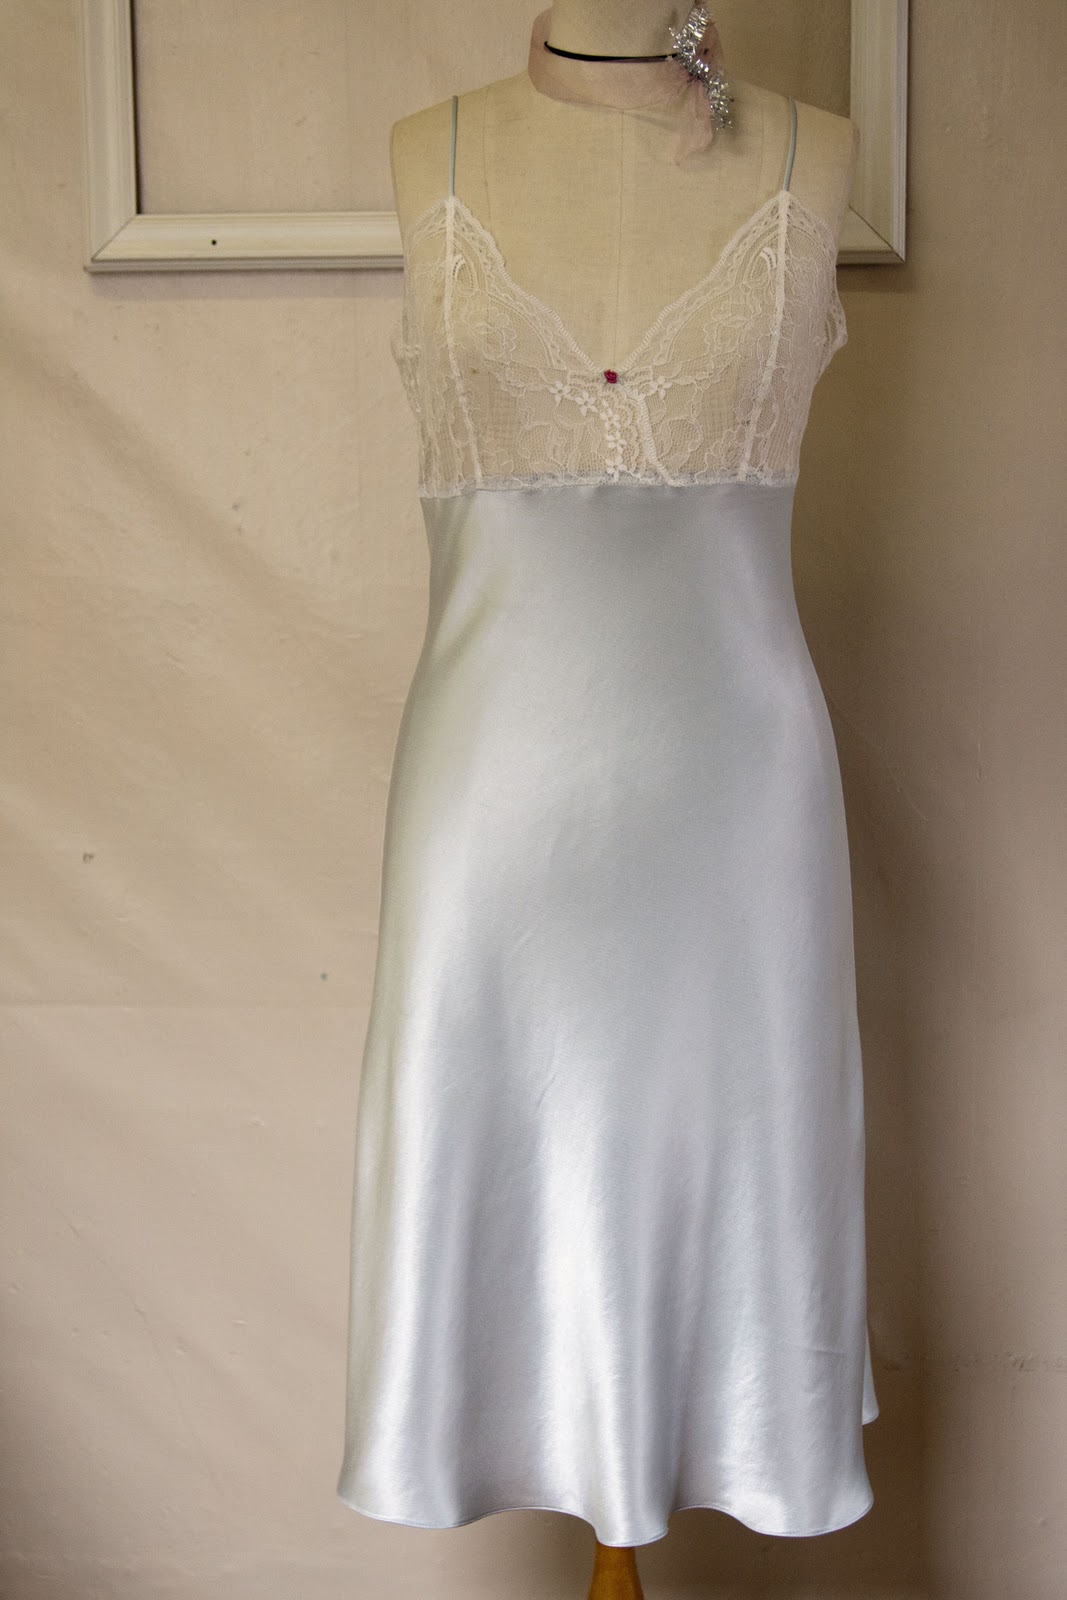
| I used a polyester crepe backed satin for this version, and it has sewn up really nice on the bias. (You might notice the bodice is larger on this version, I have altered the pattern since.) |

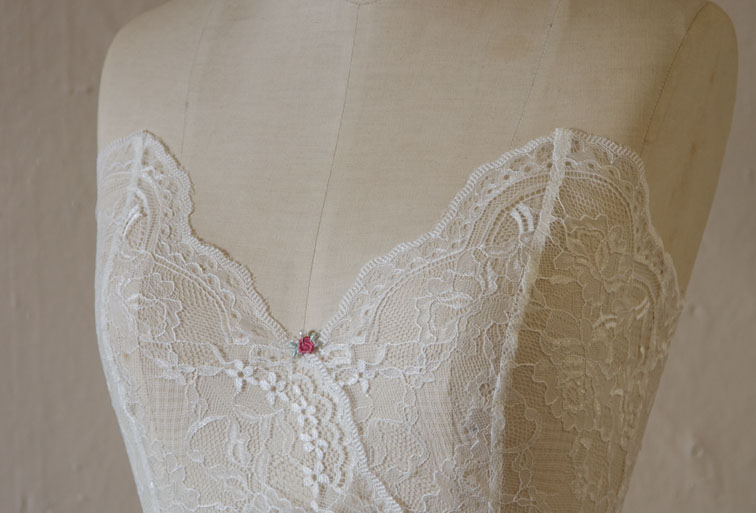

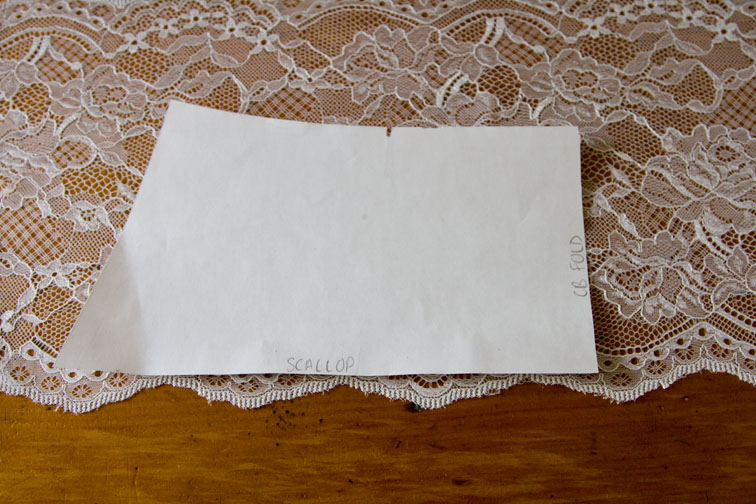
Now (unless you are still planning your layout) you can go ahead and cut this piece out:


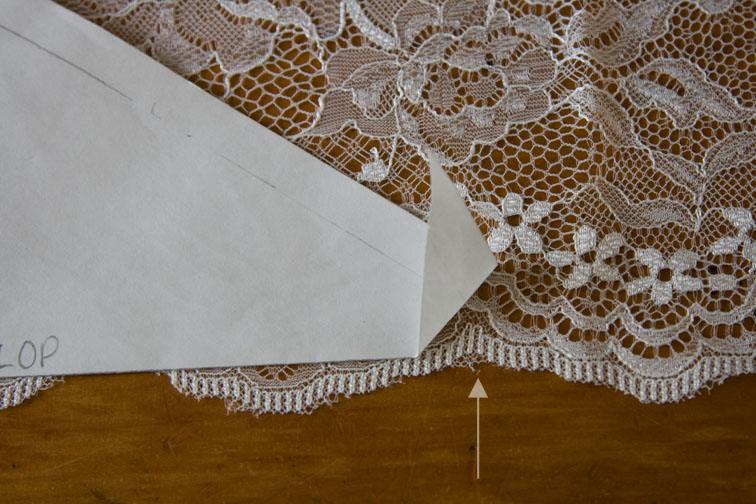
At the point on the scalloped edge where the stitching lines meet, we need to match the lace pattern. On the Centre Front Bodice this point was placed at the inner corner of a scallop, so the Side Front Bodice stitching line is placed at the same part of the scallop:

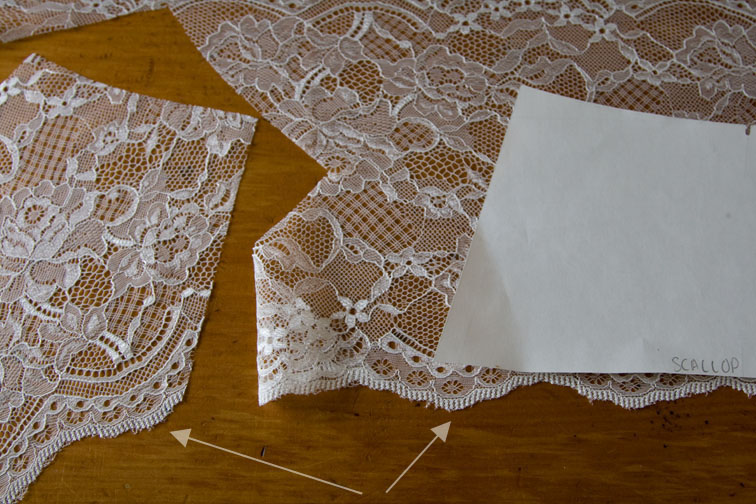
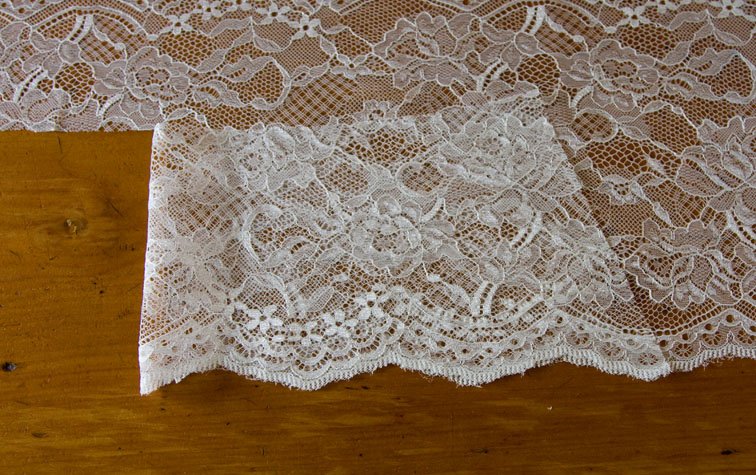
Once this is done you can cut this panel out. I’ve laid mine together here as they will be sewn – now we are starting to see how it will look:

It is important to stop here and check where the Centre Back is located. Whoops – it is not quite centred on a scallop here! This is a good reason to run through the layout briefly beforehand – so you can plan the best outcome.
I choose to centre the Centre Back Line over the nearest scallop:

The side seams still match closely enough – this is the least important join as it is under the arm, the Centre Back takes priority:

I cut half the back piece, then fold it along the Centre Back line – ensuring the scallops align perfectly – then cut the remainder. Even though your pattern has a full back piece, I still recommend doing this.
 |
Check your cutting by laying your pieces together as they will be sewn. My side seam scallop is slightly smaller, but the run is smooth:

Now for the opposite Side Front Bodice. Lay the one you have already cut face down on the lace, ie right sides together so that you have a pair. Arrange the top piece so the pattern matches along all edges:

Every lace is different – notice I am using the opposite edge of the lace to get a perfect mirror image. If you are unable to do this just match the scallops. Notice also how some lace is wasted because of the large pattern repeat.
Carefully cut around the piece – now you have a perfectly matching pair:

Do the same thing for the Centre Front Bodice – cutting right sides together so that you have a pair:


At this stage I usually can’t wait to get to the machine! I really enjoy cutting lace and seeing how it all comes together. Don’t forget to ask questions if you need to, and let me know how your skirt cutting went too!
Next up I’ll show you how to do an FBA, and then an alteration for using a narrower lace.
And shall I start a Flickr group so we can share pretty pictures of all our fabrics? It could be helpful for lace cutting queries too. Let me know in the comments!

Okay, so I get all stupid excited when I see your posts come up, because I know I'm going to be learning something new and cool. Never fails, thanks Sherry! Really looking forward to the FBA post.
🙂 Alana
LikeLike
I love this. I'm not sewing along because I've got too many other things on the go, but I will definitely be coming back to it in the, hopefully, near future because I really need a couple of slips. I really appreciate the amount of work you are putting into this.
LikeLike
HI Sherry, I plan to join in as the slip is gorgeous and I love bias cut, but I need to practice more with it. As soon as you get the FBA adjustment up then I'm in! ps I'm a D cup in a bra. Looking at your pics I instantly assumed the bust area would need adjusting for me. Would I assume I need an FBA?
LikeLike
As a person who does not have the time to sew along, it is delightful to read along! My goodness that lace is pretty. Every version of this slip is just gorgeous.
LikeLike
Great pictures! You are a great teacher. As many: looking forward for the FBA. Your slips are beautiful!
LikeLike
Ooh, this seems more complicated than I'd imagined (just cutting the lace all willy nilly) 🙂 Can't wait to hear more about the FBA. I'm curious to know if you will gather the lace at the centre bust (to give more fabric to cover breasts but not to significantly increase the skirt dimensions) or if you will 3-piece cup the lace. Or maybe there's some other way I haven't considered (likely).
I measured, against the size 12 pattern piece, another underbust of a slip with lace which fits me well. They appear to be the same size, taking seam allowances into account. My slip has no stretch but I can still remove it over my bust / head. Vis a vis your comment yesterday, I'm curious to know if there's a way to do the FBA without increasing the underbust size.
LikeLike
OH wow. Each version of the slip that you've posted has been more drool-worthy that the last. So beautiful!
LikeLike
Such a lovely clear, thorough tutorial. I am itching to cut out some lace now.
I have a small pile of luxurious slip fabric lying next to the enormous pile of Christmas sewing, quite motivating really!
LikeLike
Love your tutorials, Sherry…so interesting. I always wondered how they got the scallops on the edge! Now I know.
LikeLike
What an absolutely stunning little slip!
LikeLike
Sherry – is there a tutorial for using narrow lace yet? I'm midway through cutting out, but 18cm wide lace is NOT big enough for the side front piece of size 14! :O I really wanted to make this slip this weekend, so if you could email me some rough instructions, I'd really appreciate it! (I couldn't find any email links on your site, though I have a photo of the piece I can send you). thanks, melissa – enquiries AT fehrtrade.com
LikeLike
Great tutorial! I especially love the lace bridal fabrics you used in this post.
LikeLike
I love this pattern. Going to try it soon. Does it work to do French seams on the skirt part after it hangs for a couple of days?
LikeLike