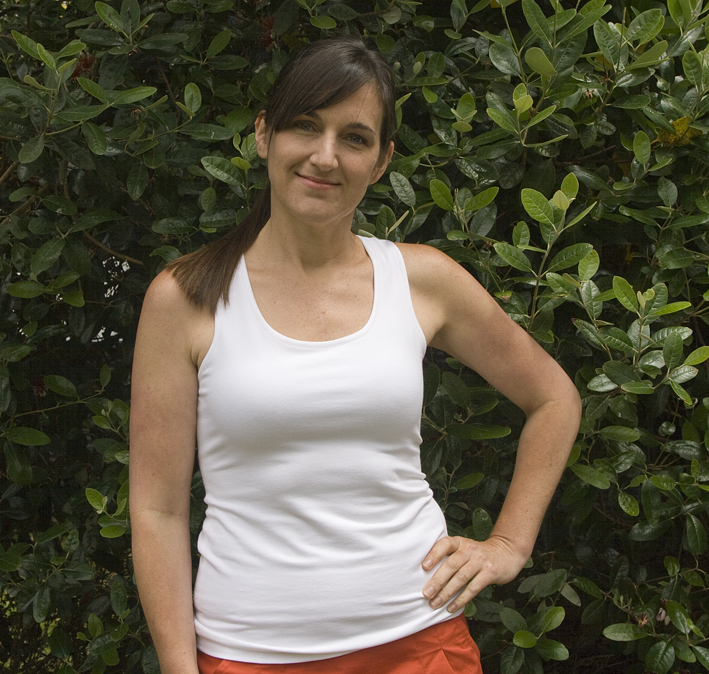
I can’t do without tank tops during summer, and since it is almost here I thought I would try and replicate my much-loved racer-back tanks from Max – that are now limp, faded and strictly relegated to the painting and decorating wardrobe!
Plus, can you believe I don’t actually have any white tops?!
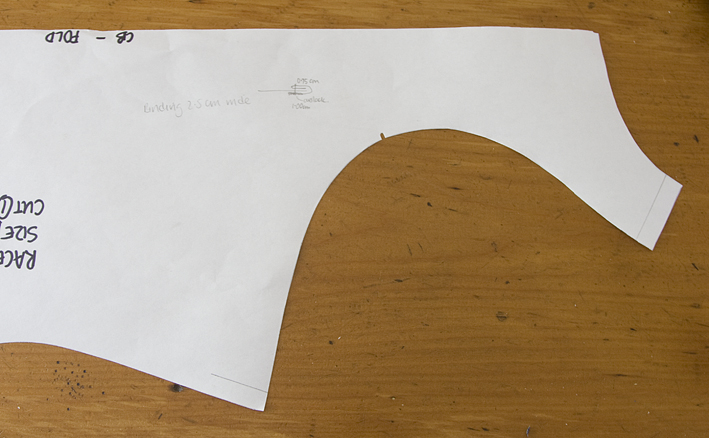
I used my knit top block – you can use a tried and true knit pattern too and follow what I did. I scooped the front neckline and cut away the back armhole so it was a similar shape to my Max tanks, added a bit to the hip side seams just in case….

…cut a mock-up in my white viscose/elastane knit…

…and tried it on… (with my black bra – cringe – please ignore!)
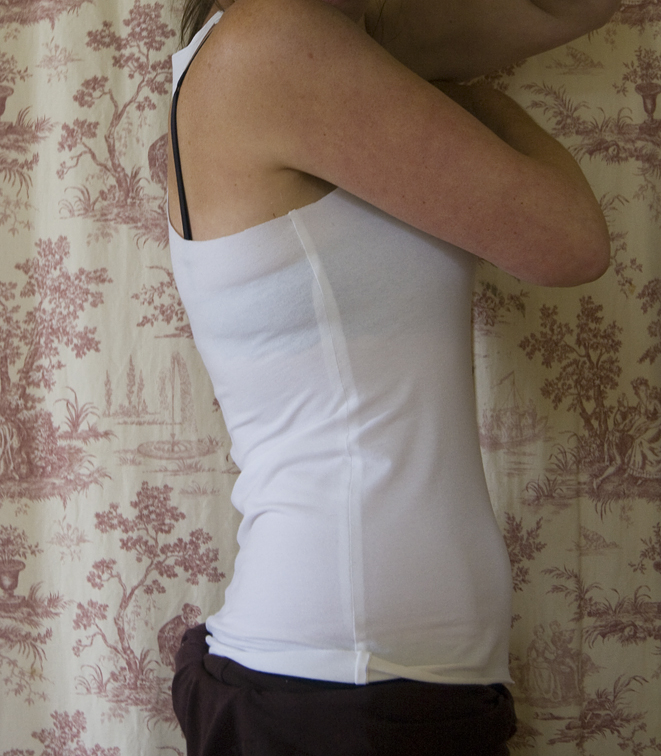
I am happy with the neckline and armhole, but I do need a sway back adjustment!
Here is a view of the cut away back for the record…
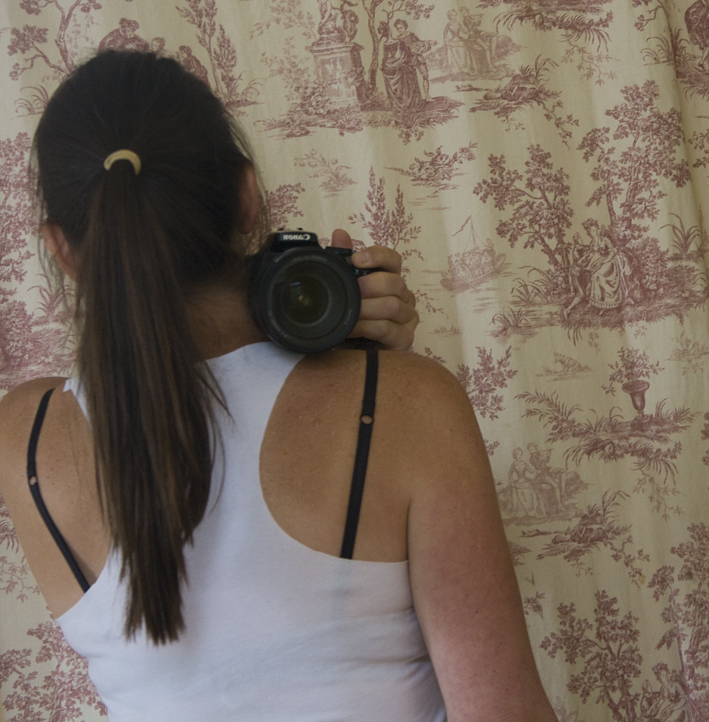
Do you know how hard it is to get a back shot of you in the mirror without liveview? I had ten tries until I finally got both shoulders…!
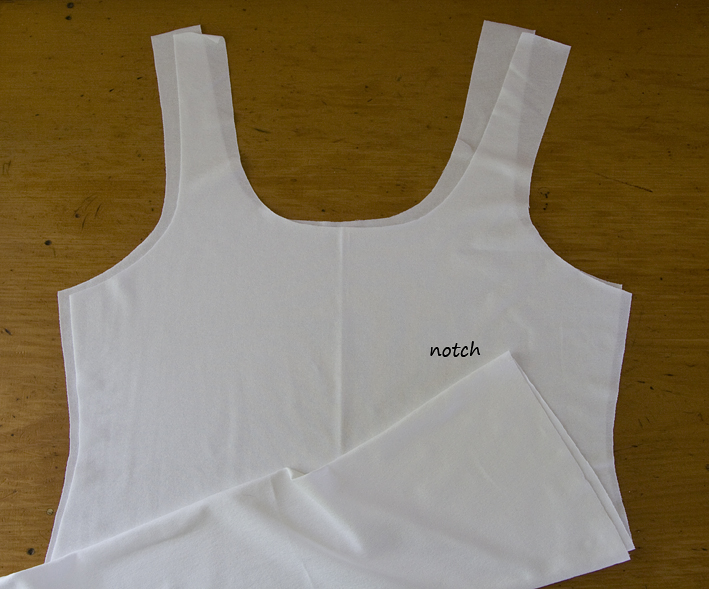
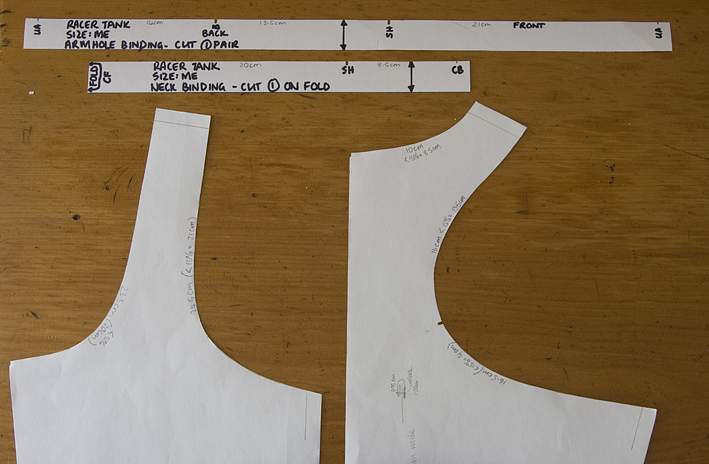
I cut the top double thickness, with the hem as the fold line, and all the remaining neck/armhole edges were bound.

This is what the top looks like cut, and you just sew the inner and outer side seams in one long seam.
Make sure you have a little notch at the hemline so you know exactly where to fold:
This hem fold trick is a favourite of mine because
- no hemming to do – yeh!
- hem is nice and flat with no visible stitching
- the double layer adds opacity and extra body to my fabric, which being white is a little sheer and flimsy for my liking. Increased quality factor is always a plus!
I pressed the side seams open…

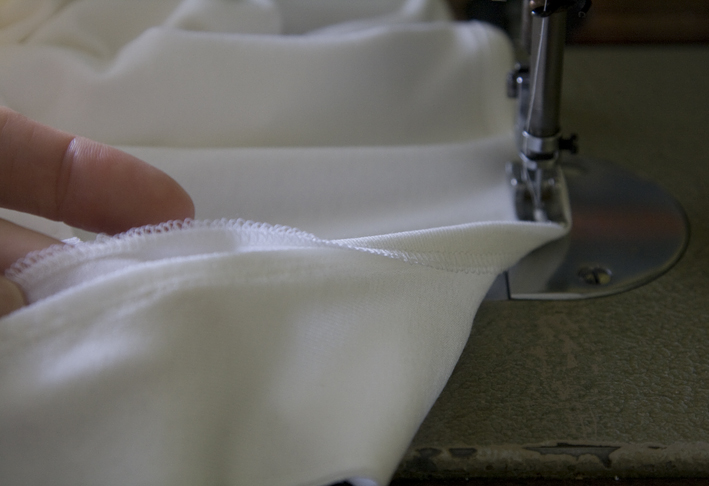
and if you fold the seam allowances together at your hem notch…

and stitch them together…

your hemline will stay in place..

Voila!
Then I tacked the two layers together around the neck and armhole at 3mm (1/8″) so they were ready for binding. If you have cut and sewn the two layers accurately, they should be flush with no bubbles and puckers – if not, fix it now – before it is bound!
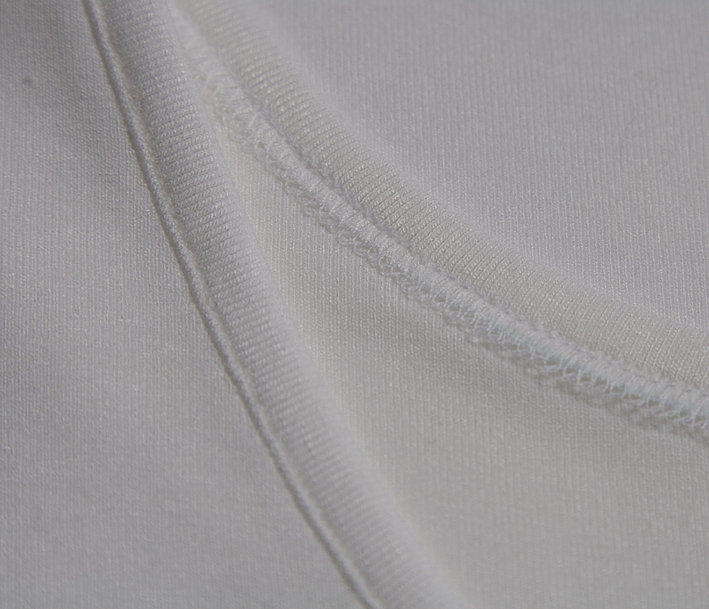
For the binding I used my cheat’s method which is good when you want to reduce bulk, as only three layers are involved instead of the usual four. Although it is not the prettiest method as overlocking is involved. I don’t know why I call it my cheat’s method – maybe because it is too easy and I feel like I am cheating?
- I cut the binding strips 2.5cm (1″) wide and overlocked one edge.
- Stitch the binding to your neck or armhole at 6mm (1/4″) with right sides together…

- Then fold the overlocked edge to the back and edgestitch the binding from the right side…
- as long as your binding is cut to the correct width your overlocked edge will automatically be caught underneath…

- Ensure your binding is of even width as you stitch for a pretty result!
More on binding:
Have you ever seen bound necklines that are out of shape – assymetrical even though they should be even? Or binding that looks like it is gathering the fabric up, or causing the neckline to waver? Obviously these are things we want to avoid, but how exactly do you get perfectly fitting, evenly distributed binding?
Here are some tips to try:
- Add some notches at critical points around your neckline and armhole – ie CF, CB, F armhole, B armhole, even more if you have complex curves to bind.
- Measure between these points and the existing seams, exclude the seam allowances.
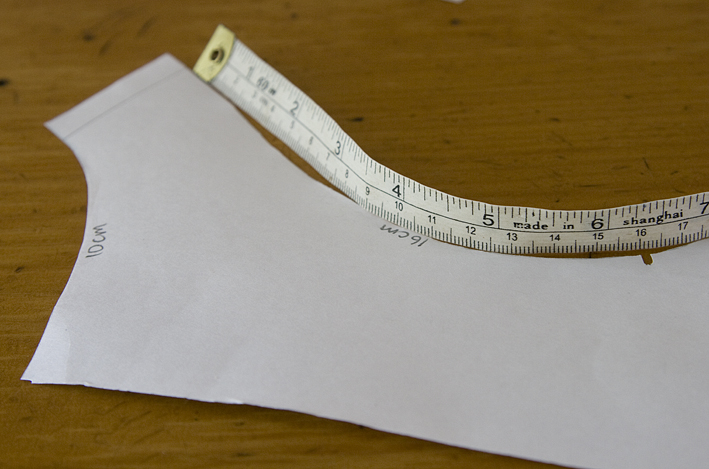
- For knits, reduce this measurement by 10-30% depending on the stretch factor of your knit (try 10% for firm knits, 30% for ribbed knits).
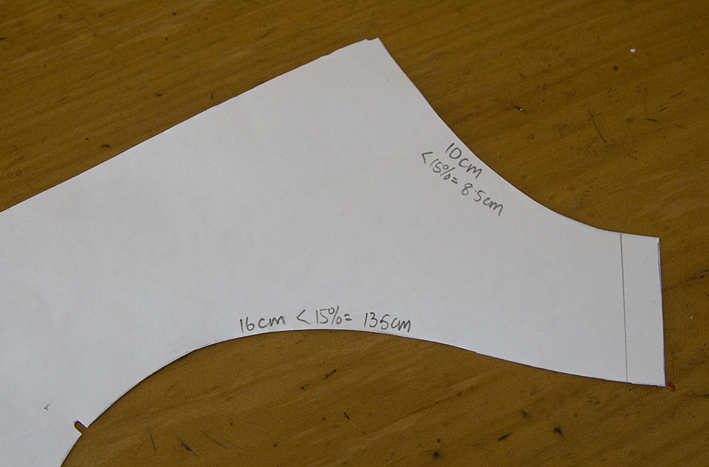
- For wovens, cut the binding on the bias. Measure the cutting line of your pattern minus seam allowances. Don’t measure the sewing line as it is longer, and no stretch factor reduction will be necessary.
- Test your binding length and width on a scrap. Admire or adjust.
- Make a pattern for your binding with your new measurements, hopefully you can see my example here!
Now you can cut and sew with confidence, knowing that your binding will fit and be distributed evenly.
Happy sewing!

That was actually very useful! Of course, it is fall (almost winter) here in the Netherlands, so I'll only use your tutorial in a few months 😉
LikeLike
Thank you for a great post. I admire your talent and enjoy reading your blog.
LikeLike
Love your tank top! And I love all your wonderful tips for binding – thanks!!
LikeLike
This binding is similar what I do, except I don't serge the edge of the binding first… so yours is much neater than mine! (once I get my serger functional, I think I will start though. It looks great!
How do you do a swayback adjustment in a fitted knit without back seams? The only ones I've seen that don't require seaming in the back seem like they would either distort the hem or the shoulders, and I'm not convinced they'd actually address the problem, but perhaps you can enlighten me (as you usually do!) 😉
LikeLike
great info, thanks very much, I have to try this.
LikeLike
Yes, I would like to hear about swayback adjustments without the CB seam too! I love your binding tutorial. THank you so much for that!
LikeLike
That's such a neat top. I love the way you did your binding – something so simple, yet looks so professional, and the double thickness trick is fantastic – have spotted some material to make a top but it is thin – you'll solved my problem – thanks so much for your tute. I always learn something when I visit your bog – much appreciated!
LikeLike
Thanks for the useful tips.
LikeLike
Very nice tank! I've been needing to make some camisoles since mine are falling apart! This is good advice and tips on binding. Thanks!
LikeLike
That's a super top. Thanks for taking the time to write out and photograph everything. Excellent.
LikeLike
Hi, thanks for your comment, and yes, I did have fun dressing up!
This is a fabulous tank top tutorial, thankyou for taking the time to do this. I like your binding method. A BIG improvement on the fold-under-again-on-the-inside method, which is tedious to get right and bulky. Yours is beautifully done!
I've seen the fold at the hemline done before; in fact I have a Yohji Yamamoto top (found secondhand, score!) that is done in this way, but the fold is on the bias which makes for an interesting effect. I've toyed with reproducing it, one of these days..
LikeLike
~Laurwyn – you could make one in some lovely NZ merino jersey for winter!
~tanitisis – great question! As usual I go to write a quick sentence and end up with an essay, so I might dedicate a future blog post to this – stay tuned!
LikeLike
Nice top and thank you for sharing the technical stuff.
I'm largely self-taught when it comes to working with knits and I used to have the least cooperative sew machine ever, so I tend to do a cheat's version of your binding techinique: serging folded binding strips (measured the same way you do) along the edges. It sort of works for wider bindings (at least 1,5 cm finished width) but only if they're pressed well. And I tend to avoid tank tops on account of the binding needed. With the information you gave, and the sewing machine I have now, I should try again…
LikeLike
This is great! I'm filing this away for warmer months, though one in wool jersey might be nice.
LikeLike
Oh my gosh, this is brilliant! I am completely knocked out in admiration.
I really like your binding method (will definitly try soon) but I'm completely bowled over by the double layers! That's an absolutely -fantastic- method! Sheer genius!
No hemming: wooh!
I am a little fuzzy on which sideseams you sew together: do you double up the pieces and then stitch through four layers? Or do you do a long seam through two layers from one front-back piece into the other front-back piece and then pull one into the other?
I would be seriously grateful for any photos of this, seeing how something is done can make all the difference.
Thanks very much for this again, absolutely fantastic!
PS: I best start on this kind a project now so I'll have something to wear in six months!
LikeLike
Ok it is several months later, but I recalled in my dim memory that I saw a tip somewhere – checked your blog first, and there it is. Tomorrow morning I will be cutting out a silk knit tank top (I made a pattern by tracing an existing tank top). So I will put this binding method to the test.
It is a very stable but soft and drapey silk knit – so 10% reduction for the binding measurement? that is what I am going to try. Will let you know my results – thanks so much for this post.
LikeLike
Thanks Sherry, what a fantastic post. Your detailed binding tips were perfect – exactly what I needed! Thanks!!
LikeLike
thanks so much for this info! i just tried your binding technique on a sample knit tank top armhole and it looked beautiful! but when i tried it on the actual jersey knit tank top, i ran into a few problems:
1. are you just stretching the binding as you sew it on, just eye-balling it? or do you pin it around equally first? i am having trouble stretching it evenly as i go, so i tried sewing the shoulder seams and then sewing on the armhole bindings, but it didn't really look any better when i did that.
2. are you using a straight stitch to sew the binding on? that's what i did, and since the straight seam doesnt stretch i am finding the armholes and neckline gape out in places, and the stitches are very tight together and uneven, probably from me trying to stretch the binding as i go.
3. when i overlock the binding on one side, it bunches it up on that side and the binding starts to curl. if i pull it straight on that side, the overlock stitches come out. ahh! do you stretch it a little as you overlock it so it comes out straight?
sorry to post so many questions, but i'd love to figure this out, and the binding on your tank top is sooo pretty! any help is appreciated, thanks in advance!
LikeLike
~sophy – the binding is slightly shorter so you do need to stretch it on, I always notch the CF/CB and shoulder and match them as I sew, pins aren't really necessary. I am using a straight stitch here but my machine sews knits OK with a looser tension, you will need to play with your machine settings to get it stitching correctly on the knit. It sounds like the needle thread tension is too tight on your overlocker.
LikeLike
Thanks so much for the tutorial! I wear a tank pretty much every day of the year (under anything I wear!) so I am always in need of new ones! ~ Jessica
LikeLike
Great tutorial – Thanks! 🙂
I wear tank tops almost every day and find the ones available here in Denmark for a reasonable price (i.e. H&M's) to be of very poor quality. I just finished copying one that has a great fit but is worn to pieces and I can't tell you how happy I am, having found your tutorial!
LikeLike
a nice post for students ,kooooool
thank you
LikeLike
Just what I was looking for, thanks for posting Sherry. Now off to bind my T shirt x
LikeLiked by 1 person