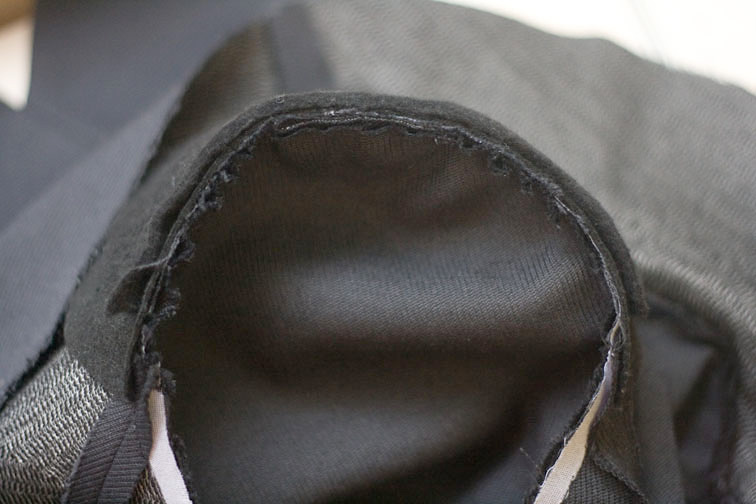
On its own, the sleeve head area of a tailored jacket can look a bit limp and in need of reinforcement – that’s where a shoulder pad and some sleeve head wadding come into play!

Shoulder pads prevent the front and back shoulder area collapsing near the armhole as the shoulder starts to round off. They needn’t be large – mine are only 7mm thick and barely detectable – but they come in many thicknesses.
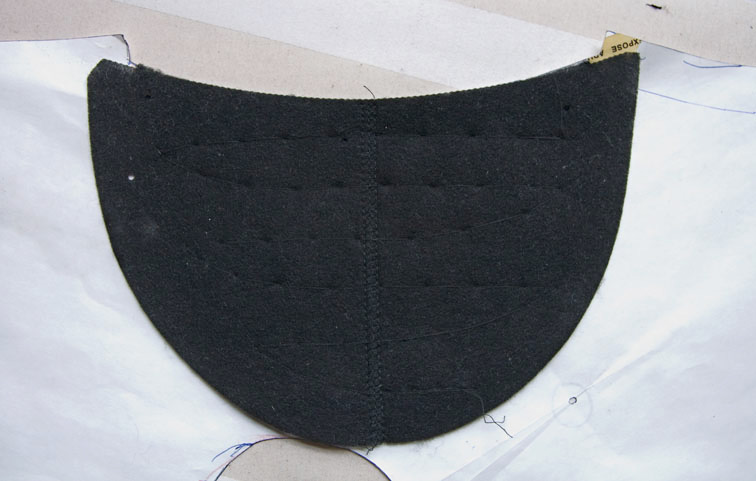
You need to make sure that your shoulder pad is shaped correctly for your armhole. Lay the Front and Back pattern pieces together with the shoulder seams aligned and overlapping like this:
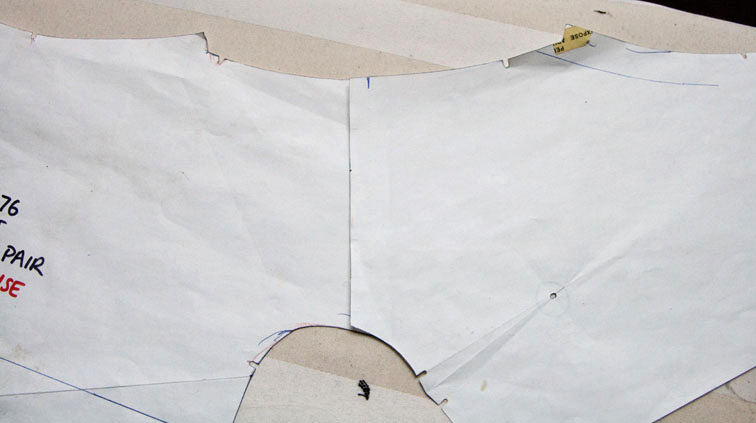
And place your shoulder pad on top to compare the shaping. If your shoulder pad has a seamline, match that with the shoulder seam. My shoulder pad is quite similar to the armhole shaping, and I only need to trim 3mm from the armhole edge at the shoulder point. I also need to trim some off at the neckline, as it protrudes into the seam allowance here.
Remember that you need a L and R pair! Most tailored pads have a notch or small hole indicating which end is front or back.
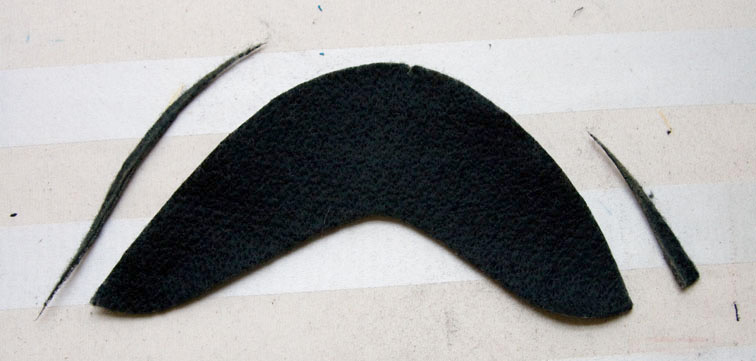
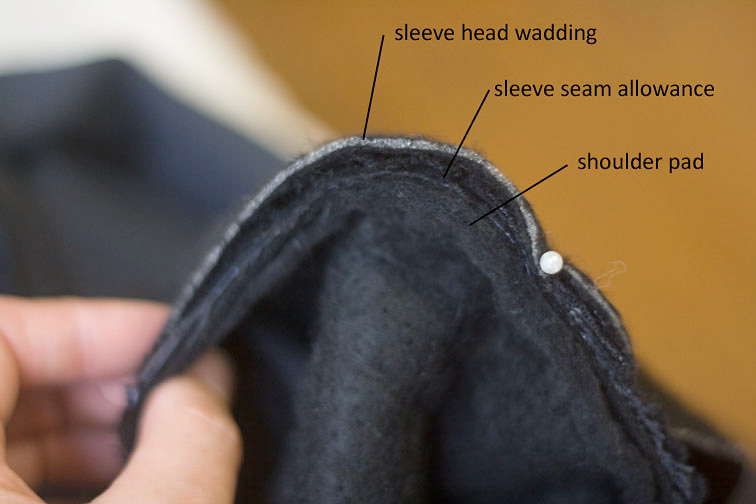
Sleeve head wadding sits inside the sleeve head, supporting it, rounding it out slightly, and concealing the sharp edge of the shoulder pad and seam allowances. My precut wadding has a slightly different shape to the pattern:
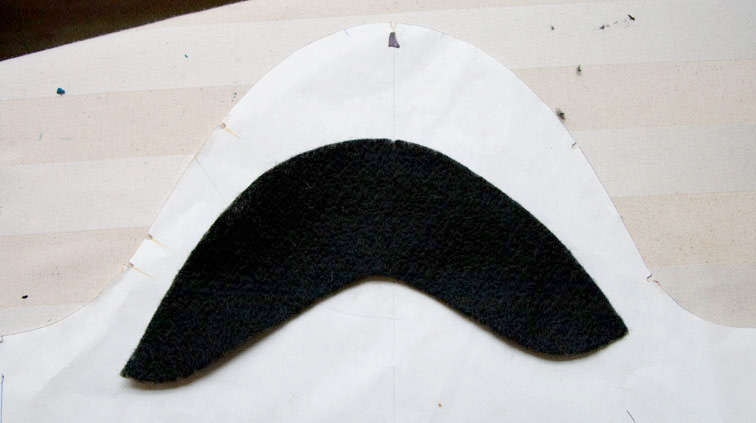
Which is easily fixed:
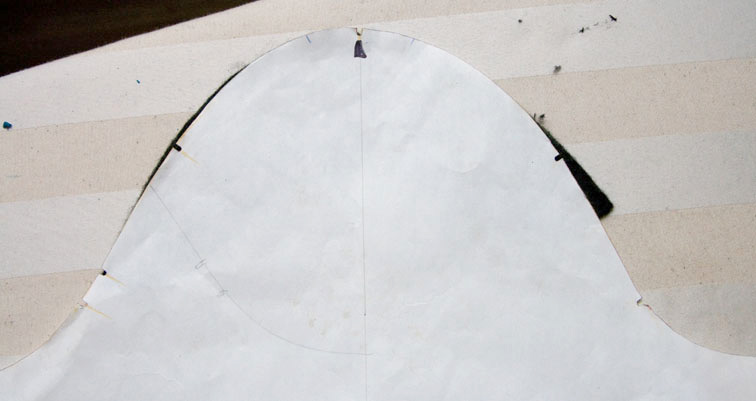
The wadding should also be paired, and mark the shoulder notch if it isn’t already marked:
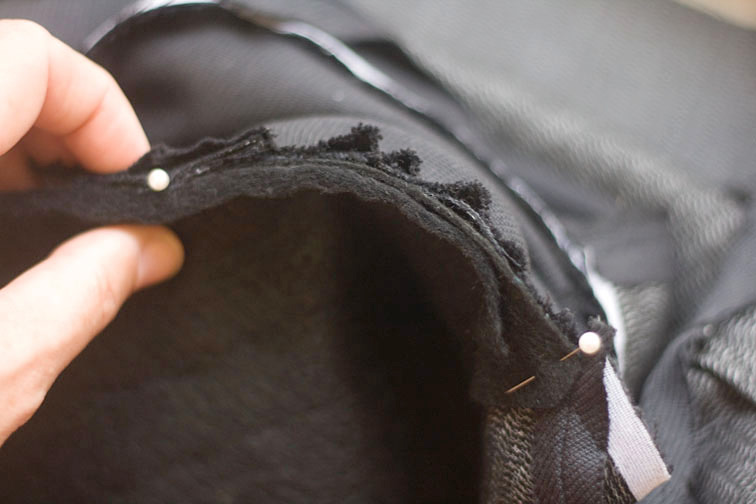
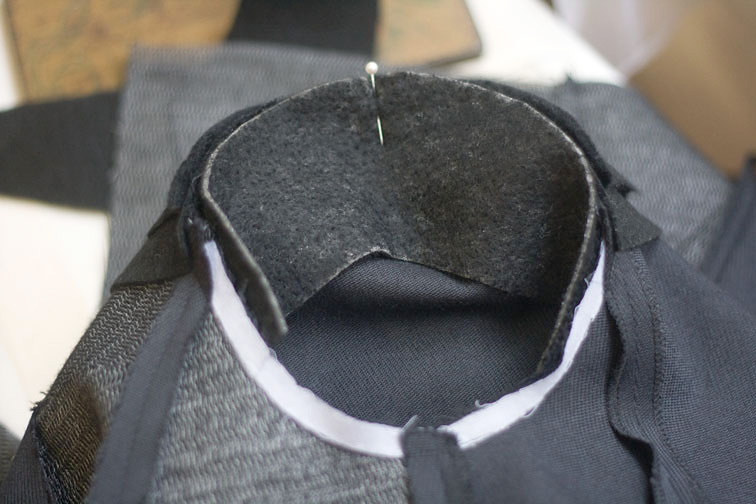
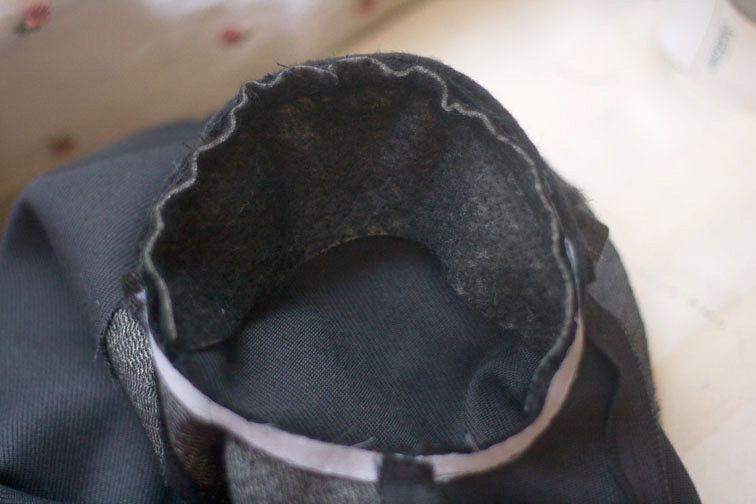
Now our pieces are the correct shape, let’s set them in! Start by pinning the shoulder pad at the shoulder point like this – the edge of the pad should align with the cut edge of the seam allowances:

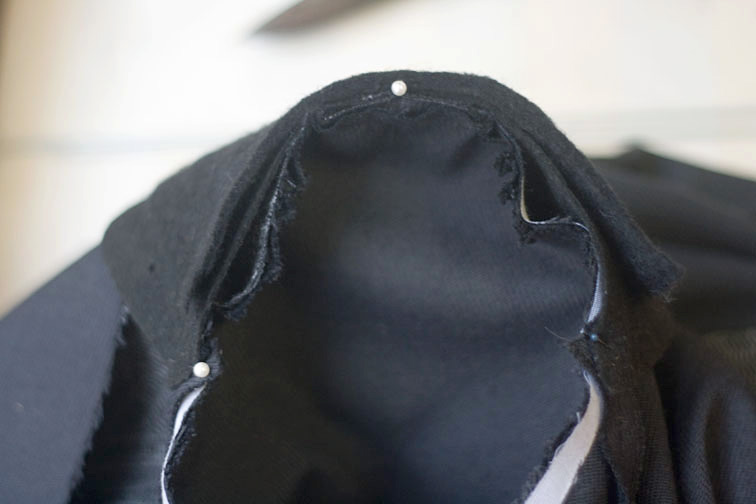
The front and back tips of the pad are not positioned by laying everything flat, they are positioned by curving the pad and armhole seam into the wearing position like so:
In this picture below, both ends are now pinned. Note that I have bent the shoulder pad back the other way, revealing the amount of ease that was automatically introduced in the step above – you need this ease!
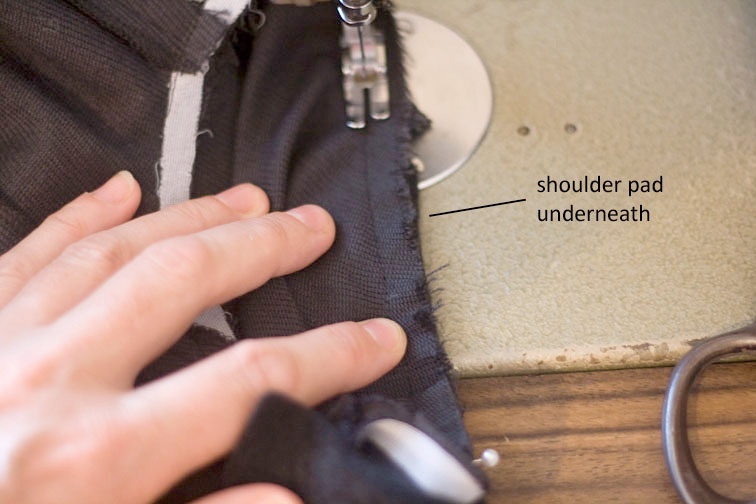
The shoulder pad is sewn in from the sleeve side, stitching 1mm into the seam allowance from the existing stitching line so it remains unaffected. As you are sewing flat, there will be some slight easing to do of the top layers:
Done:
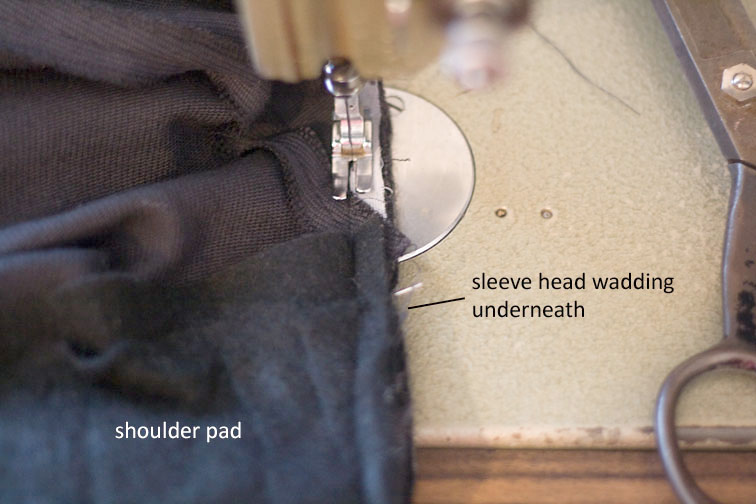
The wadding is sewn in a similar manner, except it attaches to the sleeve side of the seam:
Allow it some ease in a similar manner to the shoulder pad:
Sew it in from the shoulder pad side, in the same line of stitching as the shoulder pad:
All stitched up:
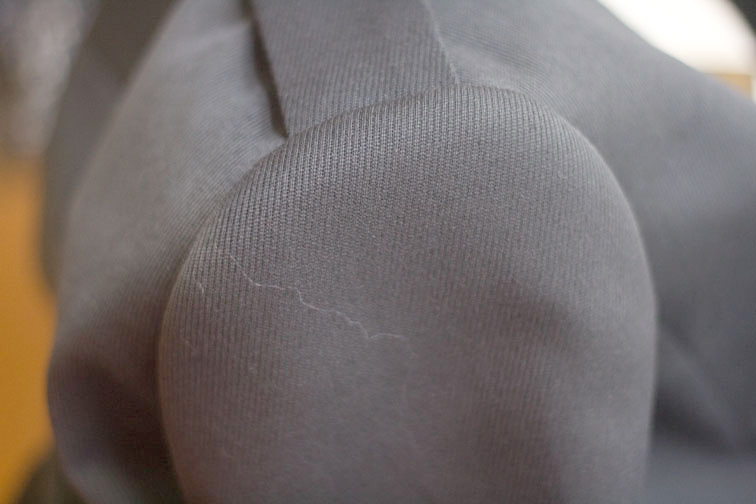
From the right side, even only supported by my hand, the sleeve head looks much classier with it’s supporting layers:
Don’t forget to pin this for later! Next up we will sew the lining in – happy sleeve sewing for now!
Sheryll

This post was originally published as #13 of the Ready-to-Wear Tailoring Sewalong.
Click Here for a full list of sewalong posts.

What a lovely sleeve!! Thanks for your reply today – I should have read your whole post!!! Anyway, a couple of things that I have appreciated even in my early stages of this sew a long…. 1cm seam allowances – love them for all the reasons you pointed out earlier, and block fusing – I love the feel and the stability of whole fused pieces. Anyway, you have put in a mammoth effort with all this and we are all lapping it up! Thanks so much.
LikeLike
Thank you again, that sleeve looks awseome. I am so far behind, keep changing my mind about what to make the lightweight cashmere up into. I am really looking forward to working with your brilliant notes when I finally get started.
LikeLike
Your sleeve is beautiful. If I were to make my own sleeve head, how long should it be–i.e., how far down the sleeve cap line does it go? And this might be a silly question but why wouldn't one just flatten out or cut down the pad and wadding rather than ease it?
LikeLike
~Amy – the sleeve head wadding usually goes down to about the sleeve notches. If you don't ease the armhole onto the shoulder pad, it will appear tight over the pad when it is turned right side out (how do I know?!). The wadding doesn't need as much ease really.
LikeLike
Sherry, I have just discovered your wonderful blog! Where do you get your pattern paper? I love the idea of chalking around the pattern! Beth
LikeLike
Hey Beth! Are you still sewing? Brian Goss
LikeLike
~Beth – I get my paper from a stationery supplies company – it is 120gms kraft paper, sort of between standard paper and card weight.
LikeLike
Hi Sherry,
Can I still join the flickr group? It's saying my request is still waiting for the moderator's approval. 🙂
LikeLike
~dilemmax – sorry I can't find your request, can you send another?
LikeLike
Fantastic! I'm making my first jacket and sewed the first sleeve as the instructions recommended – using ease stitching. What a mess! My old hand machine won't really sew long enough stitches and the thing ended up looking like the crust of a cornish pasty.
After reading your instructions I did the second sleeve your way, and it came out perfect. I have now re-done the other sleeve and actually have two which match.
One question – once the sleeve wadding is in, which way do I press the seam, or do I trim it back and let it do it's own thing?
LikeLike
Let it do it's own thing! I only press the seam after setting in the sleeve, as in the previous tutorial. The seam allowance should face into the sleeve, and you don't need to trim a thing!
LikeLike