

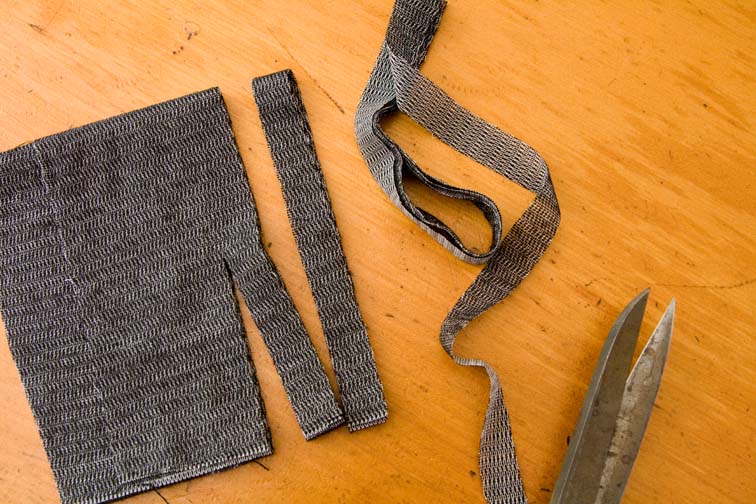
If your fabric has seam slippage or frays easily, eg a loosely woven tweed, then you will need to fusetape all seams that are not yet fused. Seams are fusetaped before sewing. I lay my cut panel on my pattern piece to ensure they are exactly the same shape and length, then apply the fusetape to the wrong side stitching line, extending it about 1cm into body panel and 5mm into seam allowance. When you sew the seam, you will sew through the tape on each side as well. Fusetape any back darts in the same manner – cut a piece of fusing the same shape as your dart intake plus 1cm all around, press it on and sew the dart through all thicknesses.

I usually apply fusetape to the front shoulder seam to prevent it stretching. Often the back shoulder is eased onto the front, and fixing the front measurement prevents inadvertant stretching as you sew, as well as stretching over time.

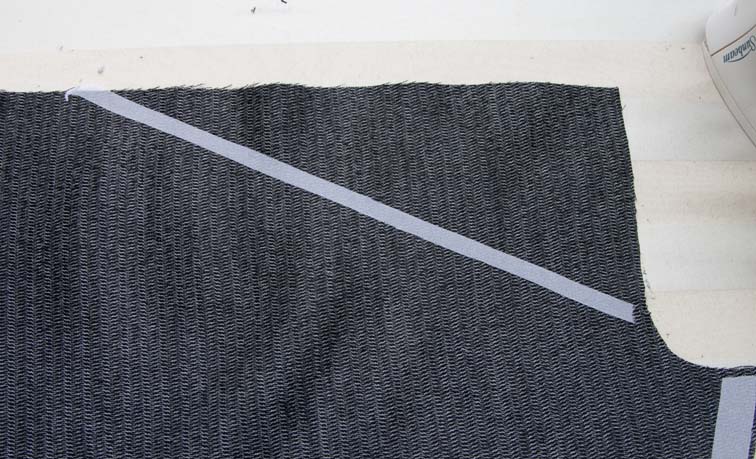
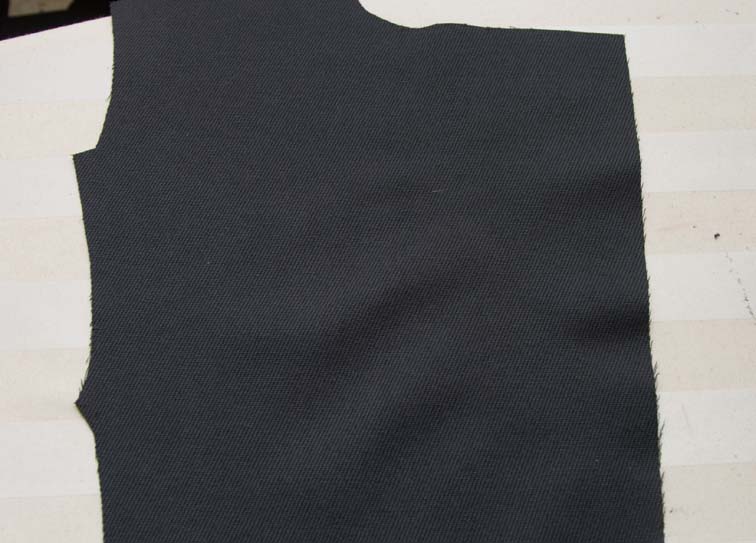
Also fusetape the armhole to prevent the bias areas stretching out of shape and consequent fit ramifications. Here I cut the fusetape in half lengthwise, and fused it within the seam allowance. For some reason I was taught not to tape the upper front armhole. Fusetape the roll line of your front to prevent it stretching. The correct placement of the fusetape is just inside the roll line, so it does not affect the roll line itself.
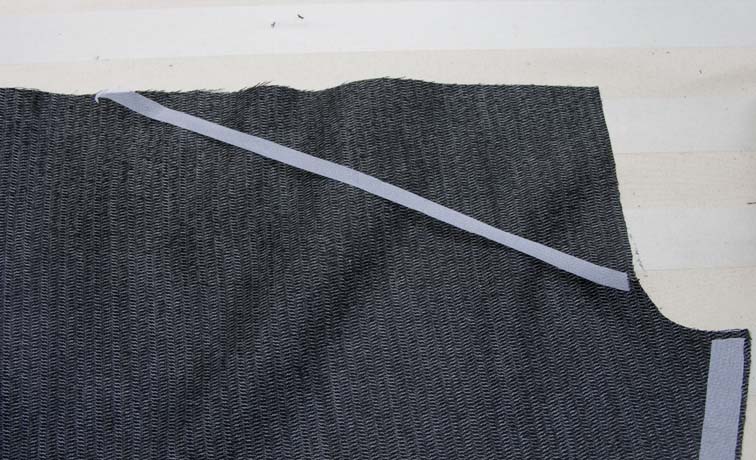
If you need to you can ease the roll line onto the tape up to 1cm – cut your fusetape to the finished measurement (roll line, less seam allowances, less 1cm) fuse the ends in place, then distribute the ease evenly over the remaining length. Fuse lightly at first, check it’s even, and then fully fuse:
 |
| wrong side |
 |
| right side |
There are a few additional areas that you may or may not want to fuse – it all depends on your design, fabric and preferences really. Here are a few ideas to help you decide whether you need to try any of these techniques:
An upper back fusing is made from the upper back pattern pieces. It can help hold the shape of loosely woven fabrics across the back shoulders and prevent CB seam slippage, as well as conceal any lines of the shoulder pad. Personally I’ve never done it, but would consider it for a loosely woven tweed where there is no risk of it being visible from the outside.


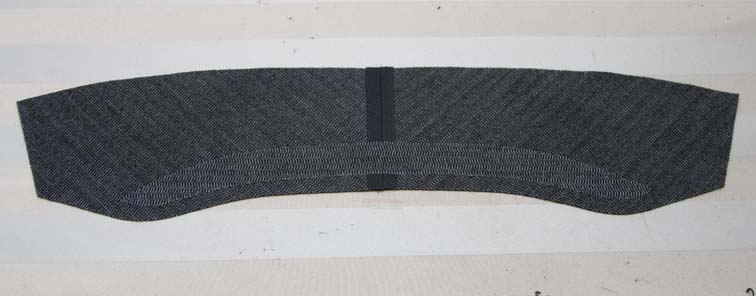
Collar stand fusing – Sew your under collar CB seam, press, and apply that piece of fusing we made earlier:
Lapel fusing – An additional piece can be applied to the lapel area of the front, cut so that its lengthwise grain is parallel to the roll line, this eliminates the need to tape the roll line, but also eliminates the option of easing the roll line:

That’s it for today – tomorrow I’m starting to sew!
If you are sewing along, what stage are you up to, and what’s the most important thing you’ve learnt so far?
And make sure you check out our Flickr group!

How smart are you! I love reading your posts Sherry, it's like my own private tailoring class!
Can I ask what studying you did to become so knowledgeable? If I had my days over I would have trained professionally in dress making and design…oh well, you live, you learn!
LikeLike
Oh, perfect! My fabric IS prone to fraying, and I had been worrying about some of my narrower seams, especially around the pockets. Yay!
I just finished my lining pattern-pieces and will hopefully cut that out later today. I have the shell pieces cut and block-fused, but I guess I have a bit more fusing to do, too! 🙂
LikeLike
I just learned to put the stay tape on the front shoulder seam, makes perfect sense though I was taught to always put it on the back. Hm.
I'm really enjoying all of it, I've always pad-stitched everything. I really like sorting out my garment in the pattern/prep stage, so your schooling on pattern adjustments was fantastic for me.
Do you know anything about easing in roll lines for fuller busts? I seem to remember something of the sort but that's about it… Ease in the roll line to avoid gappage on a full bust?
Other than a few bits and pieces, I'm set and ready to sew.
Thank you so much for doing this, by the way.
LikeLike
My current roll line is so short I'm not actually worried about gappage, I'm being greedy and picking your mind… 🙂
LikeLike
I'm just finishing the last of the lining pieces and fusing is next. I have a tiny ironing board, so that'll be fun–or not. I think the thing I'm learning, or having fun with, is just the attention to the pattern & accuracy. I really can start to see it how it comes together now.
LikeLike
~Cherri – I'm glad you're enjoying it! I studied patternmaking and garment assembly, and have worked in the clothing industry ever since!
~Tanit-Isis – that lightweight knit fusing is good for anything that frays.
~Steph – I think I was taught back too, but that's not going to work if it is eased. You can also tape the open seam, but that would be double-handling!
When I make a pattern it is designed not to need easing in the roll line, (this is effectively another bust dart, so any gaping is swung into the real bust dart), but with commercial patterns it is often necessary, an easier compromise to relocating the 'dart' and redrafting the collar, which is a bit tricky for most home sewers! I have eased the roll line in the pics above.
~Amy – so you're at the television stage! I think it's really important to know your pattern – it makes the sewing stage more of a breeze!
LikeLike
I am to the point where I need to fuse…I have been dragging my feet.
LikeLike
Got everything cut out today. Mine won't need any extra fusing, so I'm ready to start sewing, too.
LikeLike
Thanks, Sherry, makes perfect sense. So if I already altered something to fit me, that removes the gappage issue. Wicked.
The fusing took dramatically less time than I thought it would. I set up the ironing board, fabric and interfacing in my living room, then every time I passed it during the day I took a few whacks at it. In half an afternoon it was finished.
LikeLike
great info – I have used this method before, but I definitely learned something with the photo showing how to distribute the ease on the lapel roll line.
As for the chest reinforcement I do that, as I want the front shoulder to match the back shoulder in terms of texture and weight, so if one has interfacing then the other should also. Plus if the coat or jacket has a shoulder pad (like in a winter coat) then the front shoulder/chest keeps its shape and won't get any hollow where the shoulder pad ends.
i think the pattern companies are lazy nowadays – I never see a marked roll line on lapels or collars, only on patterns that are considered “couture” or designer labels. which is unfortunate, as by following some of these simple steps sewers could get better results. what do you think?
LikeLike
Your tips are so great Sherry, thank yo so much for this!
And thank you for your vote of confidence about my fabric…
LikeLike
Hooray! I started a week late, and I've just caught up! Everything cut out and properly fused – I hope 🙂 Thank you Sherry, I'm so enjoying the sew-along 🙂
LikeLike
Almost caught up, hooray! I am LOVING this, learning so much! And even though I admit, I moaned a little about having to make all these extra pattern pieces for the lining, with all those detailed mm-measurement adjustments, I know it will make the sewing so much better and accurate. I have been known to “wing” a lot of things, and your tutorial tells me how not to. I should have time to move on to step 8 today and finally be on track again. One silly question: On the collar, will we actually then have a double layer of fusing on the stand? Because we block-fused the collar, didn't we?
LikeLike
Hello! I'm all fused and ready to sew all day tomorrow. question: my fabric seems fray-prone, and I'm worried about the sleeve-cap curve. But because I'll be easing it, I shouldn't fusetape, right? I've left my SAs large around the armscye out of ravel-fear, but I know in my heart that a smaller SA will make for easier easing!
thanks so much! I'm loving all of this!
LikeLike
I'm at the lining stage, but I will be a “catching up” demon this weekend. The most important thing I've learned so far is walking the seams. I'm all a flutter when my seams match.
It's the little things. 😉
LikeLike