This is my method for inserting invisible zips – it’s a bit different to the way dressmaking patterns describe, and I’ve included a few little tips and tricks that (hopefully) make things easier!
Make life easy on yourself and insert your zip as early as possible in your garment assembly. It really is much easier to sew a CB zip into the two back panels only, than to try and sew it into a nearly completed skirt!
Here is my skirt ready for zip insertion – as you can see I have already sewn and overlocked the seam beneath the zip. (I haven’t overlocked the yoke/waistband part as that will be concealed.)
If your fabric is delicate, the stitching at the base of the zip (around the backtack) should be
fusetaped for reinforcement. For this particular fabric (a viscose georgette) I have fusetaped the full length of the zip:
Open your zip and place it on your zip seam so right sides are together – ie, your fabric is face up and your zip is face down. I always use 1cm seam allowances, and as the zip tape is the same width as my seam allowance I just need to line up the edges. The pinked edge of the top of the zip should align with the top cut edge.
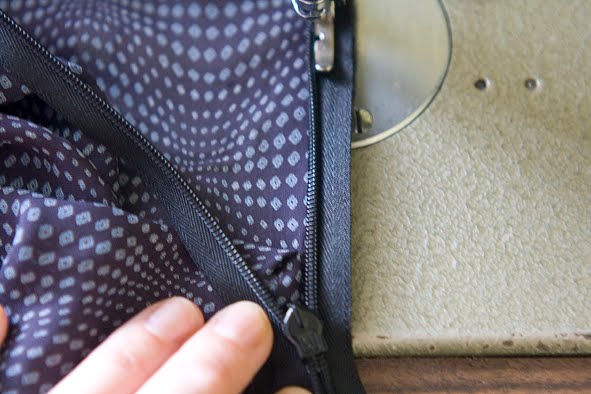
Notice how I use an ordinary zip foot? I filed my invisible zip foot in the rubbish bin years ago, as I get much better results with an ordinary one. I can stitch closer to the zip coil – by folding back the coil and stitching in the groove – so you never see the zip from the outside. This way I can also stitch closer to the end of the zip – no more gaps!
When you near the bottom lay your seam allowances open and flat, and fold back the other side so you can clearly locate the exact position of your backtack. Butt the zip coil adjacent to the backtack and stitch right down to this level.
Now you’re halfway there!
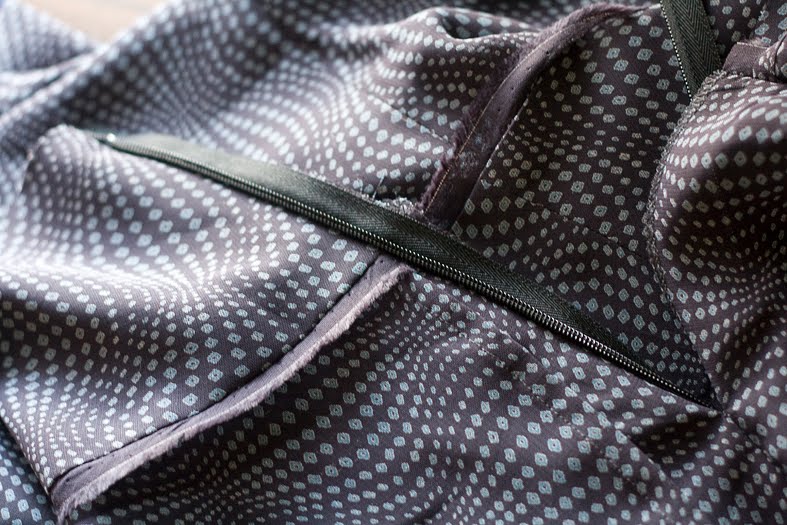
Now see how my skirt has a trim along the yoke seam? When the zip is closed, I want the trim on each side to line up. To ensure this, I marked the zip tape level with this seam with a small clip, or you could use a pin:
Then with the zip closed, clip the other side exactly opposite the first clip.
Now when you sew the other side of your zip, ensure that you position your yoke seam at this clip, and voila – they will line up!
Open the zip up again to sew the other side. With the seam allowance open and zip coils butted together, stitch from the bottom up, making sure the nick aligns with the yoke seam, and the upper zip aligns with the upper edge, by the same amount on both sides.
Now slip the zip puller through the little gap at the base of your zip – you can just see it peeking through in the above photo – and zip it up! Check everything aligns – top edge, yoke seam, no bubbles at base of zip – and you’re done!
Now who said invisible zips were tricky?!
Look out for the next step soon – all about finishing the top edge and facing your invisible zip, neatly and all by machine!


Thank you, Thank you Thank you. Thank you umpteen times. This tutorial saved me. I have been pondering over lot of tutorials for invisible zipper and i don't have access to invisible zipper foot and this was just perfect and just completed my first ever perfect invisible zipper (i had sewn around 10-15 such trial imperfect ones almost one each for every tutorial i saw…!!!)
Thanks again…. I have a section in my blog for Discovering a blog where i share with my viewers the blog of the week, I hope it is ok if i post the blog of yours in that…
LikeLike
This was really good, the clip part of the tutorial is going to save my hours of time. I could not get a zipper lined up to save my life. Thank you so much for making this tutorial!
LikeLike
Thank you so much for this tutorial. Although I *thought* I had the invisible zippers down, I was always leaving a few inches of the seam open between the bottom of the zipper attachment seam and the top of the seam below it to close after the zipper was inserted. Why? I don't know, maybe to live dangerously and have a chance of having that bubble of fabric under the zipper? Your awesome pictures and instructions have opened my eyes to the fact that there is no reason to do that. Can't wait for my next chance to insert an invisible zipper! Thanks again!
LikeLike
Thank you for this tutorial and the scallop hems too! I just found your blog today and really love your finished projects. I will be following you.
LikeLike
After 3 failures using another method I just can't wait testing yours it looks awesome. I am sure clippings and using a regular foot makes all the difference.
LikeLike
Are you sewing in this zip without basting or pinning? Or are my eyes deceiving me?
LikeLike
No your eyes aren't deceiving you! I don't generally pin or baste anything, but manipulate the fabric as I sew instead.
Pinning a zip prevents the area laying flat so I don't recommend that, but baste away if it improves your result!
LikeLike
Thanks so much for this tutorial, my first attempt at an invisible zip went so much smoother than I could have hoped for. I've just linked back to this post on my blog 🙂
http://the-urban-cottage.blogspot.co.uk/2013/06/a-line-skirt.html
LikeLike
Merci beaucoup. I'm a beginner and was doing my second skirt but this time with a zip. The first one was with an elastic because I had no idea how to do a facing, zip etc. . Now because of you this fear has gone and I am much more enthusiastic continuing sewing garments. I can't take you enough for this. I i have you as one of my top favorites lol and will continue to look at your beautiful sewing . take care and again ty
LikeLike
Thank you so much for letting us ask questions. I want to insert an invisible zipper into a shift dress that I have lined. The facing is already sewn on the top but I left an inch open on each side to attach it to the zipper. I don’t want to use a hook and eye so: Where do I place the teeth at the top? Do I place the top coil at the very top and ignore the pinked edge? Also, is there a way to attach the lining to the zipper without any hand sewing? It looks like RTW does that but I’m at a loss. I know this is a long question but any help you can give would be so appreciated. I found a vintage pattern from 1964. I almost have it completed except for the zipper. After all of this work, I want to get the zipper right! THANK YOU!
LikeLike