While remaking the Turquoise Tartan skirt, I found the stitching on the back inverted pleat had started coming undone slightly:

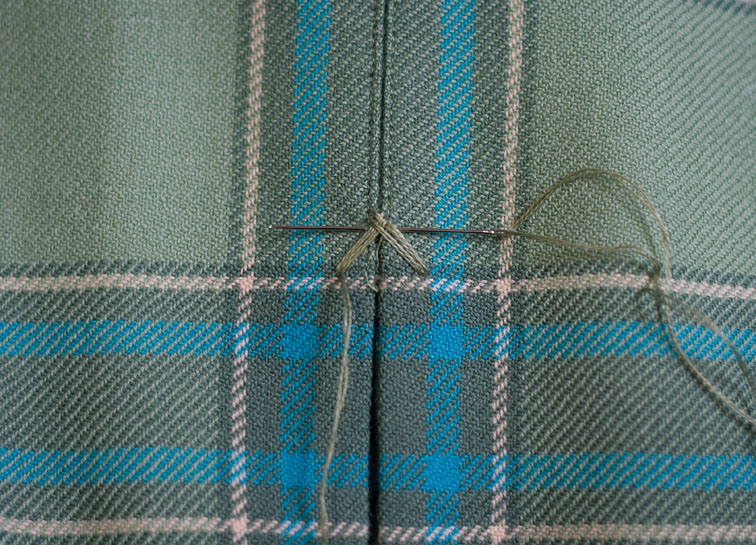
I thought I’d give one of those arrowhead tacks a go. I have to admit I haven’t done these very often and had to refer to my old Vogue Sewing book, and dig out the embroidery cottons:

You bring the thread out from underneath at the lower left point, then take a short stitch across the apex:

And take a long stitch across the bottom:

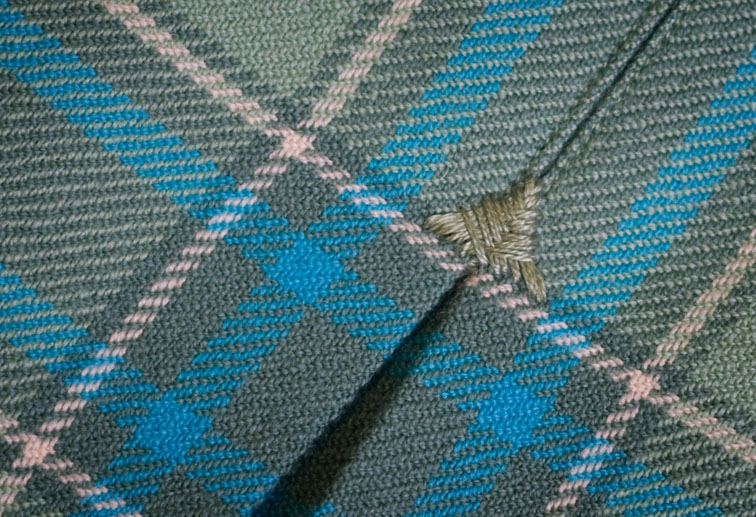
I changed to a double strand of embroidery cotton here, as it gave a more satiny effect. You keep taking stitches across the apex, and this stitch gets slightly wider as you move down from the point:
Pull the thread through, so it lies flat and the tension is even:

Then stitch across the base – this stitch gets narrower with each round:

And pull the thread through evenly…ok, it’s a bit tight here:
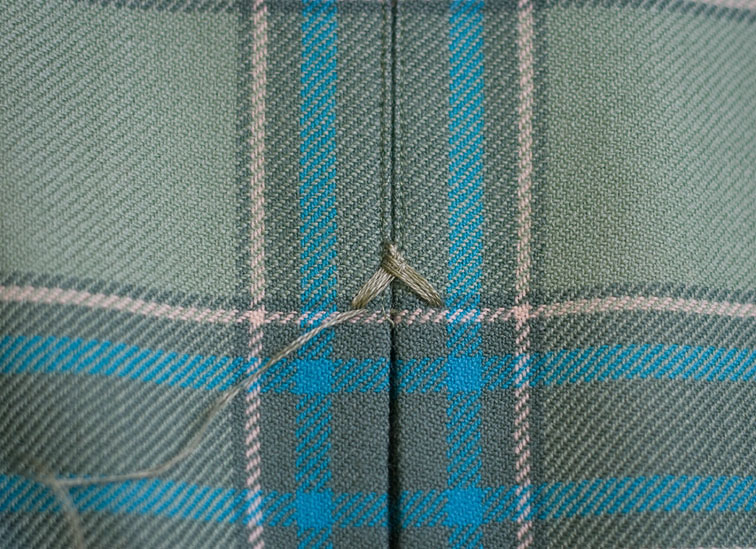
Next time I’d probably sew some guidelines for the triangle so it ends up a perfect shape – my triangle is kinda more Eiffel-tower-y!
Have you done any arrowhead tacks before – where exactly do you place them? And do you have any sewing tips for neat and tidy arrowheads?

oh how cool! I've never seen this before, but I can see how it would be so helpful! And I like your eiffel tower-y triangle 🙂 tres chic!
LikeLike
It's a lovely little detail that makes the whole skirt seem more special. Your triangle looks very good to me!
LikeLike
Now it's truly a vintage skirt.
I used to to that in the fifties and sixties. Nowadays you never see it anymore.Your example gives me the idea of doing it again ,and you really need not wait till the material has been torn
LikeLike
i use the machine and sew guide lines around the triangle, then hand stitch as you have done….i have done that in fear of my hand sewing not being strong enough…you dont see the machine stitches when it is finished…
LikeLike
Cool! I had never seen this. Thanks for sharing!
LikeLike
So interesting! Thank you.
LikeLike
I've never done this before, but I've seen my mother in law embroider some handkerchiefs with satin stitch and she did something very important at the end of the job: she burnish the job with her needle passing the needle horizontally over the whole surface a few times. In doing this she was able to “join”the fibers together and obtained a more satiny effect. She also made more stitches per millimeter. I hope this helps.
LikeLike
Last time I tried arrowheads was on a Western-style shirt for my husband. Never again! Lol, I have other talents than embroidery, so will choose to bolster my strengths and cover up my weaknesses. I use a figure-8 tack instead at stress points.
LikeLike
I love your little Eifel Tower-y arrowhead! I've read about these and I love the look, but I haven't tried actually doing one. I kinda blow at embroidery, I guess I'm a little chicken.
LikeLike
This is great…I just noticed a similar stress point on a skirt I was mending and now have a way to fix it! Thanks!
LikeLike
Terrific handwork!
LikeLike
Very cool! I love how you always have little extra stitch or technique that makes a garment really special and perfect.
LikeLike
I'll try that. I'm wearing a skirt with a front side split now that I think could do with a decent arrowhead. Cheers
LikeLike
I told you already that I used to make arrowheads in the fifties and sixties. The Dutch word for it is vlieg,( Translated fly)We used to make them with the type of material that you use for handmade buttonholes.I think, it should be strong yarn.I preschetched it with chalk. To avoid tearing of a pleat I stitch a rounded row of stitches from the side of the pleat to the middle. I hope you understand my English. If not I'll make a picture.
Marieke
LikeLike
What a great little detail.
LikeLike
And what is wrong with Eiffel-towery!? It looks great. What a pretty detail.
LikeLike
Marieke, I'd love to see a photo of what you are writing about, please! Sounds great…
LikeLike
This is a great idea. In fact, in my case, it would be just the thing to elegantly cover some machine reinforcing of the area. That baby would never come out. 🙂
LikeLike
Looks good, but can you explain why you would do an arrow head? Is it just a finish or does it serve a purpose? Thanks.
LikeLike
That's a nice couture finish. Another place they would be lovely is at the top corners of patch pockets.
LikeLike
I've a photostrip available.
I did mail the url to Sherry
Marieke
LikeLike
Excellent! Thanks!
C
LikeLike
That is so right on that skirt . I think its beautiful!!
LikeLike
Hi there, thanks for fabulous posts and info, I have often referred people here. Do you know about Versatile Blogger Award? I was passed on the award and I have nominated your fabulous blog for the award. If you are interested in, please visit my blog to see the rules to follow.
LikeLike
What a darling little fixture! Imagine making one with variegated thread! Going to save this tutorial for a future date. Thank you for making it look so easy!
LikeLike
Just a quick note to let you know that I am enjoying reading your blog so much I have nominated you for a Kreativ Blogger award.
If you would like to participate, you can read more about it on my blog here
http://thesewingspace.com/2012/03/17/award-nomination/#more-3014
Thank you!
Regards,
Lena Merrin
http://www.thesewingspace.com
LikeLike
I've just made a skirt with some inverted pleats for Julia Bobbins Mad Men Challenge, think I might add these on for decoration! Thanks! – Also a quick note to let you know that I've nominated you for a blog award! No need to participate but you can check out my blog if you're interested! 🙂
LikeLike
How neat! My Vogue sewing book has this, too. I'll have to give it a try. Thanks for the tutorial though, these are usually much easier to follow than a simple picture diagram.
LikeLike
You are my hero in sewing. I looove your blog and your sewing tips (is it the right word in english). I will try it very soon on an old skirt I don't dare to wear anymore.
LikeLike
Both! It does reinforce the area, and looks pretty too!
LikeLike
Thank you belle!
LikeLike
Thanks Lena too!
LikeLike
Thanks Vicki also!
LikeLike
Thank you for this. Exactly what I need for my new skirt
LikeLike
My mother always used to call these turkey heads and I was trying to explain them to a friend over the phone, so thank you for the tutorial, which I have now been able to send to her.
LikeLiked by 1 person