Sleeve gussets are often seen in garments and sewing patterns from the 50’s era, where kimono sleeves gave the then-desired sloping shoulder line. A problem with kimono sleeves – where the sleeve is cut in one with the bodice – is that as the fit becomes closer, the range of movement of the arm becomes more limited. This is where a gusset comes in handy. After all, these ladies still needed to brush their hair!

A gusset is usually a diamond shaped inset at the underarm, and effectively lengthens the underarm seam – ie the distance between elbow and waist. It allows a closer fitting bodice and sleeve, while still providing room for extension of the arm. Variations exist – the diamond may be comprised of two triangles, it may be shaped with a contour dart, or it may be cut in one with another garment panel. The dress I am sewing at the moment has a short kimono sleeve with a combined undersleeve and gusset:

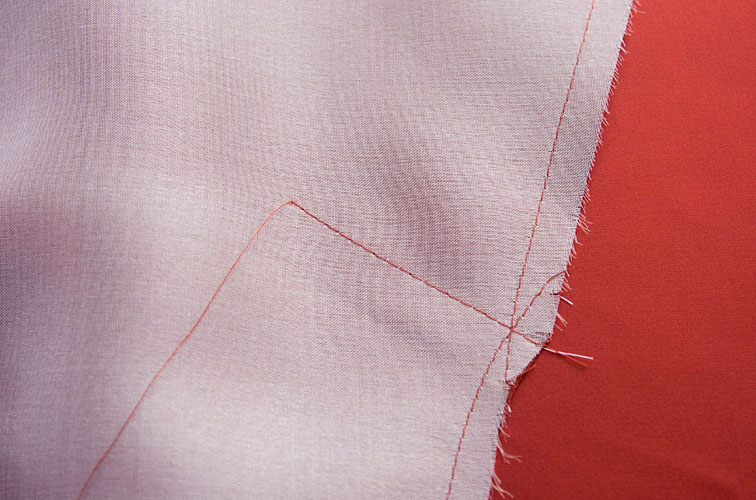
The corners of the gusset are set into reinforced slashes in the bodice panels (those markings that look a bit like darts on the pattern), and are also set into the points where the side seams join.
It is not generally necessary to underline the sleeve gusset, but the gusset I am sewing is cut in one with the undersleeve, and as the rest of my bodice is underlined I’ve chosen to underline for consistency.
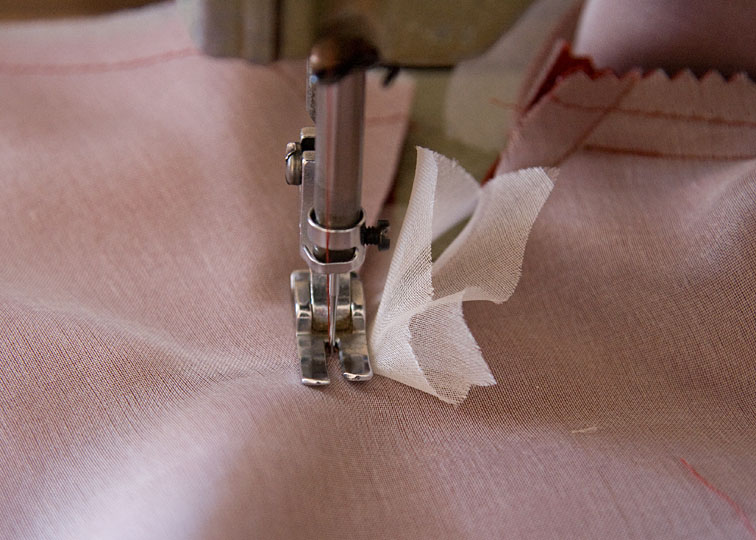
When I underlined I machine basted the slash line to the pivot point, to hold the layers together and mark the exact point. You can also see the notches in the seam allowance about 1cm above and below this line which mark the stitching line:
Before you cut the slash into the bodice, it needs to be reinforced. This also gives you a seam allowance to work with at the slash point. I cut some 5cm squares of silk organza on the bias, then sewed them to the right side of the bodice panel centering them over the point. Using a short stitch length, sew along the stitching lines taking a short stitch across the point:
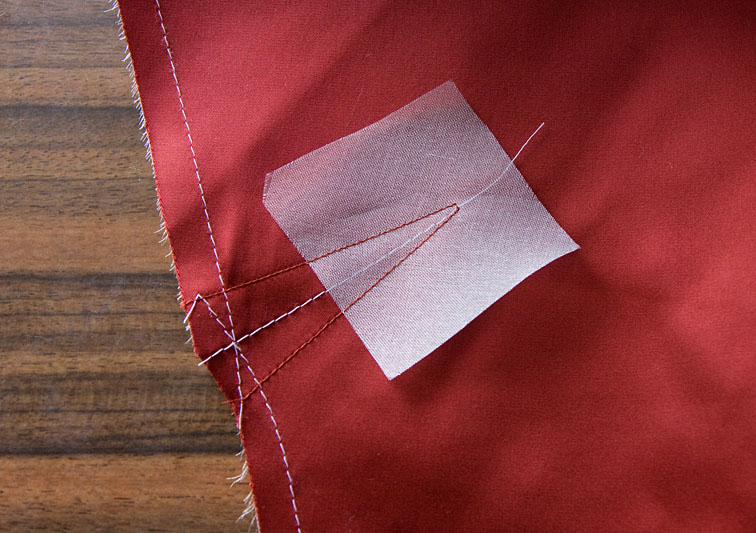
You can use any lightweight closely woven fabric, it will not be visible in the finished garment. If you think your main fabric is likely to fray, also fuse a small piece of lightweight knit interfacing to the wrong side around the point.
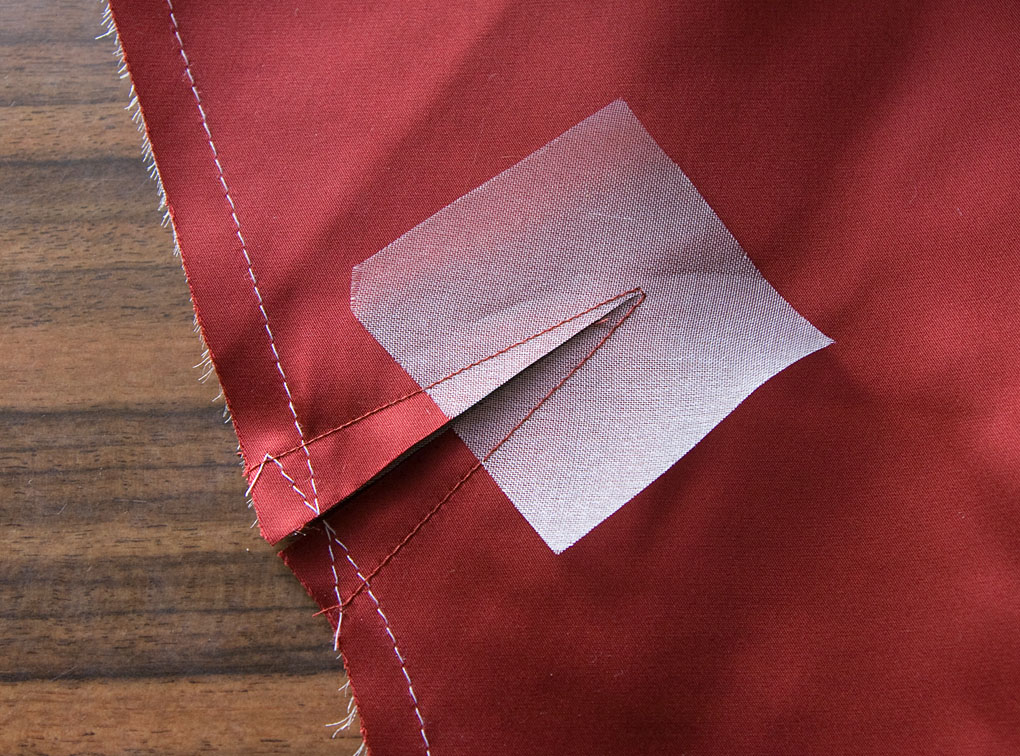
Slash to the point, turn organza square to the wrong side and press:


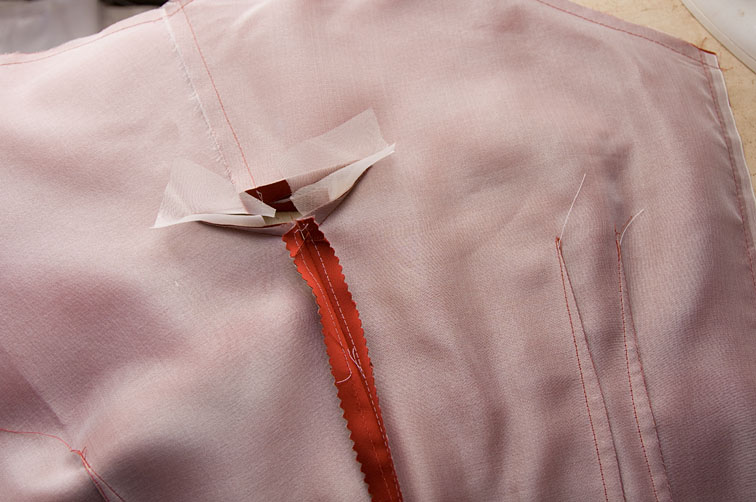
Next I sewed the side seams of the bodice from the bottom up, stopping exactly at the crease formed by pressing in the last step:
If your gusset is a diamond shaped one, you will also sew the underarm seam of the sleeve at this stage.
The gusset has seam allowances of equal width all around it, but the seam allowances on the bodice panel vary and converge to zero at the slash point. Therefore when sewing, it is the stitching lines that must match rather than the cut edges. For this Burda pattern, each corner of the gusset is numbered – make sure you match these to the correct numbers on the bodice! Start with right sides together and the gusset lying underneath:

Beginning at the sleeve hem sew towards the first point, remembering to align the stitching lines and not the cut edges. Stitch directly alongside your previous stitching, in the crease formed by pressing:

Notice how the organza square is giving us a seam allowance towards the points, where there would otherwise be just a few threads! Stitch as close as you can to the point (within 1mm), and stop with the needle down:
Raise your presser foot and pivot the gusset so the next stitching line faces towards you, I’ve rolled back the bodice so you can see what I mean:

Now pivot the bodice panel to the left so that your new stitching lines become aligned:
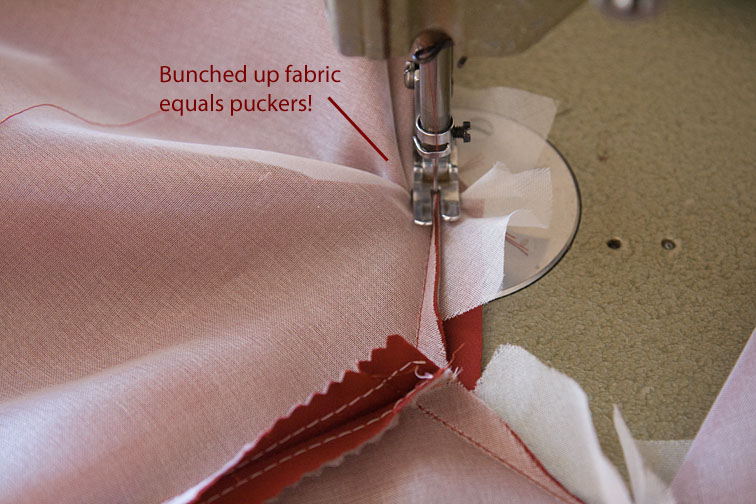
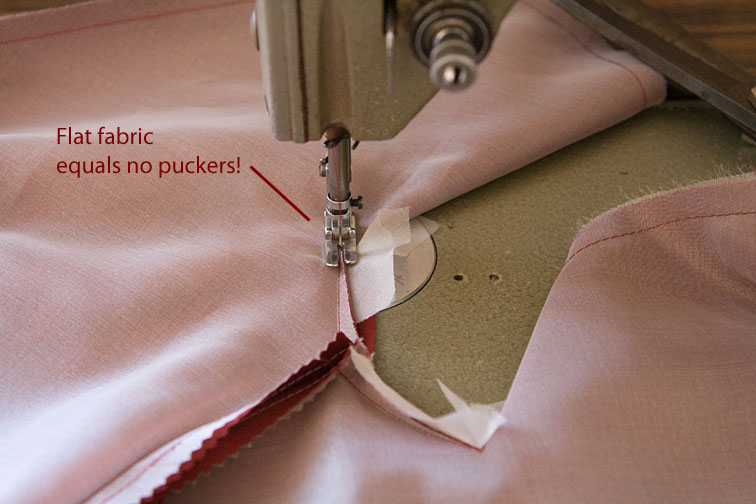
See all that fabric behind the needle? It needs to be laid flat so you will not have corner puckers. With the presser foot up and the needle down, slip your left hand between the two layers and smooth it out – so the top and bottom layers are flat right up to the back of the needle:
Now we are ready to sew the next pass, towards the underarm point. At each turn, make sure you start and finish at the correct point on the gusset itself – ie where the stitching lines intersect. As you approach the underarm point, fold the seam allowances out of the way and stitch right up to the point, finishing with a backtack:

Halfway there! Now restart at the same point on the other side of the underarm seam – I place the needle down at the start point, rearrange the fabric to lay flat, then the third pass can be made towards the second slash point:


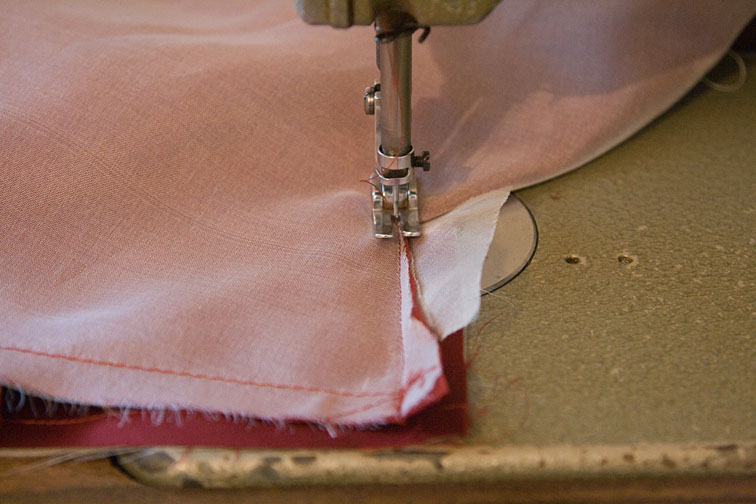
Again – stop with the needle down, swivel your fabric into position, flattening it to avoid puckers, and sew to the sleeve hem:
You can see I have a bit of a mismatch – I tried to get away with it, but had to unpick and fix instead as it affected the way the sleeve hem rolled – it just shows how important it is to get everything to match correctly. Some people never learn…
Check that the stitching lines on your gusset are even:

And that there are no puckers at the gusset corners:

And you’re done! You can trim away the excess organza and then press the seam allowances towards the bodice. If your garment is more casual you can edgestitch the seam allowances, which provides stronger reinforcement. I don’t want to edgestitch on this dress, but I am going to catch-stitch the seam allowances to the organza to help it lay flat.
Burda have some rather confusing instructions for the next step – so I’ll give you my interpretation next up, along with finishing the remainder of the bodice.
Happy sewing!

Wow that looks very neatly done! Thank you for another very informative and beautifully photographed tutorial.
LikeLike
I will be coming back to this one, I like to raise my arms ahead my head. Thank you for sharing this. Can't wait to see the whole dress!
LikeLike
That's some fancy sewing! The fabric just looks so…lush!
LikeLike
You are really talented, I am excited to see this dress.
LikeLike
Things like that, where there is no room for even a millimetre of error, scare me!
LikeLike
I love that trick with the organza! I've done gussets before, but, unsurprisingly, your method is much more tidy and refined. Yay! 🙂
LikeLike
Again, a fantastic tutorial. I've never seen this type of sleeve before (still learning) so thanks for sharing with us all. Can't wait to see the dress finished – and I love the colour.
LikeLike
I love your tutorials. And I love Kimono sleeves so may use your advise to create my own pattern. Thanks
LikeLike
This is going to be a fabulous dress Sherry! I loved the tutorial – the fabric colour is gorgeous.
LikeLike
Thankyou so much that was beautifully illustrated. Now Sherrie what happened with your trench coat and Chanel jacket? Dont answer if you dont want to , I will understand!
LikeLike
Ha mem – thanks for reminding me! The trenchcoat is hanging up waiting for a buckle and buttons, and the Chanel jacket is a bit of a bore to make to be honest, but I'll plod on with it. I kinda put both on hold over summer as there would be no hope of wearing either for a while!
LikeLike
I love your wonderful tutorials. Although I am not planning to sew a gusset in the immediate future I shall remember this when I do, your explanation and pictures are very clear.
LikeLike
hi, i love all your tutorials. The one on swayback was fabulous! It covered all the important bits and was so fun to read too. I would be so grateful if you can kindly do a tutorial on how to attach the lining part to a dress (intended to be a fully lined one) with a simple “V” split opening at the back of the dress for ease of movement, esp for a rather fitted shift dress. Thanks so much!
LikeLike
Ooo, I made that dress in December last year, wish I´d had your tutorial then, because my sleeve gussets probably would have been looking much more neat&tidy than they do;-). Thanks for this!
LikeLike
I am absolutely stunned. With your dress, with you, with that fabric and with the fact that I can actually point out an improvement to your method 😉 How did that happen? Well any ways … you mentioned that you'd have to keep the stitch lines aligned and that aligning your seam allowance wouldn't help. In my opinion that's quite hard to do and also more time consuming. Instead I use the same method, but I cut the silk organza so that it has as much seam allowance as the gusset. Does that make sense? I hope it does because it makes everything so much simpler.
LikeLike
Thank you sooooooooo much for this perfect tutorial!
Before I found your blog I thought I would never understand the instructions from burda.
Greetings from Vienna (Austria)
Petra
LikeLike
thank you sooooooo much for this detailed tutorial.
I thought i would never understand the instructions of burdastyle.
greetings from vienna (austria)
petra
LikeLike