Today I cut my fusing and applied it, so here is a rundown of what I did. Before cutting your fusing, make sure it does not transform you fabric into something else – it should add body and stability while the fabric remains supple. As some parts of your jacket will be fused and others not, you do not want any obvious differences between the two. Test your fusing first on a generous piece of fabric, drape it over your front, and ask yourself if you would like to wear it. If the answer is yes, read on!
Laying up:
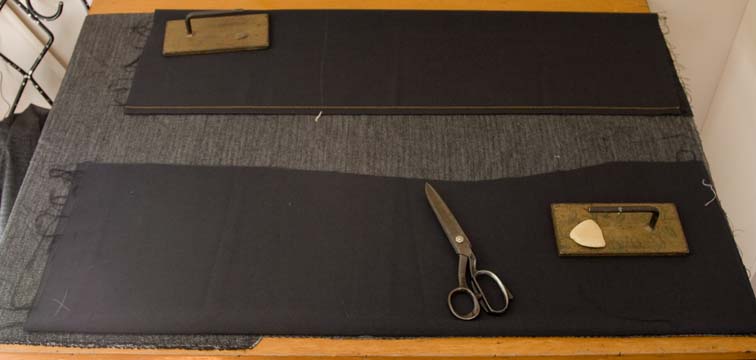
Fold fusing sticky sides together, so selvedges meet and ends are square. Take your largest block of fabric that you have cut, still paired right sides together, and lay it carefully on the fusing:
For large or long blocks it can be easier to fold it up first, and unfold it gradually onto the fusing, so the fusing doesn’t wrinkle underneath.
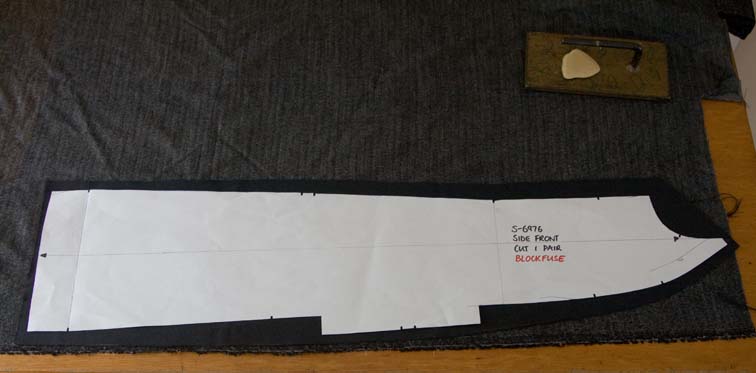
Lay all the blocks onto your fusing in an economical arrangement. The block still needs to be on grain, so lay the pattern on top and check those grainlines:
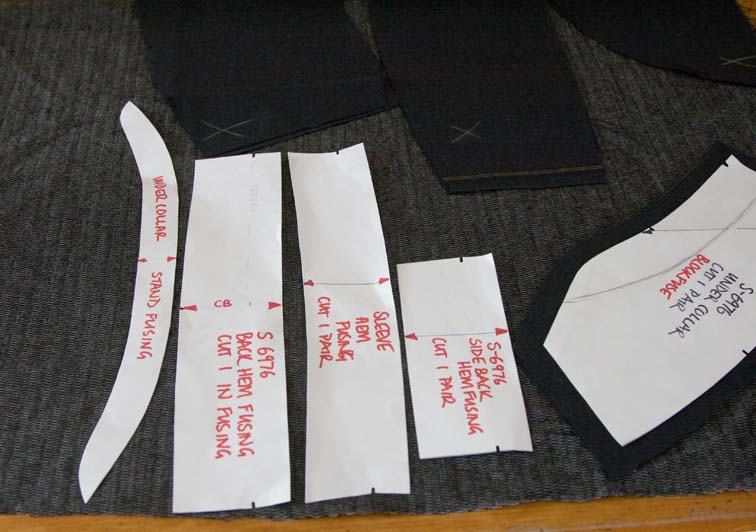
Normally I would have most of these small pieces in one block, but I cut this coat out of remnants! Cutting in one block means less handling, less cutting, and it is easier to keep the grainline consistent, so do it if you can:

Lay up the fusing pattern pieces that you made too, and chalk around these directly:

Cutting:
Cut out the fusing around the blocks. I cut the fusing about 5mm smaller than the block on all edges, but you needn’t get too fussy about this right now, you can do it at a later stage.
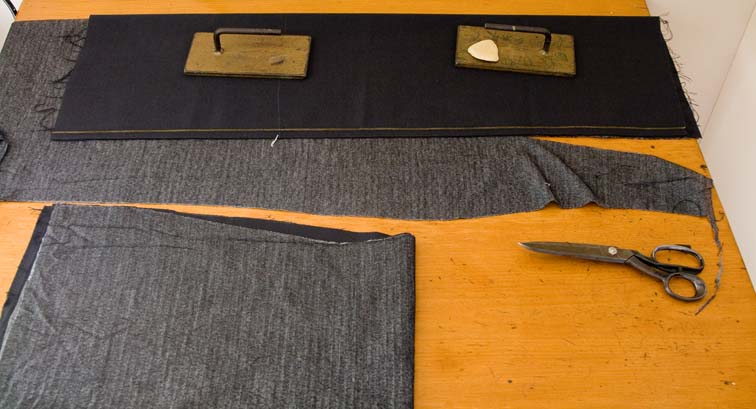
As you cut each block, fold it in half so the pieces don’t get mixed up, and place it in a pile. Cutting the blocks doesn’t take that long, because you don’t have to be really neat at this stage. But you do have to be neat when cutting the individual pieces!
Fusing:
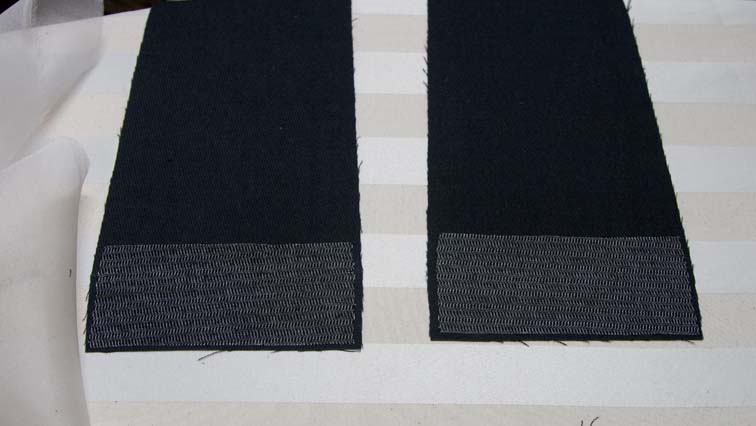
I like to get those small pieces stuck down before they get lost! Place the collar stand fusing aside for now, as it will be fused at a later stage. Locate the main fabric pieces that require the hem fusing – in my case the Back, Side Back and Sleeve. Fuse each piece to the hem area, laying the edges 5mm inside the cut edge:
Follow the fusing recommendations for your product, and check the bond is sufficient – you shouldn’t be able to peel it off:
 |
| Forever stuck! |
I use a scrap of organza to protect the iron soleplate:

Turn on the television now – this is where it gets really boring! We are going to fuse those larger panels…

It’s very tempting, but make sure you don’t take any shortcuts – it is really important to get a good bond between fusing and fabric – you want your jacket to last a few years, not a few wears!

Trim any overlapping bits of fusing off so you don’t fuse them to your ironing board, take a deep breath and think patience…

patience…

patience… and eventually you will be rewarded:

As you fuse each piece, lay it flat in a pile, paired with it’s opposite side, all ready for cutting, which is tomorrow- get your lining out too!

Hi Sherry, I was hoping for a bit of advice. I am adding storm flaps to make my pattern look more like a trench coat. From your experience, should they be interfaced? Thanks in advanced for any advice you can give.
LikeLike
I made a RTW jacket in an evening sewing class at FIT. The teacher told us to go to a place in the Garment District that does bulk fusing (Quick Fuse and Cut on 36th Street; ask for Igor). We were told to have weft fusible applied to our yardage. We then laid out our pattern pieces and cut them. One student did the fusing on his own, but he had considerable professional sewing experience.
If a similar service is available, it might be worth exploring.
LikeLike
Anon, New York is a much different place to the rest of the world… It would be fantastic to have a service like that.
!!! I can't see when I will catch up with this, I suppose I just take a deep breath and get a little done every day.
LikeLike
I was taught not to add the seam allowances to the interfacing (less bulk)
LikeLike
Oh good, I've caught up on the reading. Now time to figure out how I will apply this knowledge to my pattern and fabric. Thanks for your excellent instruction so far.
LikeLike
~Amy – I would tend to fuse the free edge of the storm flaps including the buttonhole area, as you do for a hem – but without seeing your fabric and fusing I can't be totally sure.
~Anonymous – Thanks for sharing your contact – that will be great for New Yorkers! A professional fusing service is the way to go if you have access to it!
~Steph – You'll probably be finished before me!
~Niki – You can do that but you won't be able to blockfuse, which has many advantages over a slight amount of bulk in the seam allowances. With suitable fusing there is little discernable bulk anyway!
LikeLike