Silk chiffon, so lightweight and ethereal, there is no denying the beauty of this fabric. Nor the fact it can be difficult to sew. Many sewists avoid the challenge, but I firmly believe silk chiffon is too beautiful to put in the too-hard pile. With extra care and a few special techniques it can be successfully managed. Below I’ve put together my top 15 tips for sewing silk chiffon to hopefully help you conquer any fears you might have.

But first, a short story. I remember clearly the day I first seriously tackled this stuff. I’d just started a new patternmaking job and finished my very first All-By-Myself pattern for that company. I remember the pattern well – a triple layered chiffon skirt with a tiered hem, carefully designed to be opaque in the upper half and increasingly sheer towards the hem. There were several random splits thrown in for extra sassiness – it was extremely cute! Extremely cute until I found out that I was sewing it…eek!

I spent hours hemming that skirt. Double folding the narrow 6mm hem, unpicking and resewing the three (3) (yes – three!) layers of skirt, including the mitering of the corners around all those splits. No joins in stitching were allowed, so you can imagine every time I would mess up by a mere millimetre, the complete hem circumference would have to be unpicked, including all those splits and all those mitred corners. I almost cried at the machine that day. But hey – eventually I won!
And I guess that is a good lead into my first tip:
1.Practice, practice, practice:
I know this isn’t what anyone wants to hear, but it’s 100% true. We were taught in industrial sewing to sew something ten times in a row, then you’d never forget how. Well I sewed about ten thousand chiffon hems that day, and my tutor’s theory is correct!
Through repetition, not only do you entrench sewing methods, but you develop a technique for handling the fabric. Developing the light hand feel for managing a diaphanous fabric like chiffon takes some perseverance, but it is similar to learning to ride a bike – once it clicks it stays with you for life!
I recommend using fabric off-cuts to experiment with before sewing your actual garment. Build up gradually to the really fine fabrics. Cut out some details like the collar, the hem curve, any part you’d like to practice – and do just that. Ten times to become a pro!
2. Choose your chiffon carefully:
Polyester chiffon looks like it would be easier to sew because it isn’t as flimsy, but in my opinion it is the most difficult. It is less pliable and sewing inaccuracies (we all have them!) are near impossible to remove with pressing – it just bounces back into the position it wants to live in forever! On the other hand fibres like silk, viscose/rayon and cupro are more malleable, press beautifully, and sewing discrepancies are better disguised.

Another factor to consider is whether the fabric is woven from crepe (crinkly) yarns or not. The crepe factor can be more forgiving than a flat weave when it comes to sewing and pressing.
3. Take care with fabric lay up:
Accurate lay up, with the lengthwise and crosswise grains perfectly perpendicular, is crucial. To do this, level the ends of your fabric length by tearing (test first!) or cutting along the crosswise grain, and use the table edge or grid on your cutting mat to align the fabric.
An even better technique is to cut in blocks, dividing the fabric into shorter lengths as required. For instance, one block might be for the front and back, another for the sleeves, and another for the fused pieces. This way you can ensure the crosswise grain is correct at the top and bottom of each block, minimising any distortion of grain throughout each pattern piece.

To cut in blocks you might need to change the cutting layout, and I recommend allowing an extra 5cm/2″ per block – so make sure you have enough fabric to do this.
4. Use a rotary cutter:
This tool is brilliant for cutting chiffon, it totally eliminates the need for pins and scissors which mess with the fabric layers.
Lay up your fabric, place the pattern on top with weights, then run around the edge with a rotary cutter. Use a ruler as an additional weight for straight edges. This allows you to cut fast and accurately with minimal shifting of the fabric layers.
Another thing – is your rotary blade sharp? Recently mine wasn’t, and let me tell you how frustrating it is to lift a cut out piece away, and find it is still attached by a single uncut thread that messes up the rest of your perfectly laid out fabric!
5. Throw away the tissue:
My thoughts on laying up your fabric with tissue are – don’t. How can you see the grain of your fabric if it is lying between layers of tissue? And how does this prevent the fabric from slipping around? I have read about this idea and tested it out. It was a hindrance far more than a help.
Ditto on sewing with layers of tissue. I tried that once too – and once only! The fabric did not feed properly in the machine, tearing away the tissue took forever and disrupted the stitching, disturbed the fabric weave, and I generally made a big mess.
My honest opinion is to learn to handle the fabric by itself (see #1 above), instead of attempting to handle the opposing forces of fabric and tissue together.
6. Select the right interfacing:
For interfacing chiffon you will need a specially designed fusible that is lightweight and has fine glue dots that do not strike through to the right side of the fabric. I use and recommend this fusible from Hawes and Freer. When working with sheer fabrics the colour of the fusing becomes a factor, and this product is available in five colours. I used black on my DP Studio Shirt Le 604.

Just as important as the type of interfacing, is the method used to apply it. Blockfusing is the method of choice for flimsy fabrics, and will make your sewing life easier from the moment you decide to do it.
7. Needles and thread:
Fine fabrics require a fine needle – so change the needle on your machine to a size 70/10 or 60/8. Check the needle is sharp by running your finger down the shaft towards the point. This way you will detect any burrs that will easily snag fine fabric – something you definitely don’t want!
Fine thread is required to ensure that it passes through the smaller needle smoothly and without damage. Nr 150/Tex 18 thread is designed for a 60/8 needle, but this can be harder to find and usually has a reduced colour range. Unless the fabric is very lightweight, I regularly use Nr 120 weight (Tex 24) thread with a 70/10 needle for sewing silk chiffon.
8. Stitch length and tension
Smaller needles and smaller thread equals guess what: smaller stitch length. I use a stitch length of about 2mm/12 stitches per inch. Sew a trial seam and inspect its appearance from the outer side – too long a stitch leaves unsightly gaps, too short a stitch is too hard to unpick (let’s be practical here!) – so find your happy medium.


While you are checking out the stitch length, perfect the stitch tension too. You are aiming for stitches that appear the same on the top and bottom sides of your stitching.
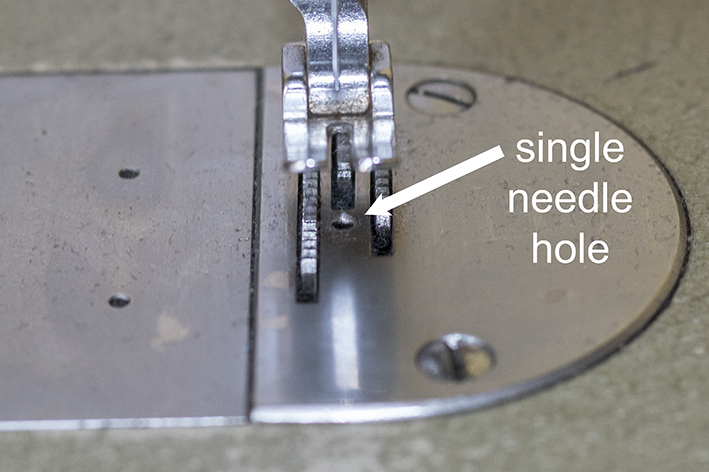
9. Change the base plate:
If you have the option of changing base plates to a single needle hole, then do so. A smaller hole in the base plate helps prevent fabric descending through the hole as the needle goes down, and potentially jamming.
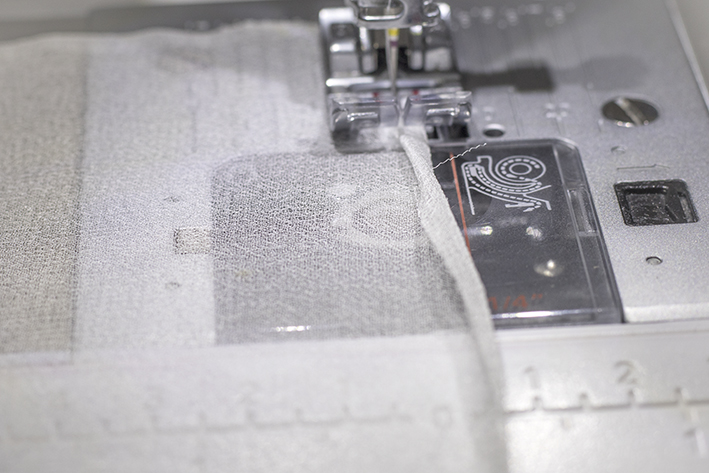
10. Starting to stitch:
Starting to stitch at the fabric edge is another point where thread jams can happen, so a few precautions taken here can help prevent it. Draw out the needle and bobbin threads so you have two thread tails to hold taut as you start stitching. This will help prevent excess thread and fabric slipping down the needle hole. Backtack only where necessary. When you do, start inside the edge of the fabric.
11. Listen to the fabric:
I know this sounds a bit nuts, but this is the best way to describe what I mean! The fabric will tell you if it doesn’t want to do something. Pay attention to the grain as you sew. Forcing the fabric to lay where it doesn’t want to could be apparent in the end garment as puckers, drag lines and unevenness.
12. Use French seams:
Overlocking or serging will be visible through sheer fabric, so avoid that unsightly appearance and use French seams instead. Another favourite technique of mine for sheer fabrics is to French seam the darts to make them less obvious.

13. Think about edge finishes:
Fine fabric looks best with fine edge finishes. Hems should be a narrow 6mm or even a baby 3mm. Neck and armhole edges should be a similar width.
If your pattern has traditional facings replace them with narrow edge finishes such as binding, inside binding (aka clean finish) or try my favourite invisible binding technique.
14. Be careful:
Take extra care when unpicking that you are actually pulling the right thread. Obvious, but it is very easy to do (just warning you so you don’t ruin all your hard work in a split second!)

If you are making buttonholes, trim all the lengthwise threads inside the buttonhole. This prevents a button pulling a thread as you unbutton your shirt – another way of ruining your garment.
15. Take your time and enjoy:
Last but not least, is something that always seems to make my sewing process go more smoothly – take your time. Immerse yourself in the process of working with this beautiful fabric, and stop to admire your work when pressing (I’m not the only one who does that, right?!) Chiffon is for slow sewing – so make the most of it!

What are your experiences of sewing with chiffon? Have you ever figured out the tissue method? Do you have any additional tips to share?
Cheers, Sheryll:)

Very useful post. I made a pretty, loose blouse in chiffon a couple of years ago and had to lie down in a dark room for a few days afterwards. I do take the ‘practice, practice, practice’ point, so it’s worth having another go.
LikeLiked by 1 person
Thanks for the useful tips! Your link to the fusable you use isn’t viable, so am wondering if you could write the name of it?
LikeLiked by 1 person
All fixed they must have rearranged their website! Thanks so much for letting me know 🙂
LikeLike
I thought it was just me wrt the paper! I have gotten starch to work for me but I lay the fabric out (to ensure it’s on grain) and spray it and let it dry. Hoping I can keep a cat away from it. That gives it just enough body to make it less of a pain.
I’d sworn off chiffon (and other lightweight, excessively drapey fabrics) until I bought silk chiffon. Much, much different.
My machine doesn’t have the option of a straight stitch plate but that is a definite must have in my next one!
LikeLiked by 1 person
And I thought it was me, because I read about it so often! I haven’t tried starch though – does it make it more like organza?
LikeLike
I’ve noticed that my featherweight sews chiffon exceedingly well, and it has the single round-holed plate.
LikeLiked by 1 person
Perfect timing for this post. I just received a piece of ombre chiffon in the mail and want to use it over a georgette shell on a top. Your tips and tricks will (hopefully) make the sewing process easier. It’s a deep breath to jump in on this one.
LikeLiked by 1 person
I hope they help! Your top sounds like its going to be gorgeous!
LikeLike
Thank you! I am inspired to make something in chiffon now.
About sewing over tissue–I haven’t tried this for chiffon (yet), but with knits and slippery fabrics only.
Sewing over tissue works well when the grain of the tissue paper is parallel to the seam (with the tissue between the fabric and the feed dogs). When the paper grain is perpendicular to the seam, you often end up having to pick out a bit of paper from every single stitch. You can find the grain of the tissue by figuring out which way tears most easily. Also, different brands of tissue are different. Some work better than others. Usually cheaper tissue is thinner and crisper, which works better for sewing.
LikeLiked by 1 person
I’m glad you managed to make the tissue thing work Jen! That’s a good point about the grain.
LikeLike
Great informative post , Sheryll! Thank you! I use block fusing too and I think that is a game changer in these light fabrics, also the straight stitch plate is something I use when I sew with light wovens, very useful. Your DP shirt is gorgeous!!
LikeLiked by 1 person
This is really helpful. My first attempt was a total fail, but since then I’ve done the gelatine thing – you mix up gelatine and water, dunk your chiffon in it then hang over the shower rail or somewhere to dry – that I read about on the internet and it really helped give it more body to sew with. (It did wash out!). I need to practice my baby hem on chiffon. Thanks for the interfacing tip. I’ve only used organza to interface so far. I never backtack on fine fabrics. It hadn’t even occurred to me to use a finer thread – what a revelation!
Silk and viscose chiffon are lovely to wear so I should arm myself with your tips and go boldly forward!
LikeLiked by 1 person
I haven’t tried the gelatine thing. Usually I am hesitant to alter the fabric with other products, so it’s good to hear that it washes out well. Whatever works, and good to hear you are having success!
LikeLike
Very helpful. Thank you
LikeLiked by 1 person
Great tips! I’m looking to finish the sleeve seam on chiffon fabric. I’m not sure how you finished yours and how it is done. Any help would be much appreciated!
LikeLike
Hello Sheryll, I have a piece of silk with which I would like to make a dress. As it is very sheer, I was going to line the fabric. Would I sew the lining & silk together in the one seam, or would it be better to sew the silk with french seams and make a separate slip to wear under the silk. With many thanks for the previous tips. Barbara.
LikeLike
Hello,
I was wondering if you use a cutting mat with your rotary cutter? Or can you do it just on a table with rotary cutter?
Thank you!
LikeLike
I am making a long sleeve blouse with some beautiful Italian silk crinkle chiffon in a black and multi floral print. I had struggled with it during the initial slippery cutting out and sewing the darts, French seams, etc. I thought I was doing OK until I realized I made 2 sleeves for the same arm (because of the transparency it was so hard to tell which was the right side). It is too difficult to take apart so I just ordered another yard to cut the sleeves out again! (Fortunately, they still had some in stock) It was an expensive mistake. I wish I had seen your tips and suggestions before I started. Would you use the same fabric for the sleeve continuous lap openings, or maybe a simple black fabric that will cooperate better for this tiny area? For the buttonholes, do you think the machine will destroy the fabric with so many tiny holes close together? Also, on the hem, what do you suggest? The fabric presses well, but when it comes to folding over a tiny edge, it is very difficult!
LikeLike
I am sewing probably my second chiffon blouse, the first time I quit, but now I went for it, this is the best tips for sewing chiffon that I have found..!! Thanks for sharing.
LikeLike
Thank you for all the amazing tips. I am planning on making a silk chiffon wrap dress with a charmeuse lining for a summer wedding and your tips will be incredibly helpful. I have some Tex 24 thread in the right colour but I’m going to look for something a better quality.
LikeLike
Kia ora Sheryll, I found your points incredibly helpful. I had some silk chiffon in my stash which had lines of beading along the selvedge length, and had been labelled “sari silk”. I had avoided doing anything with it for years. But thanks to your advice, I have made a dress, and am over the moon with it. I took it really slowly, which helped. The dress (the “Amena dress” from Simply Sewing) had a two tier skirt which was perfect for having the beading along the hem, and instead of cutting out multiple pieces for them as the pattern had instructed, I tore the fabric along the lengthwise grain to the appropriate length (with trepidation!), thereby ensuring straight grain and minimal seams, which I wouldn’t have thought of until your blog. It tears beautifully, if done with care. I learned to do a good rolled hem, thanks to practice practice practice (excellent advice) which I then used on all the raw edges I could, along with French seams, which I also used on the sleeves – first time I have tried to inset sleeves with French seams, but it has worked well. . I actually think silk chiffon is not that hard to sew, I agree that it behaves well, except for cutting out. Also thanks to your advice, I avoided the tissue idea that others had recommended, and also noted that my spray starch said on the can not to use it on silk, so I didn’t. But cutting out was the hardest part. I cut the back and front bodice pieces twice, to use self lining instead of the facings, and let’s say they did not end up exactly the same. However, I think your blog enabled me to not panic, and just work with where the lines appeared to go best. It is quite a forgiving pattern. I used silk thread, which I know is not as strong as cotton or polyester, but so far so good. The pattern had no zip, buttons or buttonholes, so it turned out to be a good one for the fabric. I feel quite a sense of achievement. Thank you for your sage advice.
LikeLiked by 1 person
Has anyone used a special glue with silk chiffon to keep the 2 edges of a seam together while sewing the seam?
LikeLike
Sheryll provided extremely helpful guidance for working with silk chiffon through these 15 tips. Her focus on techniques like French seams, binding and needlework demonstrates how to handle this delicate fabric successfully. Beginners and experienced sewers alike will benefit from her expert advice learned through practice.
LikeLike