
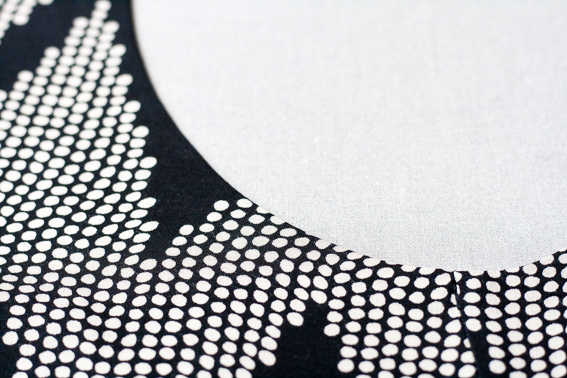
Today I’m going to share with you my method for binding necklines or armholes invisibly. Haha you say – how can binding on a garment possibly be invisible? Well it can! Using this sewing technique the finished garment will have no visible stitching on the outside, and a bound appearance on the inside. Just like this:
This sewing technique is designed for lightweight fabrics where a facing would be too heavy, or show through the fabric. It is my preferred method to finish the necklines or armholes of bias cut silk or viscose chiffon. This technique is a high-end finish and does require an experienced hand.
It is important to note that this finish is only suitable for use on fabrics that hold a press well. Viscose, silk and linen are all suitable fibres for this technique. It won’t work well in fibres like polyester or nylon.

In this demonstration I will invisibly bind the armhole of this sleeveless top. This garment is a little different to normal, as the shoulder seam is sewn after binding the armhole, but this technique is just as easily sewn on a closed armhole by joining the ends of the binding first.
To make the binding pattern, measure the length of the armhole/neckline along the stitching line. Mark the location of any notches, and intersecting seams, and add a seam allowance to the ends where the binding is to be joined. I recommend cutting the width of the binding 4cm wide for your first attempt – this results in a 1cm finished binding. For sheer fabrics I prefer a daintier finish and cut a narrower binding resulting in a 6mm finish – but see how you go with a wider binding first!
Another important note – the binding needs to be cut on the true bias.
Start sewing with the right side of the binding to the wrong side of the body, using a 6mm seam allowance:

(I know the right and wrong sides look very similar in this printed fabric. To help you recognise which is which, the black appears less dense on the wrong side).
When drafting the binding pattern you should have included alignment notches, so make sure these match when you sew – you can see mine marked in blue chalk:

Sew around the complete armhole – here is my example, now turned to show the right side of the body and wrong side of the binding:
Around all curves, clip the seam allowance until it can lay flat against the body:

Now press the seam allowance towards the binding. The next step is to press a 1cm fold along the long edge of the binding. Make sure the raw edge does not extend past halfway, so it won’t interfere with the next fold:

Now it is time to stitch the binding closed. This is what it looks like so far – from the right side of the body:

Fold the binding so that the folded edge meets the stitching line. Arrange it so the pressed fold overlaps the stitching line by 1mm, then stitch the binding down at 1mm:

This will result in both stitching lines being on top of each other. As you edgestitch around the binding, ensure the notches meet so there is no twisting:

Here’s the complete armhole binding edgestitched down, from the right side:

Lets zoom in:

But we are not finished yet, there is one more important step to go to make our binding invisible. With the wrong side facing up, fold the complete bound edge to the wrong side and press:

This is where the clipping you did previously does its work, and the bias binding moulds to the armhole shape.
The binding needs to be tacked in place at any seams. My top only has one seam at the underarm, but you can tack at all seams on your garment. I stitched in the ditch by machine, but you could tack by hand if you prefer.

Wrong side view of tacking:

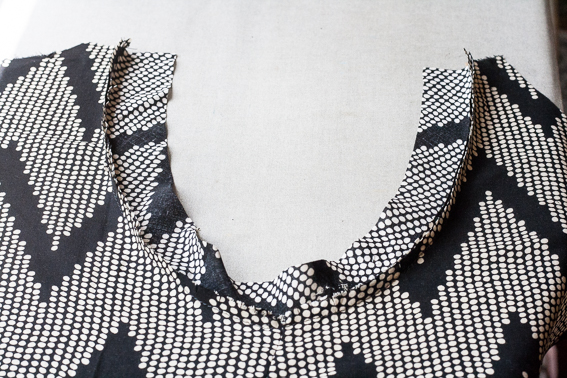
The finished binding on the inside is almost as pretty as the outside. Because the fabric is viscose, silk or linen, it stays in position when pressed, the binding ‘floats’ in place – just like magic!
So there you have it – a beautiful bound finish on the inside, with zero stitching visible from the outside. I hope you’ll find this a useful technique to use in your sewing one day!

This is fantastic, Sheryll! Thanks for sharing.
LikeLike
Perfect timing for me as I eye up the Liberty silk I found yesterday. Last time I sewed silk I swore ‘never again’ – but I’m ready for another round!
LikeLike
Thank you, perfect timing. Even though it’s freezing cold outside, and snowing, I’m sewing a sleevless rayon dress and my armholes will now have a perfect finish!
LikeLike
Thank you , Sheryll! Allways handy to have another method .
LikeLike
You certainly got my attention with your title. What a wonderful finish for edges. Just when I think I know everything (ha!) … Come to think of it, I do believe I have seen this finish before. I’ll certainly try this on the first possible candidate in the sewing queue. Thank-you for the instructions!
LikeLike
Very clever
LikeLike
This is really interesting! I can’t wait to try it out on my next silk/linen/viscose garment candidate. Thank you!
LikeLike
Magic! Thanks so much for this – I’m going to have a go asap.
LikeLike
Brilliant Sheryll! Thnk you. Will bookmark for reference
LikeLike
Nice, thank you for sharing this technique
LikeLike
What a beautiful slick technique! Filing this one in the memory banks!!!
LikeLike
Thanks for sharing this. I hate using facings but sometimes you don’t want a stitching line either so I really appreciate it and can’t wait to give it a go!
LikeLike
Hi Sheryl, am so excited to try this method. Have got a few silk tops to make, so this will be a great finish.
Thank you so much for sharing your expertise with us all – very appreciative!!! Will be sharing this method with my sewing pals. Great post!!!
LikeLike
Thank you so much for sharing it is very much appreciated.
LikeLike
Oooh, I have just the pattern to try this on! Thanks!
LikeLike
Oh nice! Just think I have a nice bundle linen I ordered. I’ll try this out in the Spring. My sewing is in it’s own building, but in the New Hampshire winters, I can’t get though the snow to get to it.
LikeLike
What a cool technique! Thank you for sharing!
Rose in SV
LikeLike
Thank-you so much Sheryll for yet again sharing your knowledge. I will definitely be giving this method a go.
LikeLike
Very tidy – thank you. I have not seen this technique before and will definitely try it. .
LikeLike
So cool! I wouldn’t have thought to try this on my own because it seems like it shouldn’t work. Now I will.
LikeLike
Excellent -shall use this very soon. Thanks so much!
LikeLike
THANK YOU!! I can’t begin to tell you how helpful this was. I was at my wits end on how to finish the armscye of my sleepless silk blouse. This worked perfectly. Thanks for taking the time to make this post.
Brenda
LikeLiked by 1 person
*sleeveless!
LikeLike
Thank you Brenda, so glad it worked well for you!
LikeLike
Thank you so, so much for that detailed and easy to follow tutorial! I made a viscose blouse today and now the armholes of it are looking very professional – super chuffed about the result.
LikeLike