

To mitre a corner, fold the hem allowances in like I have done on this sleeve pattern:

The correct position of the mitre is now evident, running from outer corner to inner corner of the hem allowance. All you need to do is add a seam allowance to this seam and you are good to go!

Here I am pressing open the shoulder seam of my coat halfway through the Ready To Wear Tailoring Sewalong:
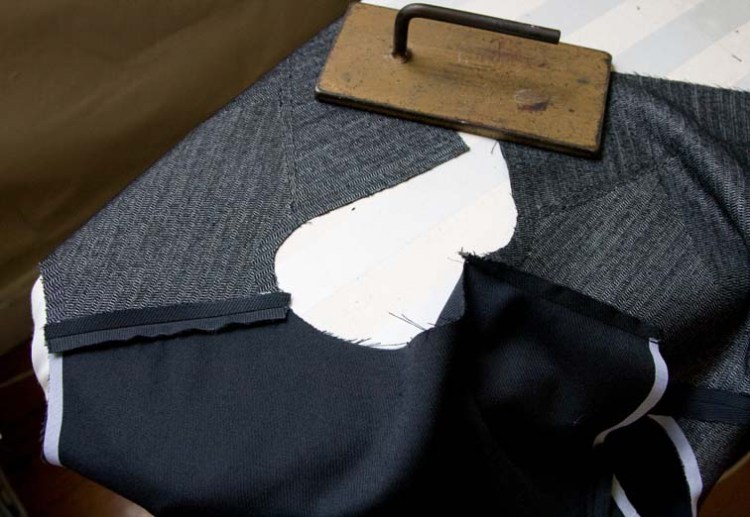
Use the corner of the ironing board to your advantage, and to prevent the bulk of the jacket slipping off and stretching important parts like the neckline, plonk a weight on it – no more wishing you had an extra hand – or three!

Another tailoring tip, this time for that junction between the collar and lapel.

Leave a gap! Yes, don’t sew right to the junction, stop sewing about 1-2mm before it. This gap will be a blessing in disguise when you come to press, and will help prevent any nasty puckers at the collar/lapel junction.

Your finger makes a great seam guide, plus – it’s always at hand! (sorry, couldn’t resist!)
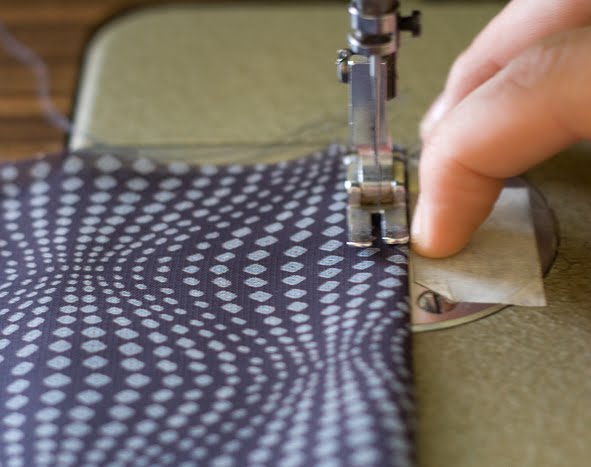
With your fingernail up against the edge of the foot, fabric is fed into the needle at a consistent width (and I can sew faster!) I use this trick a lot when topstitching at foot width, or sewing french seams on those slippery, shifty, jiggly, naughtily behaved fabrics.

This month I’ve given my tutorial ‘Inside the Sleeve Head’ from the Ready-To-Wear Tailoring Sewalong a pretty image update:

How you set in shoulder pads and/or sleeve head wadding can make or break the appearance of your tailored jacket or coat. In this tutorial there are a lot of tips to make sure you are doing it the right way.
That’s my 5 Sewing Tips for this month – hopefully you found something new-to-you. Now it’s your turn – in the comments share your sewing tip of the month!

Great tips! I love the one especially about positioning your nail up against the side of the foot to feed those bad boy fabrics through nice and straight. One sewing teacher once said, “It’s all in your hands! Learn to use your hands – that sense of feel is so important for discovering bumps where there shouldn’t be any etc.” My sewing tip would be to always use good silk thread for your button holes with a piece of solvy (solvy can be easily ripped away after the button hole is finished and water will dissolve any little bits left after tearing it away) between the fabric and feed dogs so your button holes glide nicely over the feed dogs. I’ve found following these steps produces the BEST button holes for me 🙂
LikeLike
Ooh I agree with your comment about learning to use your hands! Sounds so basic, but once you develop an instinctive feel for fabric manipulation it all becomes automatic.
I haven’t heard of solvy – what exactly is it?
LikeLike
Thank you! I think that the sleeve head/shoulder pads tutorial will be very helpful.
LikeLike
Thanks Jen! There are a lot of useful tips there – hopefully something for everyone!
LikeLike
Great tips, thankyou! I really like number 4 and want to try it out straight away. The others are excellent too. Thank you,
LikeLike
Thanks Lyndle – I reckon that tip doubled my topstitching speed!
LikeLike
Very helpful tips, especially the sleeve head tutorial, which has arrived at an opportune time for my sewing endeavours. Thanks so much!
LikeLike
Glad that it’s great timing for your project – how did you get on?
LikeLike
Your monthly tips are very helpful and useful to get nicer finished garments. Thanks for sharing!
LikeLiked by 1 person
Great tips! I’m trying to think of a good enough tip to share…. I hate hand sewing but I always always hand baste my zips in and often baste down facings before top stitching to stop things shifting and wriggling around….
LikeLiked by 1 person