The other day I was asked how I did the side split hem on my black stretch capris, and as quite a few of you liked this design feature I’ve done a quick tutorial. This is for you Liza Jane! It is a handy trick to know, because you can also use it on the hems of sleeves and tops too.
The first step is to establish the following:
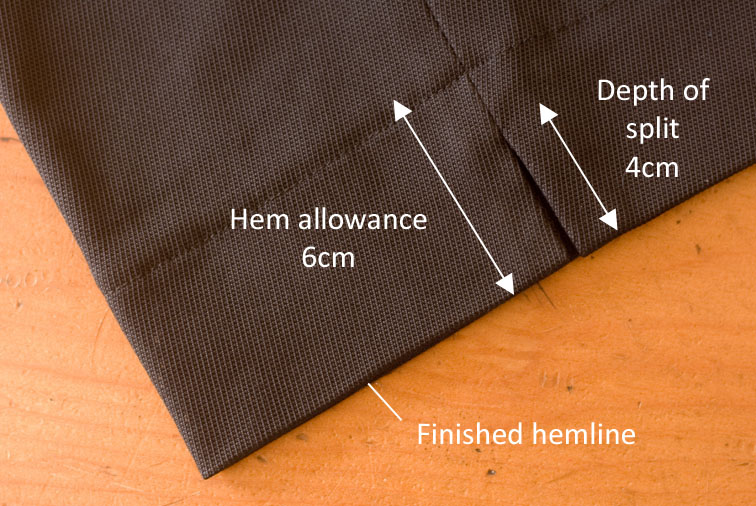
- your finished length, or hemline
- depth of the split (mine was 4cm)
- hem allowance (this needs to be 1-2cm greater than the depth of the split, mine was about 6cm)
To the side seam of your pattern, add three notches:
- one on the hem fold
- one above the hem fold and one below the hem fold, to mark the depth of the split, ie 4cm


Sew the side seam, but leave it open between the upper and lower notches, backtacking at the ends of your stitching:

Press the seam allowances open either side of the notches…

…then fold the hem up along the hemline (don’t press the hem until you’ve finished)

Now reach into the hem and pinch together the seam allowances inside…

…and pull them out ready to sew them together in that position:

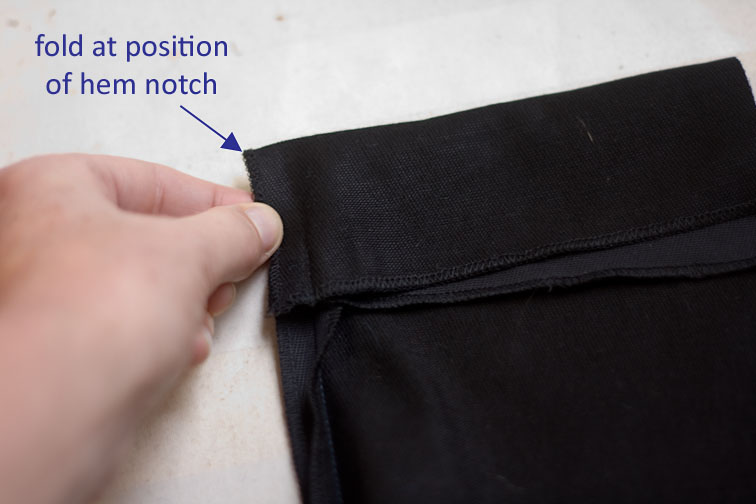
You should have one seam allowance folded at the hem notch with right sides together.
Ensure the hem notch is on the foldline, and that the two split notches match:
Sew the seam allowances together on this side of the split, between the notches:

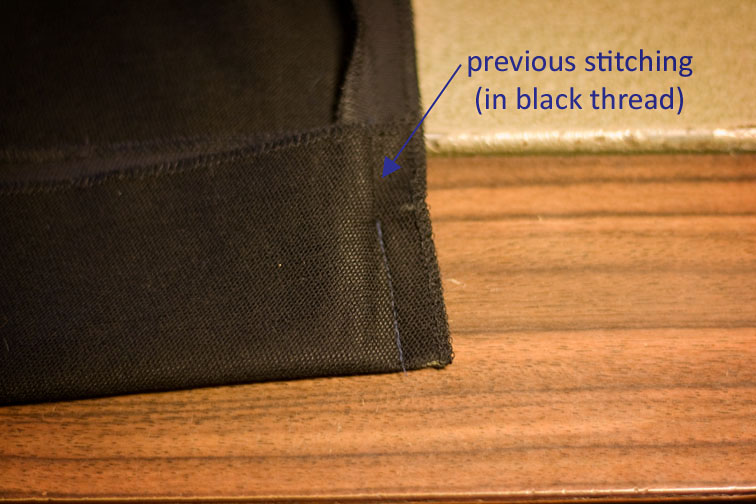
You have now enclosed the part of the seam you left open earlier:
Turn through to the right side, and repeat for the other side of the split:

Pinch the seam allowances together, pull through, and sew:


If you’ve done everything accurately, both sides of the split should be the same length (mine is about 1mm out!)
This is the inside:

And this is the outside:

Now you sew the hem as per normal – I machined the hem on my trousers, but you can do it by hand for a more tailored look.

Happy sewing, and don’t forget to pin for later!
Sherry


Thank-you for such a clear and detailed tutorial on adding side splits (and thanks to Liza Jane for putting in the request)…
✿ Judy
made by J
LikeLike
Great tutorial Sherry, than you so much for sharing 🙂 ! I've Pinned it for future ref here: Sewing – Tutorials and How To's
LikeLike
Thank you for this – it's very helpful!!
LikeLike
Wonderful post..thank you!
LikeLike
Oh, wow- you have made that fabulous detail so easy to understand! Thank you so much for this!
LikeLike
Yes!!! Thank you! I am gearing up to make some trousers here again, and they will have side seam splits! And I also like the idea of adding splits to a shirt sleeves. Awesome tutorial! You always give the best instructions.
LikeLike
Ooh, will have to try this. I recognize this a bit from how you tacked the hem in the rtw tailoring sew-along. I've used that idea a couple times now! Thank you for sharing.
LikeLike
Another super tip! Thank you…again!
LikeLike
Thank you for this tutorial. I always wanted to try this and now I can.
LikeLike
I've pinned this also. Really clear photos and instructions. Thanks so much.
Ruth B.
LikeLike
This is about a billion times easier than I thought it would be. Love it, and will definitely be trying this out, hopefully sooner rather than later!
LikeLike
Great tutorial! Thanks for taking time to post this.
LikeLike
Thanks once more for such a useful tute. I appreciate your time and sharing of technique.
Anne K.
LikeLike
Outstanding tutorial! Now I know how to give myself that little bit of extra room I need at the bottom of my shirts. I think this might also help with some shorts that I don't like because they pull when I sit down.
LikeLike
Thanks so much Sherry, great for summer clothing – you make it look so easy
LikeLike
Thank you for this. Capris are on my radar for spring so this will come in handy. Very simple when you know how!
LikeLike
Just to let you know I mentioned you in a post over on my blog if you want to have a look! Thanks for taking the time to post such wonderful tutorials!
Kay from LittleRubyRobin
LikeLike
Super cute. I love the tutorial. Thanks!
LikeLike
Hey Sherry! I just did this on a pair of shorts. I love it! Although my split ended up being more of a v. I think it probably had to do with the thickness of my fabric (it was a home decor weight). I wasn't sure if I was supposed to trim the seam allowances after I stitched them, so I didn't. That may have helped. Next time!
LikeLike
Thanks you for this.Great tutorial. I like it too much.
LikeLike
Thank you so much for this tutorial! I finally “get it” and can complete my Willow Style Arc pants!
Lynda in LV
LikeLike
Lovely detailed explanation. Thank you!
LikeLike
Thanks for sharing, I will bookmark and be back again……….Septorinoplasti
LikeLike
thanks for sharing this posting.
Estetik
LikeLike
thanks for this posting.
Estetik
LikeLike
Great photo tutorial! Very clear instructions for a tricky move. 🙂
LikeLike
Your tutorials a great! Thanks so much!
LikeLike
thankyou for this. I have been googling for ages to find out how. Lovely clear instructions
LikeLike
aaaaaaaah! did mine the other way around (not knowing how to do them at all), sewing the bagged out vent first and the shorter stitch line near the hem last! 😛
LikeLike
Awesome. I was trying to hem someones pants that had a finished split like that, but it didn't occur to me how it had been accomplished. After looking at this, it seems so easy! Now I can do it this way from now on.
LikeLike
Just love it love it love it !!!
LikeLiked by 1 person