Let’s start sewing the bias skirt pieces together! I’ll show you how I do this – along with a few tips and some troubleshooting.
Assembling the Bias Skirt
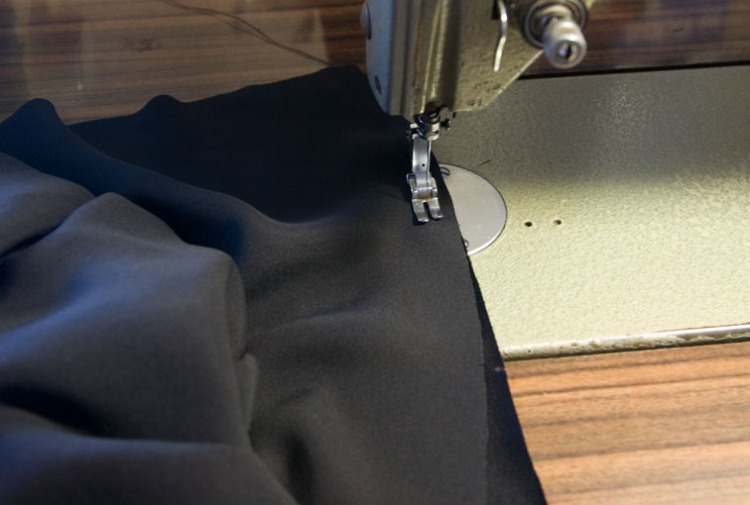
- With right sides facing, sew the skirt side seams from the hem up, matching all notches:
I recommend using the flatbed of your machine to do this as it prevents the fabric slipping all over the place.
Stretch the fabric slightly in front of the needle as you sew, so that the finished stitching is not tight. Tight stitching will prevent the side seam dropping, and cause the seams to hang shorter than the CF/CB at the hem.
I like to press the seam allowance so any ripples are flattened, but I don’t press the seam open at this stage:
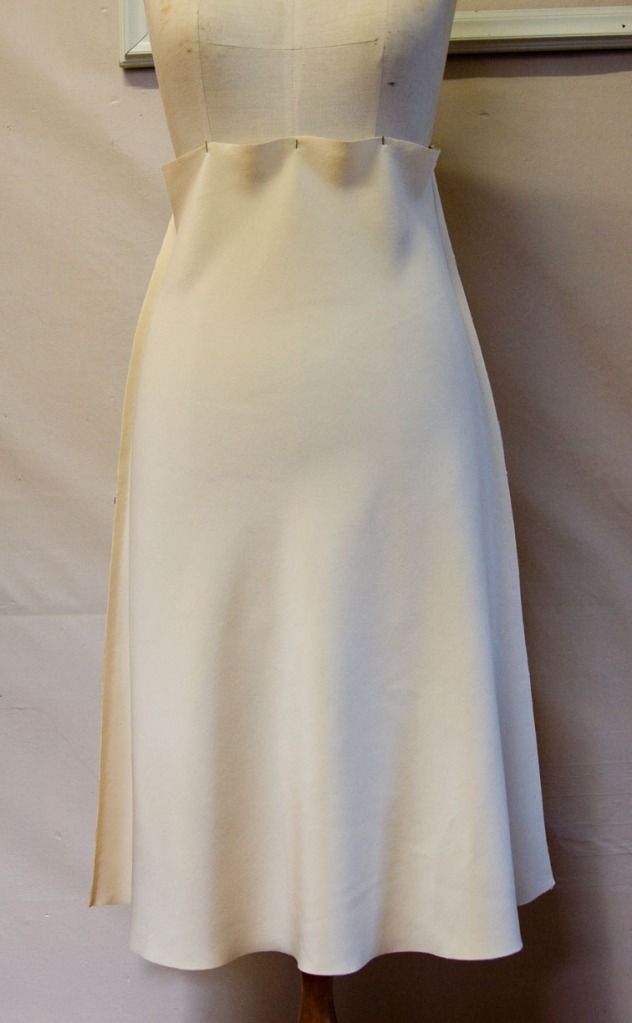
- Check the hang of the skirt on the stand.
If you don’t have a dress stand or a helpful friend, you will need to leave this step until the bodice and straps are attached, or you could try pinning it to a slip you are already wearing.
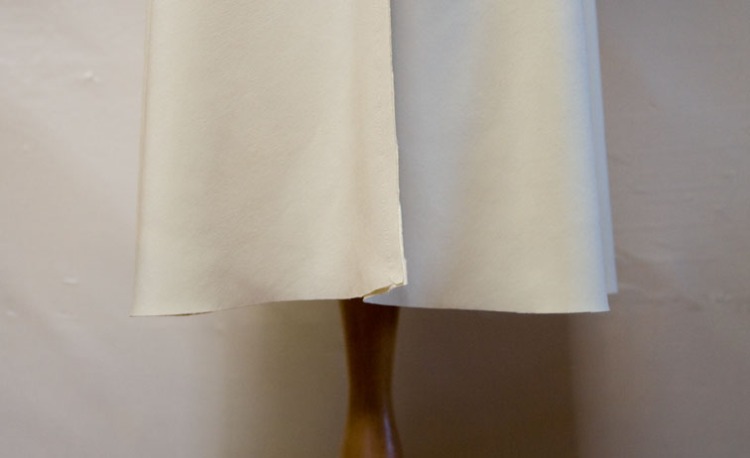
Pin the skirt evenly around the top and examine how the fabric falls naturally. You can already see how the R side wants to curl to the front, and the L side to the back. This is minor though, and within my acceptable limits.
My hem looks fairly level all around – hey, this fabric is behaving! My black version – in the same fabric quality – wasn’t nearly as obedient. With most bias skirts I aim to get the hem level to within 1cm – trying to get it 100% level will drive you crazy!
I leave the skirt hanging for 2-3 days like this to let gravity do its thing, before levelling the hem. Usually the CF and CB drop slightly, but any skewed seams will become more obvious too – which is why it it best to sort them out first (see below), so the dropping happens evenly.
- Finish the seam allowances
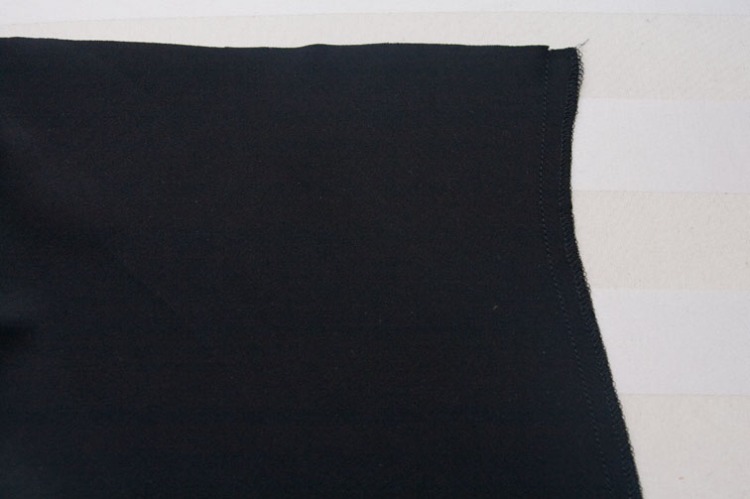
I usually overlock them together and press them towards the back. Take care when overlocking that you don’t stretch the edges and cause excessive waviness – I usually get some minor ripples like this:
…and they should be pressed flat, following the shape of the pattern:
- Now for the hem
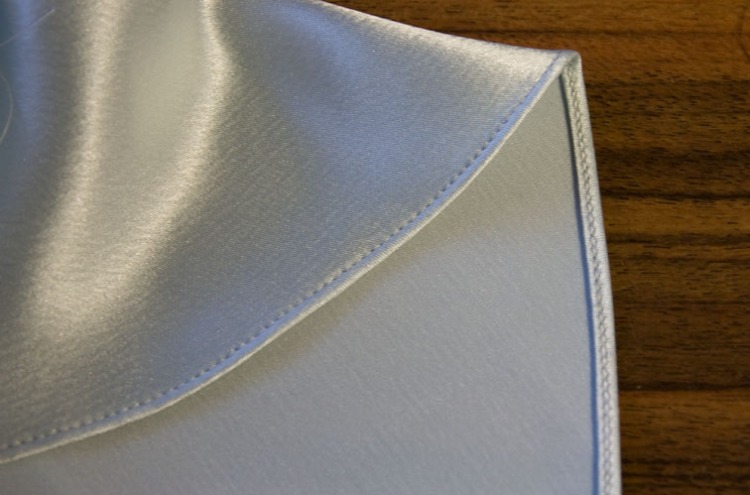
My favourite hem finish is a handkerchief hem, so that’s what I’ll demonstrate here. Turn the hem to the inside as narrowly as you can (about 2-3mm) and edgestitch the fold:
As you sew, try not to stretch the hem – try to keep the fabric in front of the needle flat as you sew.
You also need to be careful as you cross the side seams that the fabric is not stretched or you could end up with a kink in the hem.
Press this first fold of the hem to flatten any ripples, and trim away any corners of seam allowance protruding above the raw edge, so the second fold will turn evenly.
Fold the hem up again 2-3mm and stitch around once more, in the line of previous stitching:
You are done – it’s that easy!
Bias Skirt Trouble-shooting:
If skirt does not hang properly it could be due to the following:
- It was not cut on the true bias, ie the grainline arrow was not parallel to the selvedge
- The grainline was not square throughout the piece, this often shows as little disobedient flippy bits at the hem corners!
- the stitching line is too tight, as mentioned above
These three things we can prevent by taking care when cutting and sewing. However the next two are beyond our control, unless you are prepared to do multiple samples. Most home sewers don’t have that luxury, so I’ll show you what to do instead.
- The fabric weave is not even – I mentioned earlier that most dress fabrics aren’t evenweave – usually the lengthwise grain is more dominant. If you study the grain of your bias skirt, the lengthwise grain is pointing upwards at 45 degrees on one side, and downwards 45 degrees on the other side – this can result in the sides dropping by different amounts when they hang. Most often this results in the side seams twisting around the body with a slight curl at the hem. My sample above is doing this to a minor degree, but more severe cases will need to be fixed.
- The skirt is too small – this is very frequently misdiagnosed as too large by the untrained eye! If you are experiencing a horizontal ‘bump’ or series of bumps down the side seam, then the skirt is too small. It will not feel tight like a straight cut skirt would, but this is the nature of bias cut fabric. A small skirt could be caused from choosing the wrong hip size, or because the fabric has dropped excessively on the bias. When fabric on the bias drops with gravity, it gets longer and narrower – therefore smaller in size. Loosely woven fabrics cut on the bias will drop to a larger extent, and consequently you may need to cut a size larger to get enough finished width in your skirt.
When the fabric weave is causing the side seam to twist, it will look something like this:
Unpick each side seam and let it fall naturally:
If your side seams are unbalanced, the front will drop more than the back, or vice versa. Pin them together so they sit correctly and resew. The notches and hemline won’t match but ignore them – and that is about the only time you will ever hear me say ignore notches! For now we pay attention to how the cloth wants to fall instead.
We start sewing the bodice next – exciting – I love seeing how the lace comes together!
If you still want to join the Ruby Slip Sew-along it is not too late – you can download your free pattern and instructions here, and check out all the previous sew-along posts too.
How are you proceeding with your Rubies – do you have any questions, and are you getting any pre-Christmas sewing time? I had hoped to have most of the posts up by now, but this time of year is not called The Busy Season for nothing! I promise to keep on posting as fast as I can write…
Cheers, Sheryll







Progress… my skirt pieces have been cut out, and I'm going to try to get them sewn either today (probably not likely) or Saturday so they can hang the rest of the weekend. I still need the narrow lace tutorial/adjustment before I cut out the bodice pieces.
Happy holidays! I'm actually thankful that the sew along has gone along a bit slower!
LikeLike
wow, you are very skilled to fold over the silk and sew a hem like that! I need to mess around a bit more, by folding over a wider amount, stitching and then cutting off the excess before turning and stitching again.
It looks scrumptious!
LikeLike
Thanks for the tutorial you hem is perfect!
LikeLike
I love this pretty hem and look forward to trying it. Good information about the fabric weave, too. I learn so much here. Thanks, Sherry, and have a wonderful holiday!
LikeLike
One side of my skirt is very bumpy and uneven, twisting towards the back, The other side hangs ok. When I cut the seam I sewed then there is a small gap where the fabric does not meet. Do you think this means it is too small?
Thanks for any help you can give me. I'm really enjoying the sew along.
LikeLike
Bibliophile – if I was experiencing this problem I would check the following:
1. Was the skirt cut on the lengthwise grain, with both pattern and fabric Right Side Up? If not, this could explain why one side is behaving differently to the other.
2. Were the seams sewn from hem to top with notches matching, at the same tension? If one side was stretched more than the other it could cause one side to swing.
3. Are you able to unpick and repin the faulty side together so that the fabric meets with no bumps, even if the notches don't match? If so, sew it up and try that.
4. If that doesn't work, try unpicking both sides and pinning them together – one side can affect the hang of the other.
5. Still no luck? Email me photos (front, back, R & L sides) to my address in the sidebar, and I'll try to assess what is happening. Where there is a will, there is a way!
LikeLike
Tomorrow I'm going to sew the front and back skirt and I just want to say how grateful I am to have such excellent info to work with. Thank you!
LikeLike
Sherry: I'm really glad I've let the skirt hang because the shift in fabric has been pronounced. While it looks really nice (it's well pinned and on my dress form, I go in to manipulate the pins every once in a while to get the right drape), the front piece is now a good cm longer than the back piece. If I were to serge, it would be pretty easy to even that up, but as I'd like to do the handkerchief hem, I'm going to have to get rid of that extra fabric somehow and I'm kind of nervous to take my scissors or rotary cutter to the piece before or after I sew the pieces together. Do you have any thoughts? Should I just suck it up and cut the excess fabric? Or suck it up and serge before hemming? Thanks for any feedback!
LikeLike
K.Line – If it is hanging nicely I would sew the side seams then check the hang on the dress form again. You can leave the actual hemming until after the bodice and straps are attached, that way you are double-checking whether you really need to trim the hem or not. I would tend to trim by rotary/shears to ensure it is symmetrical.
By the way, 1cm variation is totally acceptable in my book – bias cut hems shift levels every time you do, so I don't get too fussy!
LikeLike
Thanks for letting me know. I can actually see, this morning, that the centre front and back are level, it's just the side seams as they move towards the front that are off. It's fascinating, really. And I kept thinking about this last night and also came to the conclusion that rotary cutters are the way to go – after a good cup of coffee for fortitude 🙂
LikeLike
Hi Sherry, I've finally found some lace to make a Ruby slip, it's taken months! I like how you did the hem, it's much easier than using the rolled hem foot! There's a video on threads insider which is basically the same as yours, “Hem Sheers with Ease”, http://www.threadsmagazine.com/item/23018/industry-insider-techniques-dvd-vol-1
There's a great tip using an organza press cloth to help turn the tiny hem without burning your fingers!
LikeLike
Hi – I made a dress and I'm unhappy with the way the CB seam is sitting… It's a 3/4 circle skirt and the seam lies slightly to one side… Would you have any idea what might have gone wrong?
LikeLike
Hi – I made a 3/4 circle skirt dress and the CB seam (the only seam) Lies to the right instead of straight down. Seeing as it's a circle skirt, obviously some parts were cut on the bias… Is there any way you might know what the issue might be? Thanks!
LikeLike
HI Sheryll, The link to the pattern is not working. Do you mind reposting this?
LikeLike
Thanks for letting me know of the broken link Rebecca – all fixed!
LikeLike
Why am I having difficulty getting the band to fold nicely on a skirt cut on the bias? The band is from the top of the skirt rather than having a separate unattached band. I am unable to get a smooth 1″ band. Have tried basting. Nothing seems to work. Thanks for anything you can suggest.
LikeLike