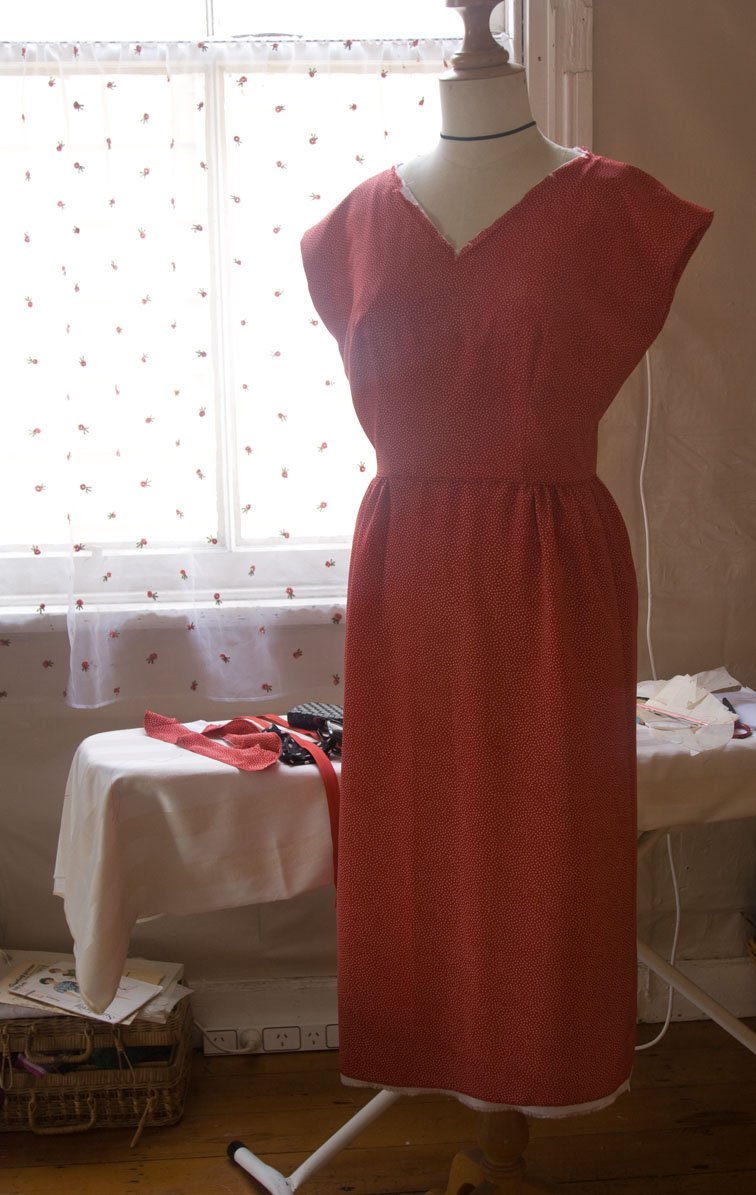
Once underlined, the only alteration I really had to do to the bodice on my Red Spot Dress was shorten the back waist. A lot of the original wrinkles appear to be caused by Polyester-Vs-Skin static rather than the actual fit. I’ve reattached the skirt with a lining and here it is so far, although it is a size too big for the mannequin:
I interfaced the facings with calico as well, partly so I could demonstrate what I mean by folding when I am machining the underlining as some of you asked. Although I am technically interfacing these pieces, the same principle applies.
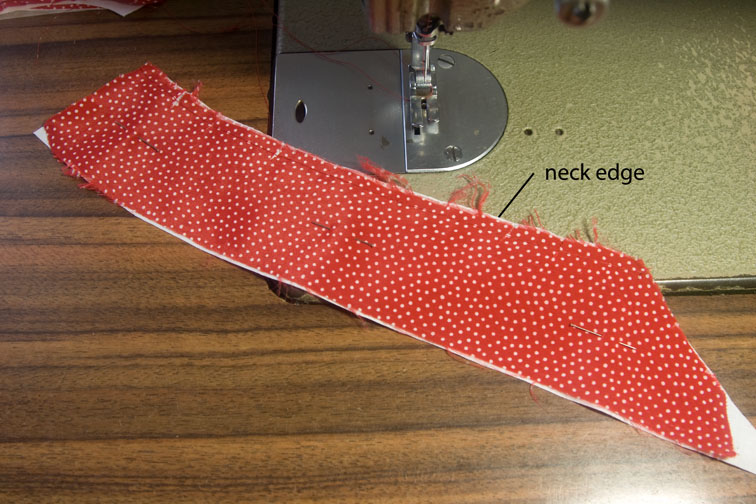
Here’s the L neck facing, and you can just see that I have machine basted the neck edge. I lightly pinned the two layers, as the spot fabric wiggles all over the place:
Now I am preparing to sew the free edge of the facing. It is important to remove any pins from the area that you are going to sew, as it defeats the purpose of what I am about to do next:
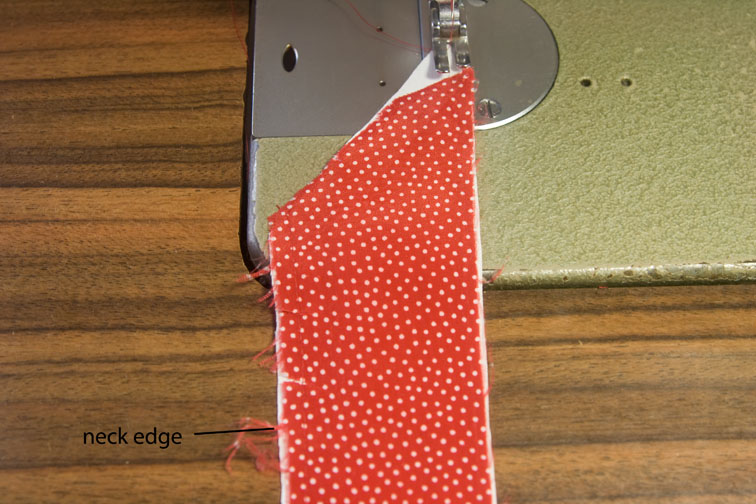
I fold under the neck edge – this emulates how the fabric layers will sit when the facing is sewn to the garment and pressed. Notice how the spot fabric pulls over slightly, so it can wrap around the calico at the neck edge?
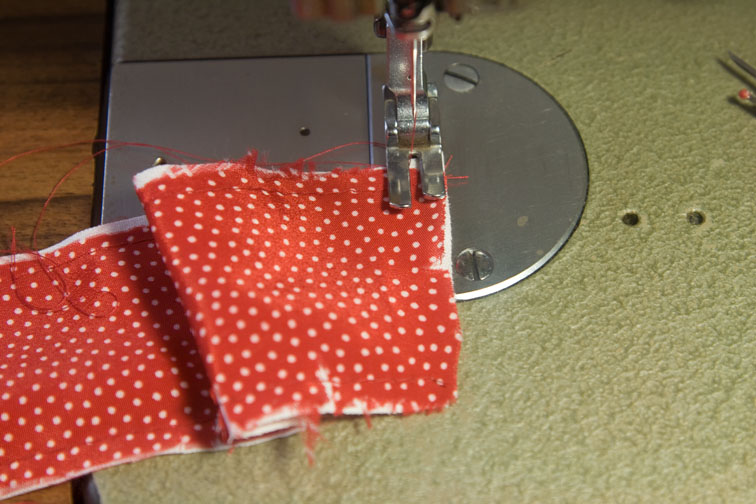
That is how it wants to be – always listen to the fabric! Now sew the edge, removing any pins before you near them and folding the edge under as you go.
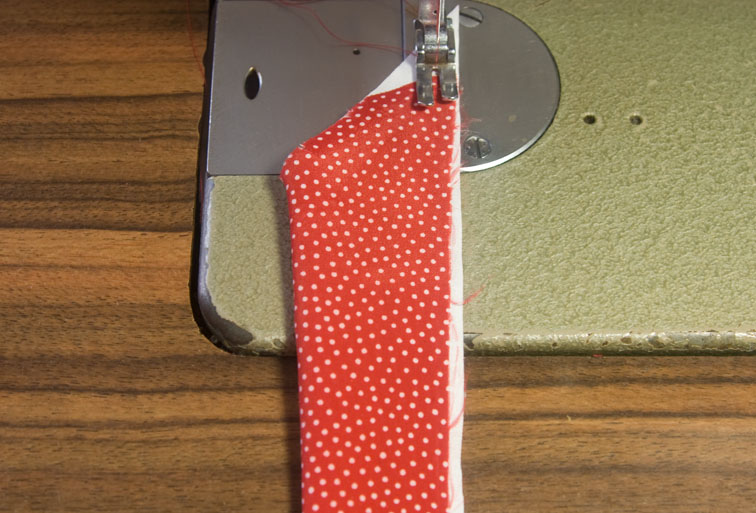
To prevent the layers shifting, a bit of sewing technique is necessary. Go slowly, sewing a few stitches at a time. Smooth the layers as you go – a flat bed on your machine is better – and as soon as you start to see any shift raise the presser foot and let the fabric lay flat again. Use an awl or quick-unpick in your R hand to hold or ease the top layer as you go (I’m using my L hand here so I can photograph!). Some fabrics may be better sewn the other way up, against the feed dogs (in which case your neck edge will fold to the top):

I folded my fabric at the shoulder and CF edges too:
Once you are done lay it flat again – see the bubble in the upper layer? It looks wrong, but really it is perfect!
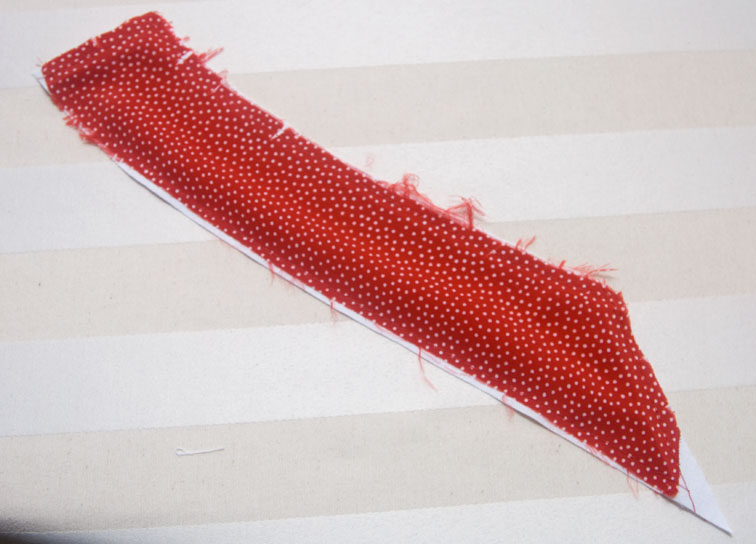
See how when the neck edge is folded under – as it will be on the assembled garment – the bubble disappears?
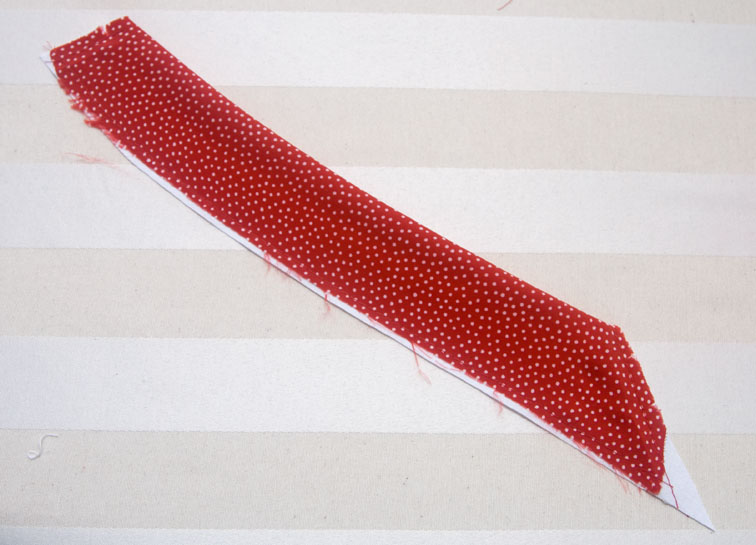
You can still see slight bubbles at the shoulder and CF edge where I haven’t yet turned them under, but the rest lays perfectly flat, which is what we want.
If you don’t accommodate this ease in your upper layer, then you can get a yukky crease in your underlining or interfacing around the finished seam line. Some fabrics need more ease than others, and my folding method eliminates the guesswork by giving you the exact amount of ease for your fabric combination. You may not get a crease in more forgiving fabrics that meld into shape with the iron, but they will always lay better if you allow extra for the cloth folds – ever had The Case of the Flipping Out Facing? Well your problem is solved!
OK, back to work. Hopefully I’ll get this thing dress finished this weekend so I can move on…
To more stashbusting!

This is absolutely genius! I was one of those having a hard time imagining what you meant with the folding, but this is making perfect sense now! Thank you so much for sharing.
LikeLike
Wow, you have the most amazing and mind-blowing tips and techniques. My brain is boggled. Thank you so much for taking the time to share your experience and wisdom with us.
Also, the dress is looking good! 🙂
LikeLike
Brilliant, thanks for sharing!
LikeLike
I've been doing the exact same folding thing for collars forever to accomodate turn of cloth before sewing them in, but it had never occurred to me to do it for facings too. I just had a huge DUUUHHHH moment when I read this – brilliant! Thanks for sharing 🙂
LikeLike
Thanks so much for this.
LikeLike
I have never seen anything like this! Thank you so much.
LikeLike
Oh I love your tutes – no pretentious showing off, just a skilled seamstress sharing her considerable knowledge. The dress is coming along nicely – now I have an unfinished 'thing' (or three) to get on with!
LikeLike
Thanks Sherry – I was one of the ones who couldn't envisage what you meant from the last post, and this clears it up perfectly. Now I know why my last attempt at underlining went a bit skewy (thankfully it was a loose fitting top, so it doesn't look toooooooo bad).
LikeLike
These are great tips! Thank you! It's looking great.
LikeLike
I'm a new reader to your blog, but I absolutely love all of the tip and tricks you've been blogging about recently.
I do have a question in regards to this tutorial…
At the free edge where the two layer are uneven, which layer do you use as a guide to sew to the facing collar? Do you use the underlining/interfacting edge or the fashion fabric edge? Does this make sense?
Thanks so much!
LikeLike
The layers at the neck edge are even – I basted them together first. (Well, they should be even, looking at my photos they don't look 100%!) Due to the folding technique the layers become uneven at the free edge of the facing, and I just trimmed the excess underlining off when I overlocked.
In instances where you do end up with both edges uneven, I would use the edge of the main fabric the guide for stitching, the underlining is 'excess' usually.
LikeLike
I must be so dense, I just had the hardest time trying to figure out what you meant by folding. Fold what, where? And that's because I kept staring at the edge you were about to sew along. Then it finally occurred to me that you folded the opposite edge and that you must have folded it under. Oh gosh, that took a long time, but I think I got it now. And taking the pins out finally makes sense too! I can't believe I didn't get this a bit quicker.
That's really clever. And it is obviously how you get the exact fold of cloth amount – now why didn't I think of this? So very clever! And extremely useful, thanks so much!
I am still not clear what you do at the shoulder and CF – that's a long distance to go to the opposite edge. I guess you must be folding under again the opposite edge, to get an accurate result.
I will remember that for my next project, thanks so much again!
LikeLike