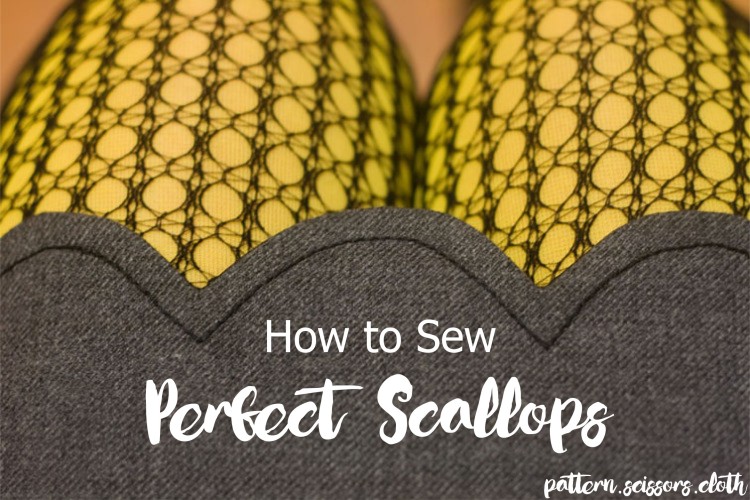
Let me show you how I did the scallops on my Scallop Skirt – this way is quicker, easier, and gets better results than the methods I’ve seen in sewing books.

First of all you cut a straight hem, not a scalloped one! Cut your hem and hem facing about 1cm longer than the finished edge of the lowermost part of the scallop:

It might pay to apply some lightweight fusing to the hem and/or facing to reinforce. Some fabrics (eg loosely woven ones) will need this and some may not, and make sure the fusing does not cause unwanted stiffness.
Now chalk the outline of your scallop directly onto the wrong side of your cloth, using sharp chalk for an accurate line:

My pattern is made of card so this was easy, but if you have a tissue pattern you could make a card template from it. Or use another transfer method like a tracing wheel and Simplicity tracing paper – do they still make that stuff? What we are interested in is the stitching line, not the cutting line:

With your hem and hem facing right sides together, stitch along the chalk line – or more accurately, stitch on the inner edge of the chalk line right where the edge of the pattern was. Check your stitching is accurate and that your scallops are all the same size and shape, now is the time to adjust them if they are a bit wonky!
Once your scallops are stitched the seam allowance can then be cut down to 6mm (1/4″) around each scallop.
Clip into the point between each scallop with sharp scissors. Clip to within 1mm of the stitching, or further away if your fabric is loosely woven and fraying is a concern. You need to clip close enough for the point to turn properly though:

Now – most books will tell you to notch into the seam allowance of each scallop several times, just like I’ve done above – but that takes forever. Which is OK if you have forever, but when you are impatient like me it is not. I tried that technique to compare with my method – I found that I needed to cut tons of notches to prevent the scallop looking angular, and even then it was fiddly to turn and press to maintain the curve between the notches, and to avoid steam burning your fingers. If I did my skirt hem that way it could take a couple of hours!
 |
| Trying again with tons of notches… |
Instead I chose to do what we usually do in RTW production for convex curves – I trimmed the seam allowance down to around 3mm (1/8″) at the height of the curve, it takes 2 seconds:
 |
| The quick and easy way! |
I only trimmed where necessary, leaving the full seam allowance intact near the clip. As you trim hold the shears at an angle to automatically bevel the edges.
When you turn the scallop through, the curve practically forms itself and is smooth and angle-free. The raw edges of the smaller seam allowance mould themselves evenly into position. Pressing is quicker and less hazardous. Time taken was ten minutes.
 |
| The two scallops on the left had their seam allowances notched, and are angular in appearance. The two on the right had their seam allowances trimmed, and are smooth. |
Try it next time you do scallops, or any convex curve for that matter – collars, cuffs, jacket front hem curves – and hopefully you’ll have better results like I did!
Fraying isn’t usually a problem on enclosed seams like this, but the risk can be reduced by understitching or topstitching. Understitching by machine isn’t really possible on small scallops, but can be done by hand. I chose to topstitch instead!

Some readers asked for topstitching hints – but I don’t really have many! My main tip would be to sew at a speed where you have good control. For these scallops I sewed slowly and used the handwheel a lot! For 5-6mm topstitching like this I line the edge of the fabric up with the edge of my presser foot, and watch the fabric edge rather than the needle. It helps with straight feeding and speed if I place a finger up next to the foot/fabric edge and hold it there while sewing, a bit like a compensating foot.
Maybe some readers have topstitching tips that would help me – if so, be sure to leave them in the comments below!
And happy scallop sewing from now on!
By the way, Mother Nature has got back at me after I noted we were having a warm winter in a recent post – we awoke this morning to a chilly 6C and most skifields now have enough snow to open for the season, plus I’m now wearing my ski socks around the house…
And have you entered the Seam Allowance Guide giveaway yet?

Excellent tutorial, thanks!
LikeLike
Thanks for the tutorial! I've been having lots of trouble getting nicely curved edges on pockets etc, no matter how many notches I cut – I'll be trying your method next time instead! 🙂
LikeLike
Lovely scallops! I had an article about that too! http://magdamagdadesignstudio.blogspot.com/2011/05/scalloping-tips.html
LikeLike
Thank you for taking time to share this. What a difference. I have bookmarked this blog for future use.
LikeLike
Fab tutorial Sherry! Bookmarked, saved to PDF for ever and printed to use this weekend on my Sorbetto top (yay!). Thank you once again for sharing a lovely technique with us all 🙂
LikeLike
Excellent tutorial, Sherry! I love when the faster way is actually better.
LikeLike
This is wonderful! I will be trying it soon. I still iron my darts pointing up because of your tutorial, your tips have made a big difference in my sewing.
LikeLike
Great information here! Very clear and easy to understand. Thank you for taking the time to post this.
LikeLike
I don't bother with a template — I fold and mark divisions with pins, then sew a curve down to the bottom and up to the point. That way I don't have to do math to draw a template, but can rely on the garment itself to provide evenly divided scallops. I trim curves with pinking shears, which automatically cuts notches for me. Scallops are such a lovely, feminine detail, on bottom hems for skirts and slacks, sleeve hems, necklines, peplums.
LikeLike
I've got to try some scallops. You have the best tutorials! Whenever I top stitch I watch the fabric further back from the presser foot and needle. I find when I focus right on the presser foot or needle it gets off track. Probably has to do with my terrible vision.
LikeLike
Great tip. Thank you. The results are fabulous. It's a gorgeous skirt.
Myrna
http://blog.myrnagiesbrecht.com
(blogger won't let me post comments lately – not sure what's up with that.)
LikeLike
Thanks for the scallops – you're a doll!
LikeLike
Great tip – you always know the best way of doing things! Many thanks.
LikeLike
Really great tip!
sdBev
LikeLike
Thanks for the trimming versus notching tip! Even if I never made scallops, I'm sure I can use this tip other places.
LikeLike
Lovely tip! well done!
LikeLike
Your scalloped hem is delicious! Thanks for validating my strong preference for trimming over clipping.
LikeLike
Love those stockings! Great tutorial – as always!
LikeLike
I like the texture design
LikeLike
Excellent! Thanks for the tutorial. I appreciate your dedication to “saving time” (:
LikeLike
Wonderful tutorial, as always. Never was a fan of notching, and I'm happy to see that I was right.
LikeLike
Thank you, there have been a lot of scallop tutorials out there lately but this is the best!
LikeLike
I've decided I'm having a scalloped skirt – What are your thoughts on using denim? Too heavy?
LikeLike
Gail – I don't think denim is too heavy – my fabric is almost denim weight, although I faced it with silk satin, you could try a chambray to face with. Let me know when it is made!
LikeLike
Awesome tute! I had seen that idea of cutting a straight edge then stitching the scallops and trimming somewhere, but can't for the life of me remember where. And I love your trimming tips! (although I think you have much better trimming skillz than I… any chance you want to do a tute on how to not have your trimming look wonk-tastic?
I wonder if pinking the trimmed edge would work well… I've heard that suggested rather than notching.
LikeLike
Tanit-Isis – Yes, LinB mentioned pinking in an earlier comment, and I think its a great idea! Mine are totally blunt from Children Using Them To Cut Paper!
LikeLike
Brilliant tutorial. I love scallops and had no idea there was a trick to them. I'll try it out asap!
LikeLike
Thanks for sharing! I love trying new ideas! I need to try this on the aprons I make.
LikeLike
Thanks for sharing! I love trying new ideas! I need to try this on the aprons I make.
LikeLike
oh-la-la! love this! thanks for sharing! – new follower 🙂
LikeLike
Brilliant tips! I wish I'd discovered these last year when I made a scalloped skirted dress for my daughter. Guess I'll have to make another one. 🙂
LikeLike
Totally going to use your tip! Stay tuned! Thanks!!!
LikeLike
I have always been a clipper (haven't we all been trained to do that?!!), and I am definitely going to try this!!! I'm going to do a scalloped dress for my soon-to-be-three granddaughter, and it will now look perfect!! Thank you so much for sharing!!
LikeLike
Wow! Thanks for the great tip!
LikeLike
I have used pinking shears with this 1/8 inch cutting method, and it works so well. You get lots of little notches for “no work”! Thanks for sharing.
LikeLike
Very helpful! Thank you!
LikeLike
great tutorial but the finished product does not match the picture of the scallops shown at the beginning, they seem to be finished with a bias trim and the ones you show are just plain scallpos.
LikeLike
Ummmm, she top stitched the hem to help prevent raveling.
LikeLike
My comment is really very late since I only just found this site today! I didn't see any hints for top stitching. Here's my hint for near perfect top stitching – quilter's/quilting tape. It's a 1/4-inch wide masking tape that quilters' use to keep their quilting lines straight.
LikeLike
Great tutorial… need to think of something to make with scallops now so I can try it out
LikeLike
So great to be reminded of this fabulous technique!
LikeLike
Thanks for sharing this! My top topstitching tip (ha!) is to mark the pivot point! That way it’s easy to see exactly where you want to have your needle down. It might seem like a lot of time on scallops, but surely less than understitching by hand or clipping a thousand notches. 😉
LikeLike
I wanted to make a scalloped shirt, but my scallops were wonky and uneven (fairly new to sewing), had the straight top that you spoke about, because I notched the material (the instructions told me to) I cut and sewed the scallop – not the straight line as you suggested, and just looked so home-made. I will try your method. It can only be an improvement on what I produced. Thank you
LikeLike