
Sewing the collar, lapels and front edge really starts to bring our garment together. There are only eight sewing steps to complete this stage – and one of them was completed in RTW Tailoring Sewalong #10!
But, first:
Full marks to the first person who notices my mistake in that last post:

I am really not surprised – I find it hard enough telling my left from right, let alone top collars and under collars! Here is what you should do:
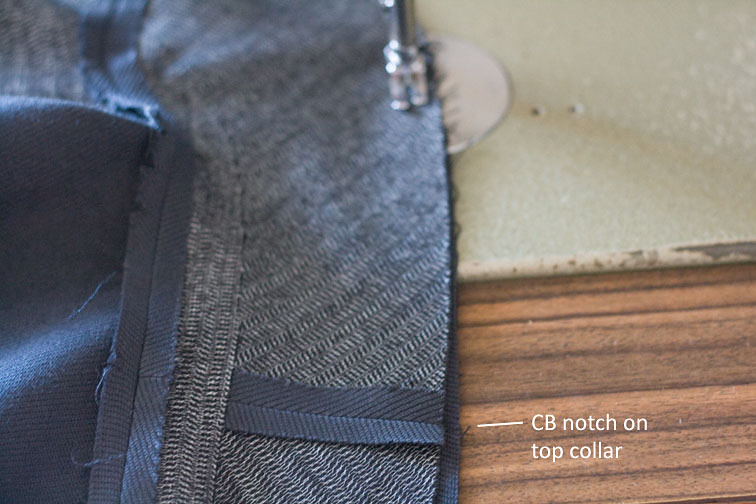
- Sew the Top Collar to the Front Facing/Back Neck Facing unit
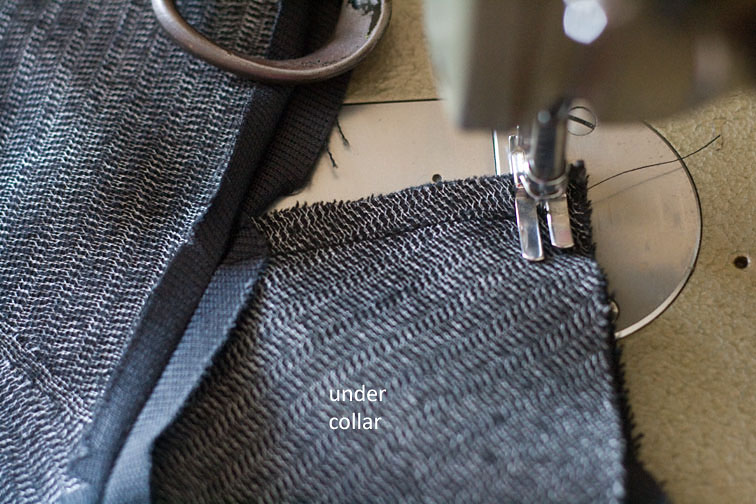
- Sew the Under Collar to the Outer Shell
Sewing the under collar to the outer shell is done in exactly the same way as sewing the top collar to the facing unit – by matching notches and ensuring those endpoints are exact. That process is fully outlined in the previous post here.
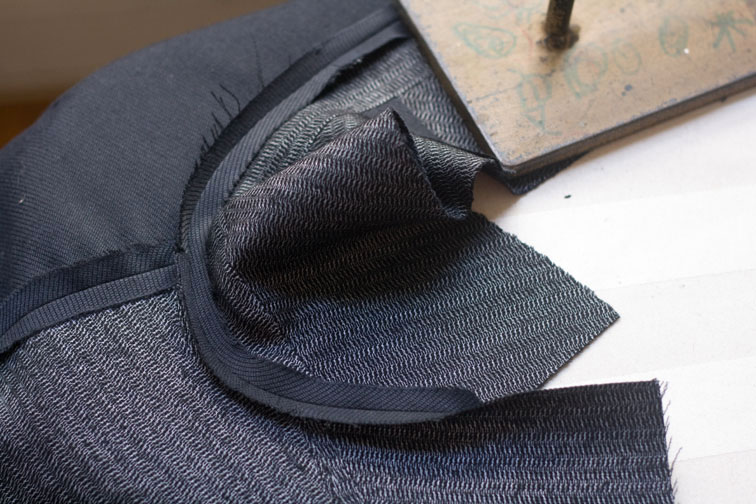
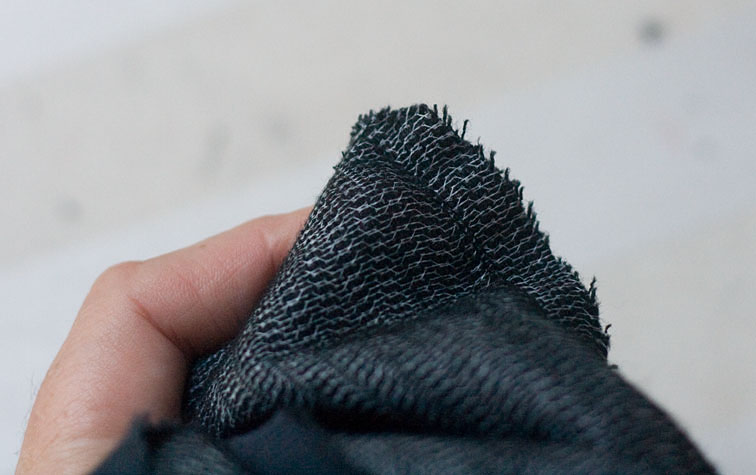
Press the seams open, without pressing past the collar notch on the lapel. I like to drape the garment around the end of the ironing board for this, like the photo below. You can see I need to clip to release some tension in the seam allowance around the gorge line and back neck:
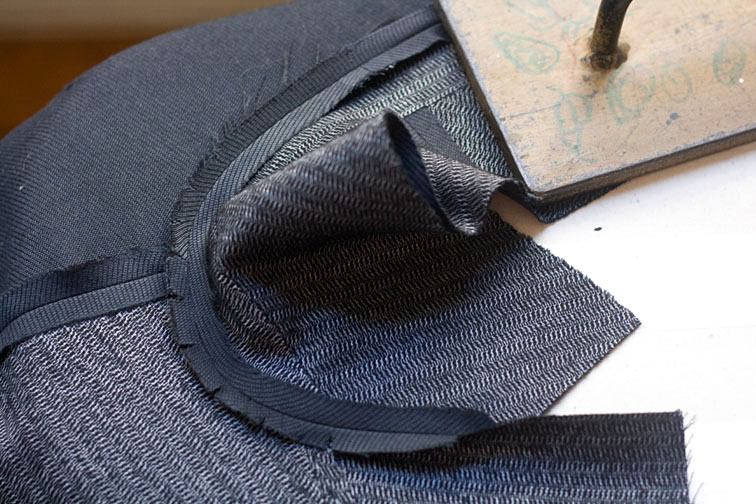
Clip only where necessary. I clipped 5 times around this fairly tight curve, slight curves and loosely woven fabrics may not need much clipping at all:
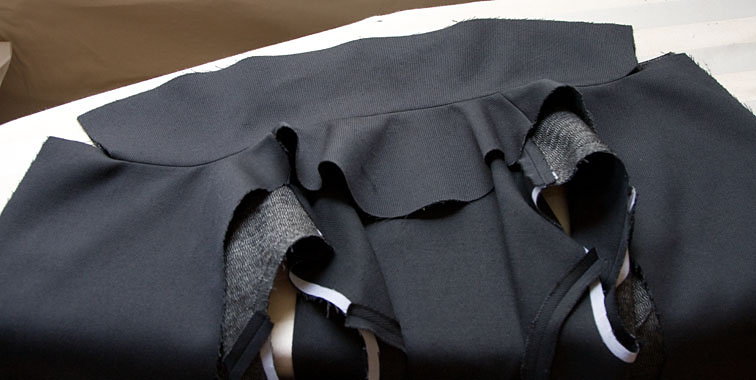
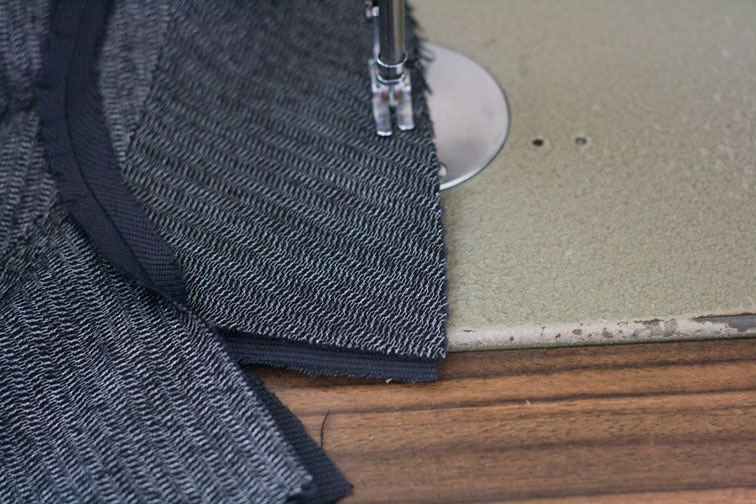
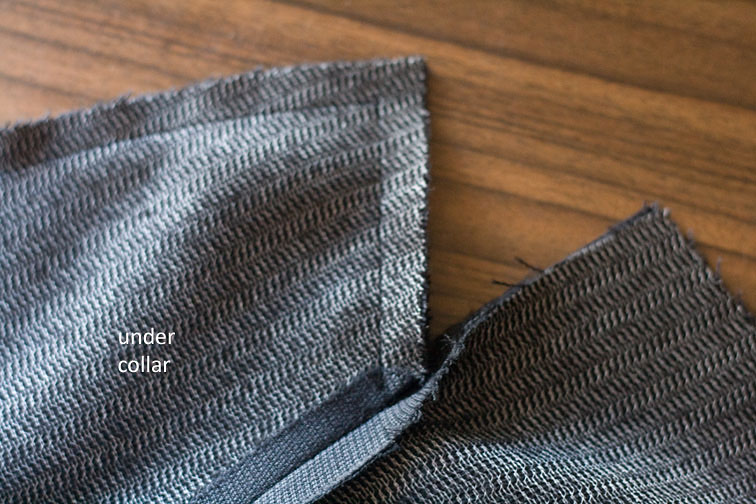
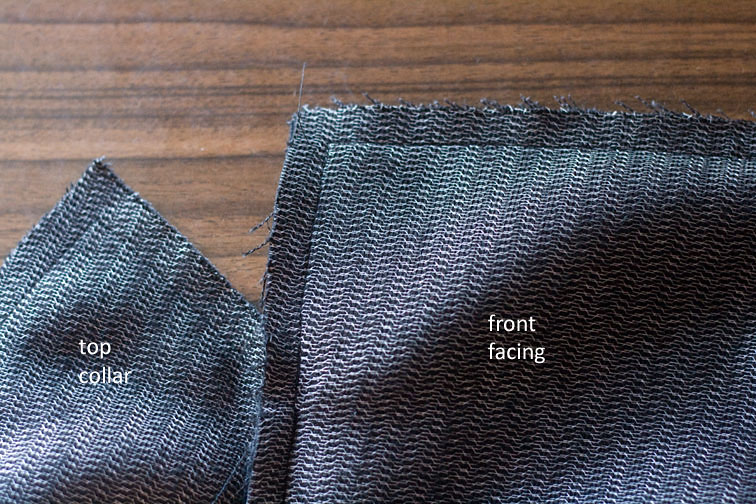
By now you should have an outer shell with under collar attached:

And a facing unit with top collar attached:
Let’s join them together!
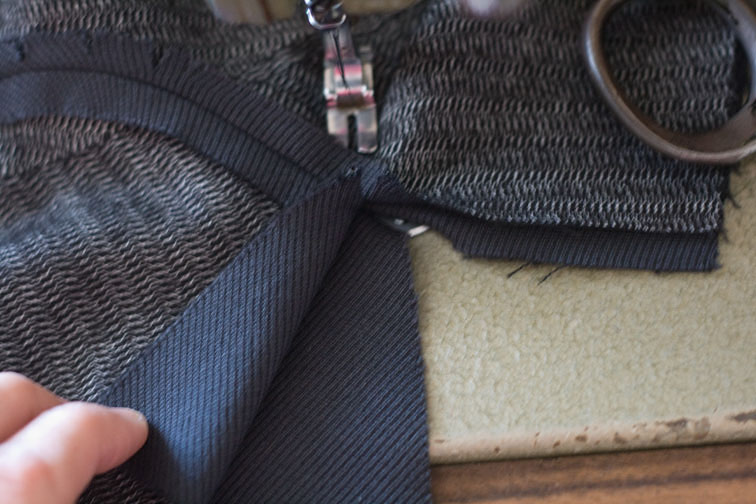
I start with the collar – place the top and under collars face to face with the top collar below – this way the feed dogs will help to ease in the excess we added for turn of cloth allowance, way back in RTW Tailoring Sewalong #2:

Make sure the endpoints, where the stitching ends at the collar notch, are directly on top of each other:
Start stitching 1mm away from the endpoint, catching the collar seam allowances. The lapel seam allowances must be kept clear. See the 4mm turn of cloth allowance that was added to the top collar peeking out the end? We need to ease that in as we sew:

That doesn’t mean stretching the under collar to fit! To ease the top collar which lies underneath, I match the corners and hold them down together with my right fingertip, then slip my left hand between the layers and distribute the ease evenly with my fingers, then I hold it down firmly with all my fingers as I sew – you can see the wavy easing underneath:

When you get to the corner, turn with the needle down:
Continue sewing the outer edge of the collar, matching all notches, and easing where necessary:
There will be some easing either side of the corner:
When you turn the opposite corner, align the endpoints of stitching (near my index finger) exactly:

And remember to catch the collar seam allowances, but not the lapel seam allowances:
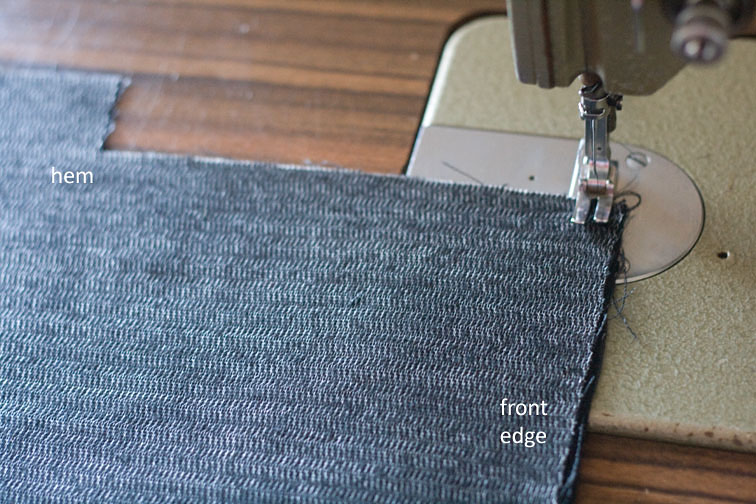
The front edges and lapels:
Before turning the collar through, sew the front edges and lapels. Sew with the front facing underneath, and begin at the hem:
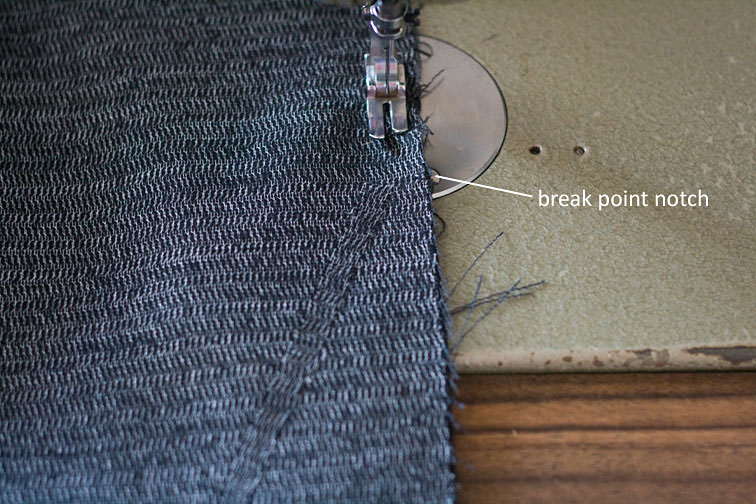
Sew up to the break point notch. Around the notch sew for about 1.5cm with the upper layer held taut – this creates some ease at the break point to encourage the lapel to roll:
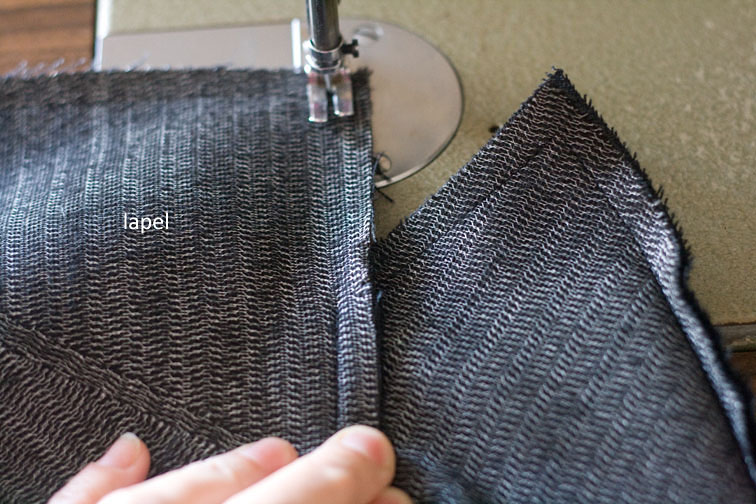
Sew the lapel edges and pivot at the corner, ready to sew the top edge. Make sure the endpoints at the collar notches lie exactly on top of each other, place your left fingers between the layers to distribute the ease evenly. Fold both lapel seam allowances up out of the way. Stitch to within 1mm of the end of the previous stitching, without catching any seam allowances:
Like so:
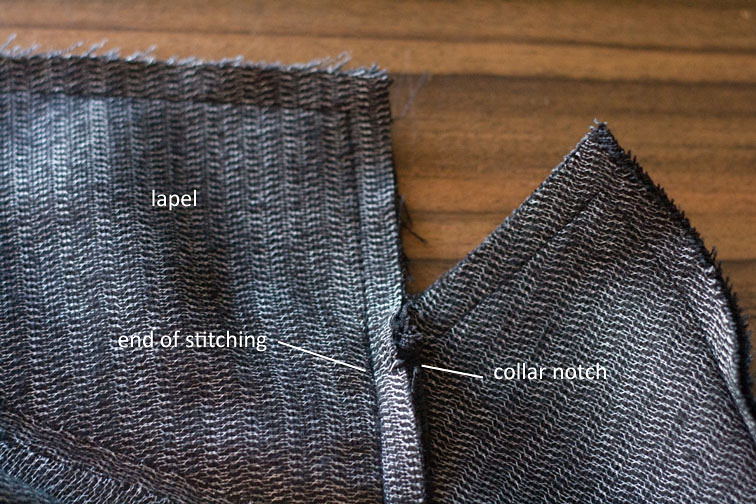
Check the reverse – the stitching should end at the same place:
Repeat for the other side, this time starting at the collar end:

Easing at the breakpoint, and finishing at the hem:

If your front edge has a curved hem, continue sewing around the curve, to about 3cm from the end of the facing.
Check and make any fixes now!
- Stitching is straight, and corners look symmetrical
- Stitching starts and ends 1-2mm from collar/lapel junction
- Lapel top edges are the same length, and slightly convex, rather than concave
Understitching:
I know you are dying to turn the collar and lapel corners, but first we need to understitch!
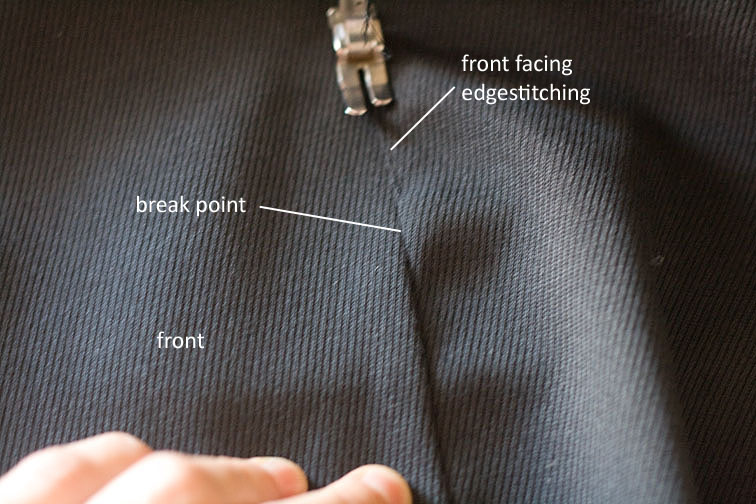
Understitch the front edge seam allowances to the front facing, from the hem edge to 1cm before the breakpoint, then backtack:

Start sewing again 1cm above the breakpoint, understitching the lapel seam allowances to the front, as far as you can comfortably sew up the lapel:
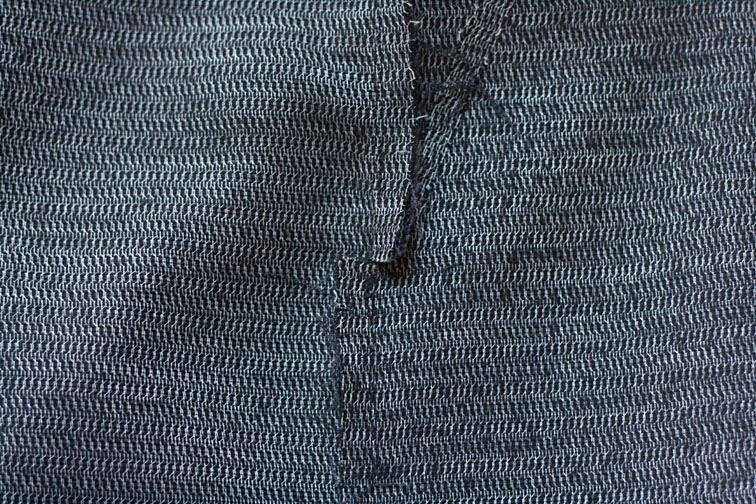
You’ll need to clip the seam allowance at the break point to do this:
Understitch the seam allowances to the under collar around the long outer edge. Then understitch the opposite side lapel, followed by the front edge down to the hem.
Turn the Corners:
I’ll show you how I turn corners – it seems to get me the best results without any special equipment.
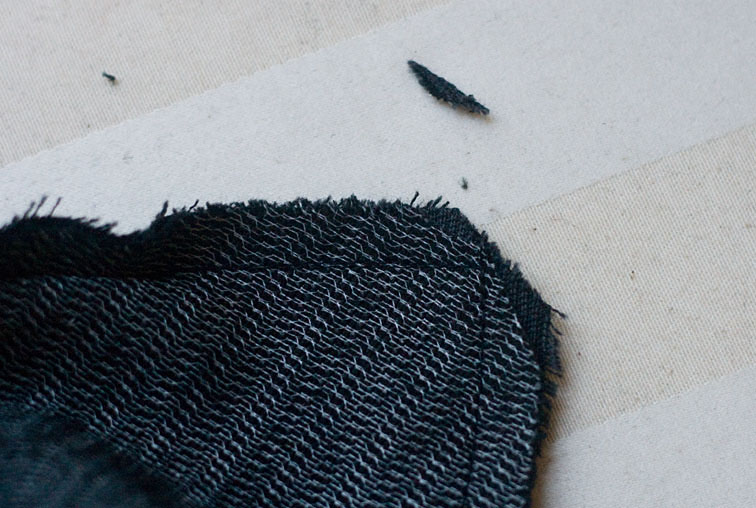
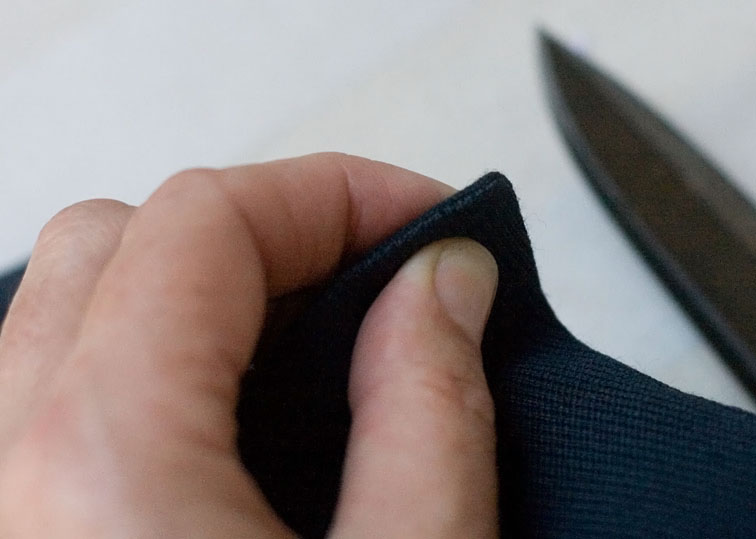
Clip across the corner about 2mm from the point – you need to clip close enough so you don’t get a bump, but not too close or it will fray.

Clip a bit more from the seam allowance of the underneath piece like so:
Stick thumb into top piece, and fold one seam allowance around to underneath piece, pinching it with your finger – I’m using my left hand here, because the right one’s holding the camera:
Then fold the other seam allowance around:

Then the middle pointy bit:

This is where it helps if you have long fingernails! Pinching it all together, turn it through:

Roll the seam line either side of the point until the seams inside feel flat:
This method works most of the time for me. Sometimes you don’t need to trim the corner, just fold the seam allowances over each other neatly. It all depends on the angle and the fabric.

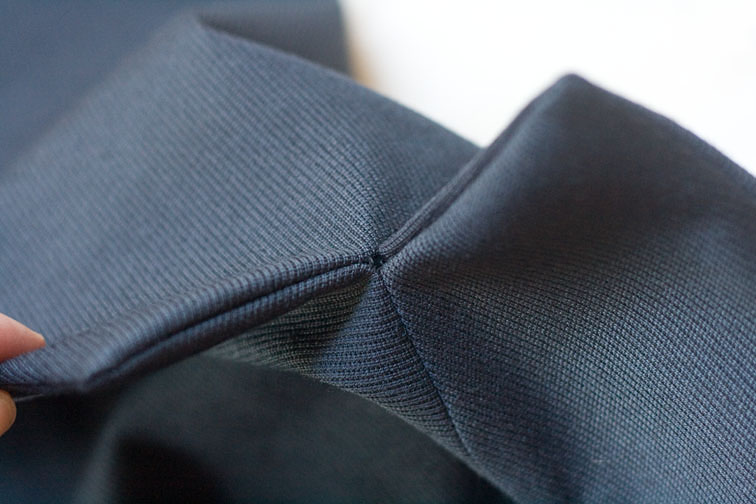
Don’t worry about a little gap in the junction at the notch – it gives you a bit of flexibility in this region. You don’t want it too big though – no more than 3mm:
Pressing:
Now that you have understitched, the collar and lapel will practically turn into position itself due to the cloth allowance you added earlier – you just need to fine tune it and press! Press the front edges from the facing side, and the lapels and collar from the underside.
Take particular care that you don’t end up with the dreaded “scoopy lapel”:

Remember adding that slight convex curve to our pattern? That should give you a nicer shape like this:

Here’s what mine looks like after underpressing – the collar and lapel are rolling smoothly with no breaks, and the breakpoint is folding by itself. The outer edges of the collar and lapel should be smooth, symmetrical and with no visible stitching lines:
Locate your sleeves – because they’re going in tomorrow!

This post was originally published as #11 of the Ready-to-Wear Tailoring Sewalong.
Click Here for a full list of sewalong posts.

The coat's gonna look amazing! I enjoy reading your detailed posts, and I like seeing such a neat job you're doing.
I'm way behind the schedule for the sewalong – I haven't even made a muslin! That's a petty, but I know I'll make my jacket eventually!
LikeLike
Hi Sherry- I'm really enjoying the detailed instructions and pictures.I wasn't able to join the sew along, but I plan to start my jacket soon, and will go back over everything then.thanks for all the info:)
LikeLike
Thank you so much for your detailed construction explanations. I plan to use many of the techniques you are describing in my sewing. Your visual explanations helps those of us who need to see what is being done.
Thank you
Marie
LikeLike
Yep – it's looking great – thanks so much!
LikeLike
Thank you for the clear pictures and the excellent tutorial. A classmate of mine in my Tailoring class introduced me to this blog. Our jacket project is due this week and I find myself wishing to have had this two weeks earlier. I think I did every single “don't” you listed.
I'm philosophical though; it's my very first jacket and the next one will be much better. My self assigned homework between the semesters is to make at least two more jackets, more if I have time. Practice always improves my sewing.
Theresa in Tucson
LikeLike
GREAT lesson Sherry. Your closeup pictures make all the difference in the world. This part of the jacket construction has always scared me. With this step by step guide, I feel much more confident I can line everything up.
LikeLike
Wow, your instructions are amazing. Turning the corners your way worked like a charm, and the collar and lapel turned into position magically!
LikeLike
Hi Sherry, I'm just about to turn the collar and wondered if you ever press open the collar seam on a point presser before turning? That's what I've done or learned before – with one other jacket and shirts – or is that sort of unnecessary?
LikeLike
Interesting and clever how you attach different parts at different times – that is, you don't just do the whole facing and collar as one – as the commercial patterns usually do. Also, interesting how the understitching switches sides – makes sense but I wouldn't have thought of it – thanks again!!
LikeLike
~Amy – I've never used a point presser – maybe I should as that might help me with my corners! So I'm not sure if the results it achieves are superior or not. I know understitching replaces pressing-as-you-go a lot in RTW, and I haven't seen them in use in my workplaces.
Does anybody else highly recommend a point presser?
LikeLike
I know this comment is way behind schedule 🙂 but I wanted to say thank you for this section of instructions. I am happy to report that I have finished this section of my jacket! I am so glad I didn't give up on this project. I am liking how things are turning out so far, even though I didn't achieve as beautiful of results as you've shown here! But practice makes perfect right?
LikeLike
Thank you for this tutorial – really helped me to finally create a perfect jacket after many many failed attempts over the years.
LikeLike
Thank you for posting this tutorial. I followed your instructions and have finally created a perfect jacket with perfect lapels. I have been trying for years to perfect the lapel – lots of different advice but there was always a little pucker or something that would drive me insane – this time I have a perfect suit that I know I will wear for a long time. Thanks!
LikeLike
That's a great collar; it's got such a nice roll to it! 🙂
How do people sew Peter-Pan collars in the industry? I sewed one myself the other day and there seemed to be a lot of fabric what with the shell, undercollar, interfacing, top-collar and neckline facing. It was a bit much for my sewing machine. I just wondered if there was a way to do it that wouldn't require sewing through so many layers at once?
(By the way, thank you for the post on bagging the hem lining. Once I had a go it came together quite well. My shop-bought coat has a horizontal pleat the hem. I was just wondering how to alter the pattern to allow this _and_ bagging the lining?)
LikeLike
Thank you, Thank you, Thank you!!! I think I can do it now. Your directions are so clear. Mary
LikeLike
Thank you for this amazing tutorial. So appreciated.
LikeLiked by 1 person
This is STILL so helpful! Every Single Time!! thanks again, Kim
LikeLiked by 1 person
And just like that! A newbie to tailoring, such as myself understands what to do just by the pictures on their own 👏🏾👏🏾👌🏾. I am clearly going to be reading too but this is the first thing I have found that has made any sense on how to sew notched edge collars (and that includes YouTube videos). I feel I can start my blazer with assurance now, so thank you so very much for your well written, well photographed article.🥳💃🏽
LikeLike