Under Collar:
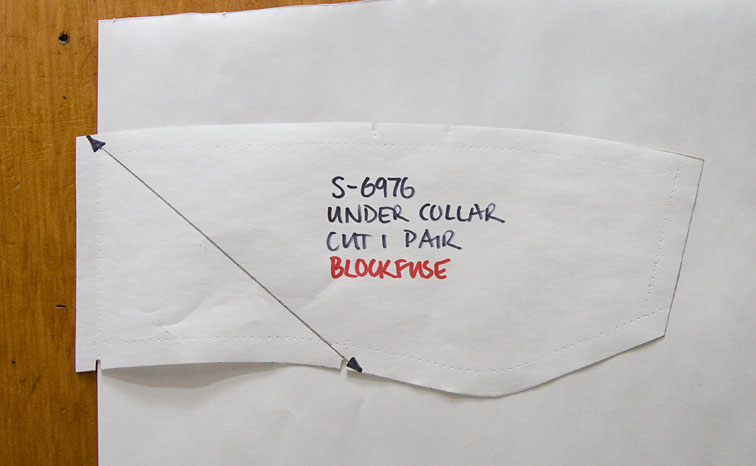
The under collar on a tailored jacket usually has a CB seam and is cut on the bias so that it rolls smoothly without breaking. If your under collar is cut on the fold it is easy to change – just add a CB seam allowance, and redraw the grainline 45 degrees to CB seam:

Once again, give your pattern 1cm seam allowances and walk the pattern around the neckline to ensure it fits.
Label – Under Collar, Cut 1 Pair, Blockfuse, Grainline:
Top Collar:
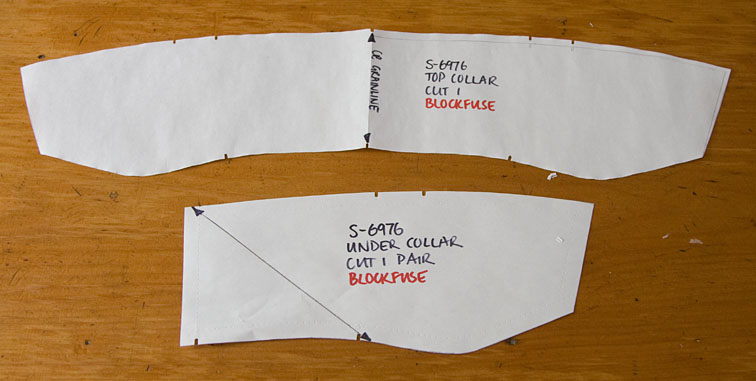
The Top Collar is made from the Under Collar. Fold some paper, place the CB seam to the fold, and trace around the Under Collar:
Your existing pattern may or may not have cloth allowance added, but you’ll definitely need to add some to the outer edges of your top collar. The amount added depends on the thickness of your cloth – you’ll need less for a fine wool, and more for a thick coating, about 3-4mm is average. There’s more info on cloth allowance here.

Ive added 7mm to the CB, tapering to 4mm at the collar point, and to zero at the lapel junction. Here’s my finished collar pieces:
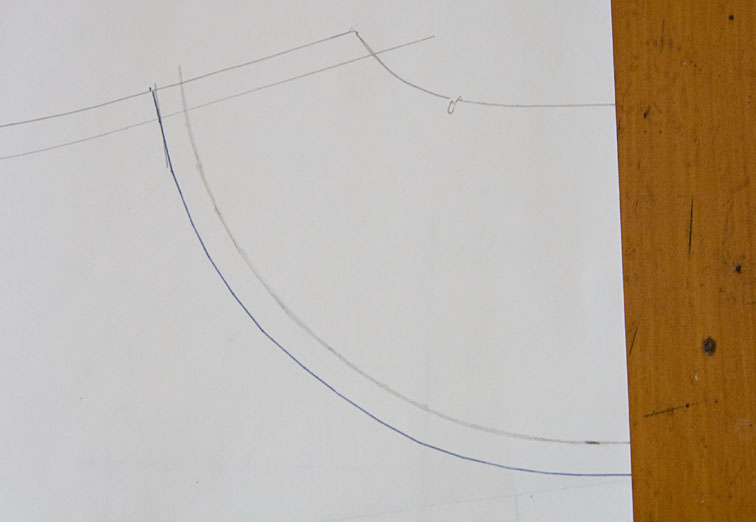
The Front Facing is made from the Front – trace around it and draw in the line of the facing, you can use your pattern as a guide. The line should be square at the shoulder seam and hem. Now add 1cm seam allowance to this edge:

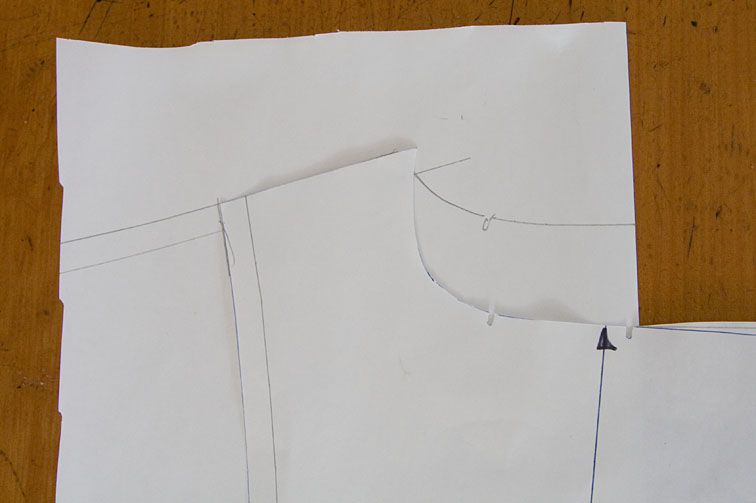
We need to add cloth allowance to the lapel edges. From the lapel point, add to the upper edge, tapering to the collar notch. Give this line a slight convex bend – this prevents what I call ‘scoopy lapel’ – which is not a good look.


Below the break point, cloth allowance is removed all the way down to the hem. If your front hem edge is curved, remove it right around the curve – as in the example in the cloth allowance post.


Cut out and label – Front Facing, Cut 1 Pair, Grainline, Blockfuse:

Back to the Front for a minute:
Now we have established the width of the facing, we can cut away the front hem allowance where the facing bags out. Mark the facing width, less 2cm seam allowance. From the finished hem foldline, add 1cm seam allowance (no extra 6mm here), and cut away the rectangle:

Back Neck Facing:
You will need a Back Neck Facing if you don’t already have one, and it is easily made from the Back.
Fold some paper, and place the CB fold line to the fold and trace around the upper Back. If there is a CB seam, place the CB stitching line to the fold:

Draw finished line of Back Neck Facing (pencil), and add a 1cm lining seam allowance (blue pen):
The curve should be square to the shoulder seam and CB seam. The facing should be the same width as the front facing at the shoulder seam:
Cut through both layers and open it out. Notch CB neckline and lower edge, and label – cut 1, blockfuse, grainline:

- Front
- Side Front or Side Body
- Front Facing
- Back Neck Facing
- Under Collar
- Top Collar
- Pocket Welts and Flaps
- Back (Back Hem Fusing)
- Side Back (Side Back Hem Fusing
- Top Sleeve (Top Sleeve Hem Fusing)
- Under Sleeve (Under Sleeve Hem Fusing)
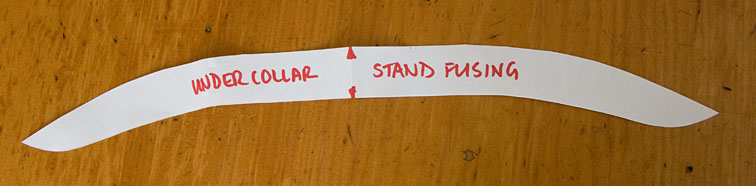
- Under Collar (Stand Fusing)
Back Hem Fusing:
Trace around back hem area and mark hem foldline. Mark 2cm above hem foldline, and 5mm inside all other edges:

Cut out fusing pattern and label – Cut I pair if you have a CB seam, Cut 1 if you have no CB seam, grainline same as back:

Side Back Hem Fusing:

Sleeve Hem Fusings:
If you have a one-piece sleeve, make the sleeve hem fusing in the same way:

Under Collar Stand Fusing:
Mark roll line on under collar, it must run into the roll line of the lapel (a dress stand helps to model the collar, you can see where mine has been folded)

Have you made it this far? I hope so! It all sounds so long-winded in words, but put into practise this doesn’t really take long – a few minutes for each piece, if that. And the time taken will repay itself when it comes to cutting and assembly – I promise!
Tomorrow we tackle the linings…

Heh, we had a slow Saturday at home today, I've been looking out for these instructions because my fingers are itching to cut… 🙂 I'm really excited about the changes to the pattern. My WW2 coat under collar piece was already precisely as you said it should be, out of the envelope…
LikeLike
Thank you so much for all the wonderful detail, I am hoping to catch up.
LikeLike
Yay! Facing question: my coat has a waist seam, but I'm thinking I should omit that on the facing and just have it run the entire length of the front. Does this sound right? I'll have more questions about the lining, too, but I'll hold off on those for now… 😉
LikeLike
Hello! I am not doing the sew along, but I just wanted to thank you already for the wealth of information found here. It reads like a whodunit, is chockfull of information and the tips are exactly what I was looking for in October but will be priceless when I make my next jacket.
Thank you so much for taking the time!
LikeLike
Sherry, this is awesome! I will really enjoy following along.
Thanks for sharing your knowledge 🙂
LikeLike
Wow, you are going fast! I don't think I'll be able to keep up at this rate, I'll have to catch up later. Is there a timeline for your RTW posts?
LikeLike
I too am immensely grateful to have this opportunity to learn so much. I too will struggle to keep up with the demands on my time in real life – however, we have the whole winter ahead of us and I'm sure even if I'm a bit slow getting things done at the end of it I'll have a lovely jacket. it seems too good an opportunity to miss.
LikeLike
~Tanit-Isis – I'd make it one piece to reduce bulk. Unless you want to put a buttonhole in the seam by leaving a slit…
~Lisa – I think the sewalong will take about a month in total. I'm trying to get these pattern posts up during the weekend, but promise I will leave gaps during the week!
LikeLike
Oooh… I hadn't thought to make my front facings in one piece with no waist seam for de-bulking. Thanks for that.
LikeLike
Less work too!
LikeLike
Hello Sherry, I am making a mans overcoat for my son and its a BUrda pattern where they have a separate collar stand cut on the fold for both and interfaced , They also cut the under collar on the fold .I am making this coat out of a heavy wool cashmere coating so its pretty thick . I am thinking that I should cut the under colaar on the bias with a centre back seam and NOT interface it and interface the separte collar stand . Would you cut this on the cross too? Should I interface the upper collar with whisper weft or something less beefy ? Thanks Marianne . PS I havent yet got my photos up . Thanks for your instructions they are EXCELLENT!!!!
LikeLike
I would still interface the undercollar Marianne, and would probably cut the collar stand straight. Sorry I'm not familiar what whisper weft is! If you are worried about bulk you could grade the seam allowances.
LikeLike
Sherry, on the back facing, you say “The facing should be the same width as the front facing at the shoulder seam.” On average, how deep should the center back facing be?
LikeLike
~Jeanette – I usually make mine about 10cm deep, but you could make it the same width as at the shoulder seam if you like, it is personal preference. Check out Tanit-Isis's back neck facing!
LikeLike
Love the piped facing. Very cool idea, Tanit-Isis.
LikeLike
Hi Sherry, my pattern has a separate collar stand. I assume I blockfuse 2 of them cut on the fold? I checked a RTW jacket I have and the undercollar in on the bias but not the stand.
LikeLike
~Vicki – yes I would blockfuse and cut 2 on the fold, just the under collar part needs to be bias.
LikeLike
Hi Sherry
I'm very behind and working on prepping the pattern. I'm a bit stuck on the front facings, as I have a dart which runs from the collar down the front. There is also one on the back from the shoulder, which I see you folded out before tracing the back facing. Should I fold the dart out on the front piece too before tracing the facing? The dart is a funny shape, the instructions tell you to cut down the middle of it about 10 cm before bringing the lines together to form it. I've posted a couple of pics on the flickr group for you to look at.
Am I right in thinking that the facing runs square from the mid shoulder to the hemline (I wasn't sure from the photo as you have another line nearer the centre front from the mid-neckline – I get easily confused lol)
Your help would be greatly appreciated. I am intending to catch up this week.
LikeLike
Hi daisydonut – if it is what I imagine, it is probably best to leave the front dart in the facing if it is already there. There is possibly a way of eliminating it, but I can't tell without seeing the pattern.
The facing should be square to the shoulder seam, but then it will curve slightly over the bust and straight to the hem, following approximately the lines of the front edge. Is the other line you mention my CF line? Don't forget to allow plenty for the buttonholes!
LikeLike
This is amazing ! Thanks so much for posting all of this.
LikeLike
Dear Sheryll, thank you so much for sharing your knowledge, it has been extremely useful!!
My question to you: what is the reason for having to add 6 mm to the front facing and front lining?
LikeLike